Table of Contents
This updated guide explains how to Turn Off Caps Lock through clear steps, practical examples, and important checks that help prevent common errors.
Method 1 of 3:
Turning Off Caps Lock
-
 Press the Caps Lock key again. If you turned on Caps Lock by pressing the Caps Lock key (accidentally or otherwise), pressing it a second time will turn off Caps Lock if the key itself is functioning properly.
- This can be annoying given Caps Lock's proximity to the ⇧ Shift and Tab ↹ keys, so you may want to disable it entirely. This is possible on Windows and Mac computers.
-
 Clean the stuck key. If the Caps Lock button doesn't turn off when you press it a second time, it might be stuck in a lowered position. Clean it with a can of compressed air, or wipe it carefully with a cotton swab dipped in rubbing alcohol.
- Be careful when doing this, as harming the key or its underlying components may void your computer's warranty.
-
 Restart your computer. Sometimes restarting your computer will be enough to cancel out a stuck or broken Caps Lock key. To do so:
- Windows - Open Start
, click Power
 , and click Restart .
- Mac - Open the Apple menu
, click Restart... , and click Restart when prompted.

- Windows - Open Start
Method 2 of 3:
Disabling Caps Lock on Windows
-
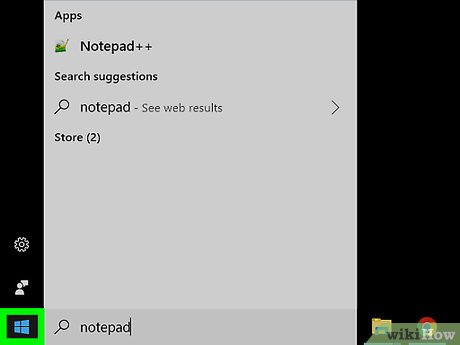 Open Start. Click the Windows logo in the bottom-left corner of the screen.
-
 Type in notepad. This will search your computer for the Notepad program, which is what you'll use to prevent Caps Lock from working on this computer.
 -
 Click Notepad. It's a blue, notepad-shaped icon at the top of the Start window. A Notepad window will open.
 -
 Enter the Caps Lock termination code. The Notepad document that you'll create consists of a heading, an empty line, a line indicating a destination, and the code itself:[1]XResearch source
- Type in Windows Registry Editor Version 5.00 and then press ↵ Enter twice.
- Type in [HKEY_LOCAL_MACHINESYSTEMCurrentControlSetControlKeyboard Layout] and press ↵ Enter.
- Type
"Scancode Map"=hex:00,00,00,00,00,00,00,00,02,00,00,00,00,00,3a,00,00,00,00,00into the final line of Notepad.
-
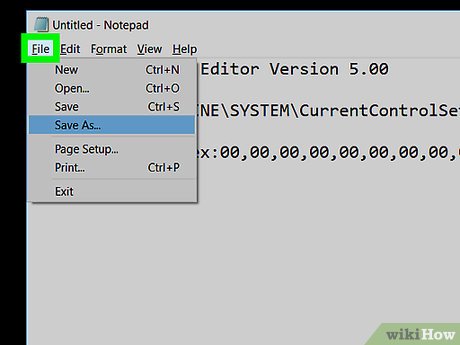 Click File. It's in the top-left corner of the Notepad window. Clicking it prompts a drop-down menu.
 -
 Click Save As.... This option is near the bottom of the drop-down menu. A "Save As" window will open.
 -
 Enter the file name. Type disable_caps_lock. reg into the "File name" text box that's near the bottom of the window.
 -
 Click the "Save as type" drop-down box. It's below the "File name" text box. Clicking it causes a drop-down menu to appear.
 -
 Click All Files. This option is in the drop-down menu.
 -
 Select a save location. Click an easy-to-get-to folder (e. g., Desktop ) on the left side of the window. Remember the folder that you choose—you'll be opening it in just a minute.
 -
 Click Save. It's in the bottom-right corner of the window. This will save your file in your selected folder.
 -
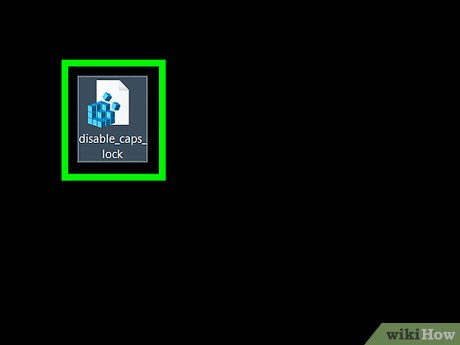 Install the file. Go to the folder in which you saved the file (if you selected the Desktop folder, just minimize any open Windows), then double-click it to open it and click Yes until you receive a notification that the registry file was successfully merged.
 -
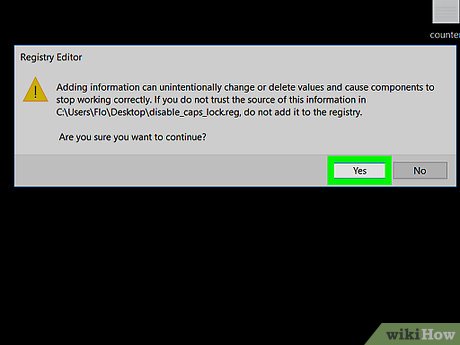 Click OK when prompted. This will appear on a prompt notifying you that your changes to the registry were successful.
 -
 Restart your computer. Click Start, click Power
 , and click Restart in the resulting pop-up menu. Once your computer finishes restarting, you'll notice that your Caps Lock key no longer works.
- You can delete the file that you created after your computer finishes restarting.
Method 3 of 3:
Disabling Caps Lock on Mac
-
 Open the Apple menu. Click the Apple logo in the top-left corner of the screen. A drop-down menu will appear.
-
 Click System Preferences.... It's in the drop-down menu. Doing so opens the System Preferences window.
 -
 Click Keyboard. This keyboard-shaped icon is in the System Preferences window. The Keyboard window will open.
 -
 Click the Keyboard tab. You'll find this in the top-left corner of the Keyboard window.
 -
 Click Modifier Keys.... It's in the bottom-right corner of the Keyboard window. A pop-up window will appear.
 -
 Click the Caps Lock drop-down box. You'll find this in the middle of the pop-up window. Doing so prompts a drop-down menu.
 -
 Click No Action. It's in the drop-down menu.
- If you have a Mac that has a Touch Bar instead of a row of function keys, you might want to click Escape here instead, as doing so will bind the "Escape" function to the Caps Lock key.
-
 Click OK. This blue button is at the bottom of the pop-up window. Doing so will save your changes; your Caps Lock key will now result in no action when pressed.
- If you notice that you can still activate Caps Lock after doing this, restart your Mac to solidify the changes. You can do so by clicking the Apple menu , clicking Restart... , and clicking Restart when prompted.
FAQ
What is the easiest way to Turn Off Caps Lock?
Start with the requirements in this guide, then follow each step in order. Check the result after every major change so problems are easier to identify.
Can beginners follow these instructions?
Yes. The process is organized into practical steps, and you can repeat any step before moving forward.
What should I check if the method does not work?
Confirm your software or device version, permissions, settings, file format, and internet connection when the task depends on online services.
Related Articles
 How to Turn Caps Lock Keys into Modifier Keys on Mac6 minutes read
 Instructions: Turn Off Caps Lock Keys in Mac OS X2 minutes read
 Steps to Turn Off Caps Lock Using Caps Lock or Shift Key in Windows 11 Explained4 minutes read
 Fixed a Bug with the Cap Lock Key on Windows 10 Suspended3 minutes read
 How to Disable the Caps Lock Key in Windows 104 minutes read
 Create a Tone When Pressing Caps Lock, Num Lock, or Scroll Lock3 minutes read
Reader Comments 0
Sign in with email or Google to join the discussion.