How to Uninstall Norton 360 2013 (Beta)
The following steps apply to users that installed or registered Norton 360 2013 (BETA) for Microsoft® Windows® Operating System. And it's recommended that you backup and save your personal setting file for it (TIP: Run the 'Backup S...
Table of Contents
Method 1 of 3:
Instruction One
What's Important: Logged on as an administrator, make sure that you've saved and closed other personal file(s) and/or Windows program(s), you then run the "Uninstall Norton 360" on the Start menu of Windows 7/Vista/XP SP3.
-
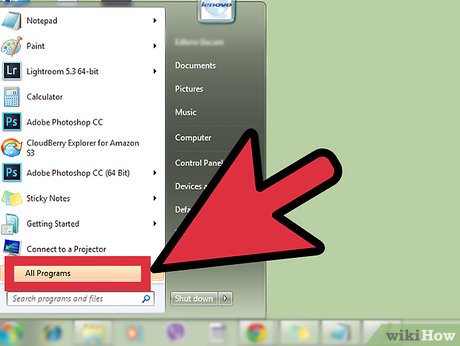 Click the Start button, select All Programs (or Programs for other earlier editions of Windows)
 -
 Open up Norton 360 entry on the currently installed program list; scroll down and launch the "Uninstall Norton 360" application in it.
 -
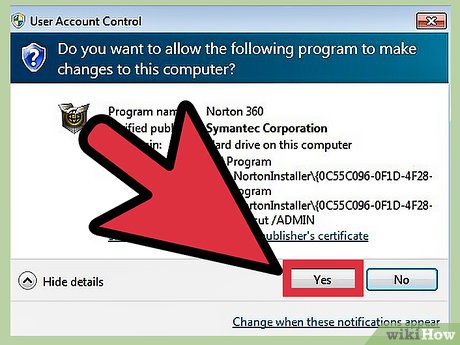 Select Yes option for UAC (if you're running a Windows 7 machine.)
 -
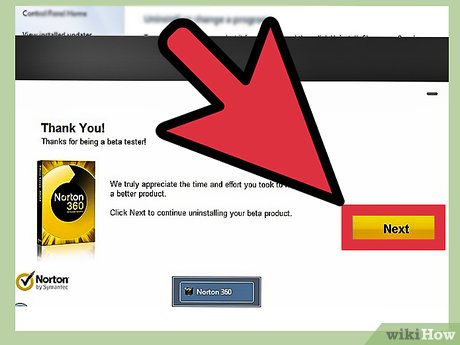
 Click the Next button on "Thank you!" window.
 -
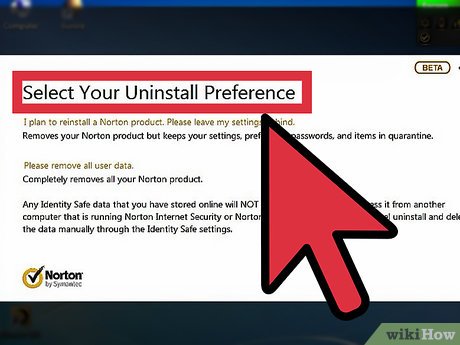 Understanding your needs for computer security, select one of the TWO uninstall options listed by using a single click on it.
 -
 Click Next button on "Subscription" information box.
 -
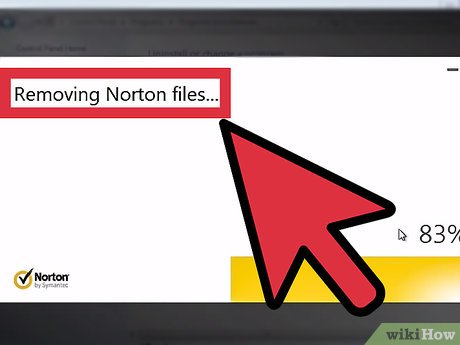 Please wait and then, reboot your device clicking "Restart Now" button.
Method 2 of 3:
Instruction Two
- Similarly & typically, you can review some steps above to automatically remove Norton 360 2013 (BETA)/version 6.0/version 5.0.
-
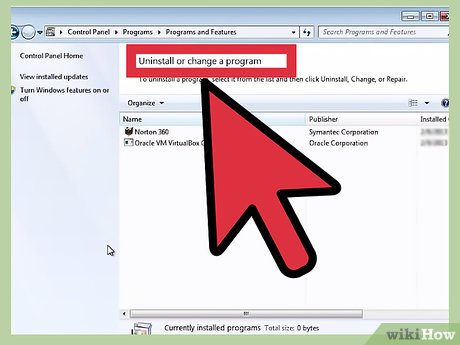 Start > (Settings) > Control Panel > Programs - Uninstall a program; or Add or Remove Programs.
 -
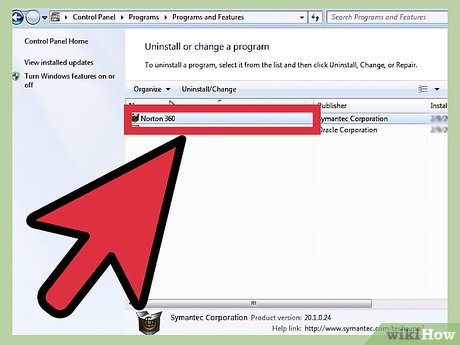 Launch Norton 360 program listed (by: 1) clicking on it, running the "Uninstall/Change" option on the top of program list; 2) right-clicking on it, selecting "Uninstall/Change" on the right menu; 3) running it directly).
 -
 Review or follow the on-screen automatic procedure.
Method 3 of 3:
Related Remnants Troubleshooting Guidelines
-
 Take a newest clean backup for your Windows system, including Registry Editor.
 -
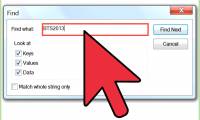
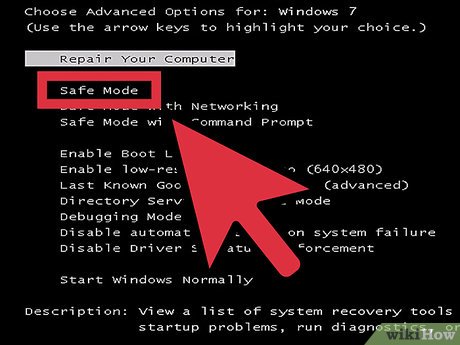 You may manually search for Norton 360 leftover files and registry keys and then, delete them you would find; moreover, you may need to clean them in Windows Safe Mode.
Was this article helpful?
Your feedback helps us improve.
Related Articles
 Norton AntiVirus 2011 Beta launched3 minutes read
 Norton personalized with Norton One4 minutes read
 How to uninstall the iOS application is not displayed on the Home Screen screen4 minutes read
 How to Uninstall Bitdefender Total Security 2013 (Beta)4 minutes read
 Symantec increased its operations in Vietnam4 minutes read
 You can uninstall iOS 14 or iPadOS 14 and go back to iOS 135 minutes read
Reader Comments 0
Sign in with email or Google to join the discussion.