How to Uninstall Apps on Windows 11
For an application that is no longer needed, or causes software errors or system conflicts, uninstalling it is essential. This article will show you how to uninstall an application on Windows 11 extremely quickly and simply.
Uninstall apps using Start Menu
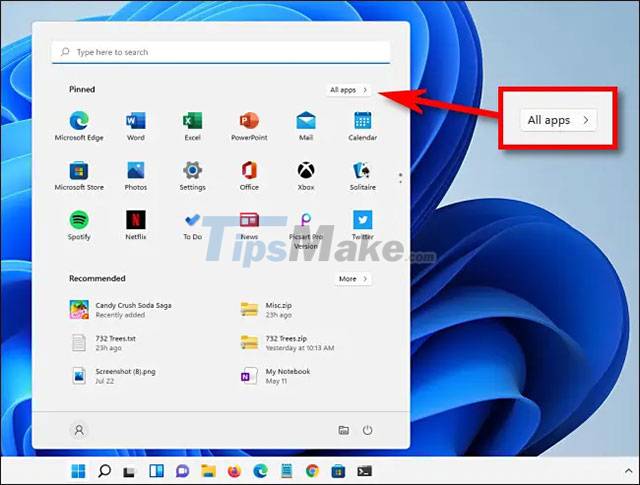
First, click the Start button on the taskbar at the bottom of the screen. In the Start menu interface that appears, click 'All Apps' in the upper right corner.
On the 'All Apps' screen, find the app you want to uninstall in the list of available apps on your system. Right-click the application's icon and select 'Uninstall' from the small menu that appears.
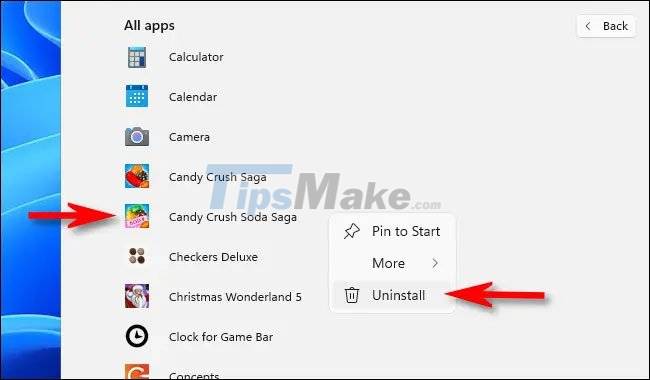
If this is a Windows Store app, you'll see a confirmation pop-up. Click 'Uninstall' and the app will immediately be completely uninstalled.

In case this is a classic Win32 application, the Control Panel will open to the 'Programs and Features' page. On this screen, find the app you want to uninstall, select it, then click the 'Uninstall' button on the toolbar just above the list of apps.

Click 'Yes' in the confirmation window that appears and Windows will uninstall this program completely.
Uninstall apps using Settings
You can also uninstall an app easily using the Windows Settings menu.
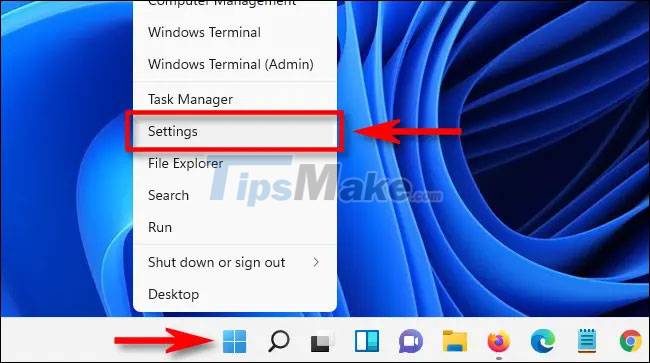
First, open the Windows Settings application by pressing the Windows + i key combination. Or you can also right-click the Start button on the taskbar and select 'Settings' from the pop-up menu.
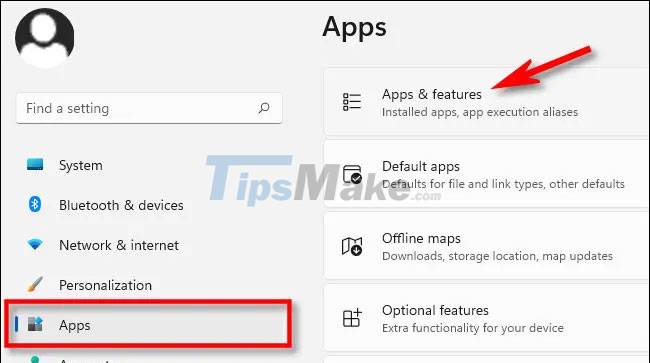
When the Settings window opens, click on the 'Apps' item in the list on the right, then select 'Apps & Features'.
On the Apps & Features settings screen, scroll down to the list of apps and find the app you want to uninstall. Click the three-dot button next to that app and select 'Uninstall' in the menu that appears.
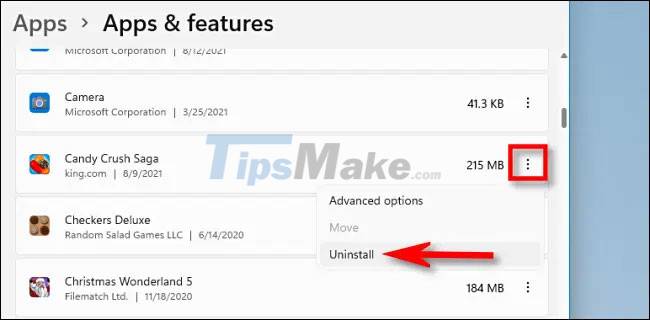
When the system asks for confirmation, click 'Uninstall' and the app will be uninstalled immediately if it's a Windows Store app. In case it's a Win32 app, you'll need to click 'Yes' on another confirmation window, and the uninstall will take place.
Uninstall apps using Control Panel
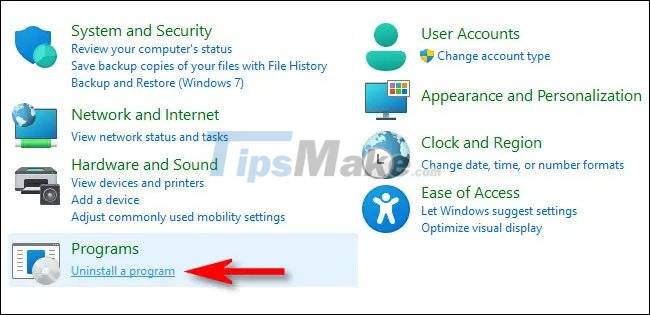
For now, Windows 11 still includes the legacy Control Panel interface, although Microsoft is slowly moving much of its functionality to the Settings app. If you want to uninstall an application through the Control Panel, first open the Control Panel, then click 'Uninstall a Program'.
On the 'Programs and Features' page, scroll through the list and find the app you want to uninstall. When you find it, select it and click the 'Uninstall' button on the toolbar just above the list.
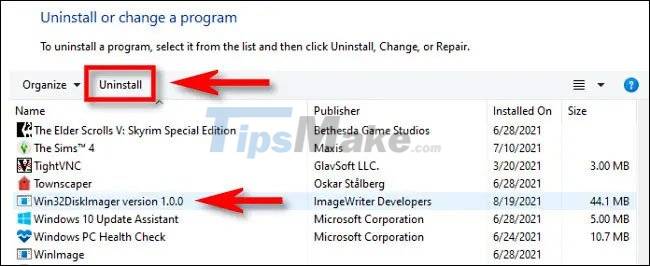
Click 'Yes' when the confirmation window pops up and the program will be uninstalled.
Hope you are succesful.