How to turn off Windows 10 update to avoid automatic updates?
When using a computer, the frequent Windows update makes users spend a lot of time waiting. So what is the fastest and most effective way to turn off Windows 10 update? The answer will be answered in today's article.
How to turn off Windows 10 update with service
If you feel too tired and bored with waiting for Windows 10 to update every time you turn on or off your computer, then immediately use service.msc. There are many people who have tried to turn off this Windows 10 update and succeeded.
To turn off Windows 10 updates with service.msc, users need to follow the steps below:
Step 1: Press the key combination 'Windows + R'. This first step is used to activate the Run program. After pressing the key combination 'Windows + R', enter the name service.msc in the 'Open' field displayed on the screen and then click on the 'OK' box at the bottom.
Step 2: Search and select the item 'Window Update'. When the Services window appears on your desktop, double-click to select 'Window Update'. Next, the user needs to click on the 'Properties' item.
Step 3: When the 'Windows Update Properties' menu appears, search for 'Start up type' and select 'Disabled'. At this point, the automatic update function of Windows 10 has been completely turned off. You just need to confirm again by left-clicking on 'OK' and then selecting 'Apply' and you're done. In addition, users can press 'Stop' immediately if the service is in an active state.

Although this method is appreciated by many Windows operating system users, you should also note that using service.msc will make the Windows 10 update process completely turn off. The next time you start or shut down your computer, the Windows 10 update notification will no longer appear on the screen. Therefore, if you need to update Windows 10, you will have to do the reverse of the above steps to be able to successfully update.
How to turn off Windows 10 updates using Group Policy
Among the many methods of permanently disabling Windows 10 updates, the way to disable it using Group Policy is also very popular. Basically, using Group Policy is also quite simple, not too complicated and anyone can do it by themselves. The process of turning off Windows 10 updates using Group Policy now includes 4 main steps:
Step 1: Click the key combination 'Window + R' to start the Run program. Next, users enter the term 'gpedit.msc' in the search field and press 'Enter' for the link to appear.
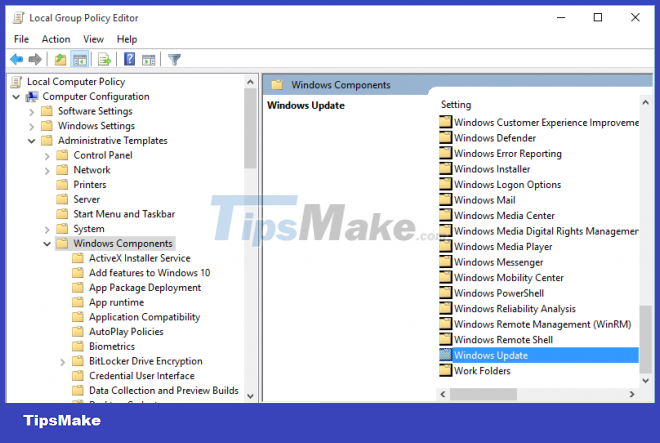
Step 2: Click the 'Computer Configuration' item when the Local Group Policy Editor window appears. Then need to move to 'Administrative Templates' section by left clicking. The next step is to left-click to select 'Windows Components' and then go to 'Windows Update' in the Settings section.
Step 3: Search and click on the item 'Configure Automatic Updates' displayed on the screen.
Step 4: Continue to select 'Disabled' when the settings panel appears on the screen, then select 'Apply' and press 'OK' to complete the operation.

Similar to using service.msc, this way of turning off Windows 10 updates also allows users to turn off updates permanently and not be bothered anymore.
How to turn off Windows 10 update using settings
If you are not satisfied when you turn off Windows 10 update in the two ways above, you can try another method. That is using settings. This method allows users to postpone Windows 10 updates instead of permanently shutting down like the two methods above. With this way of turning off Windows 10 update, you can turn it off within 7 days so you won't be bothered. After 7 days of stopping updates, Windows 10 will continue to perform updates without the user having to reopen.
The steps to turn off Windows 10 update by setting are as follows:
Step 1: Access the Settings application in the Starts menu of Windows 10. In addition to this access, you can also directly use the Windows Search toolbar by pressing the 'Windows + S' key combination and entering Settings .
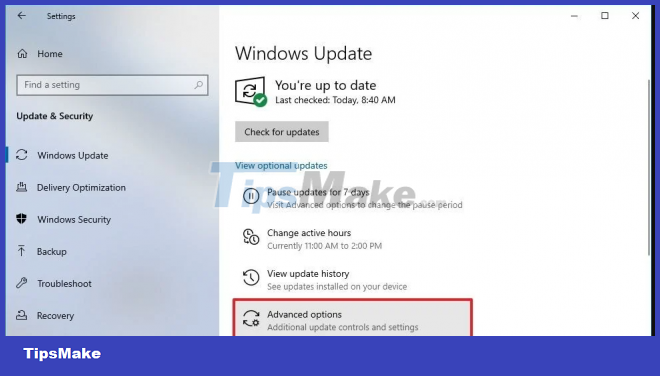
Step 2: Select 'Update & Security' on the displayed screen. Continue to select 'Windows Update' and then go to 'Advanced Options'.
Step 3: Continue to scroll to the 'Pause Update' section in the 'Pause until' section to choose the time period to turn off automatic updates of Windows 10.

With just these 3 simple steps, you can turn off Windows 10 updates for a certain period of time.
The above are the 3 most common methods commonly used by users and IT experts to turn off Windows 10 automatic updates. Although these are not the only 3 ways to turn off Windows 10 updates, these are the the least complicated implementation, suitable even for those who do not have much experience in using computers. Depending on the preferences of each person, you can choose the method that you feel is most suitable and easy to do.
You should read it
- ★ Turn off driver update on Windows Update Windows 10
- ★ How to turn off Windows 7, Windows 8 / 8.1 updates
- ★ How to turn off Update Windows 10 thoroughly
- ★ How to turn off Windows 10 computer without waiting for the update to install
- ★ Turn off the computer when updating Windows? Is this good or not?