How to Change Color Saturation on Windows 10
Do you want to adjust color saturation on your Windows 10 device? Saturation determines how vivid colors are displayed on the screen. To adjust color saturation is very simple, you just need to install the Intel® Graphics Command Center software. TipsMake today will guide you how to change color saturation on Windows 10.
Table of Contents
Install Intel® Graphics Command Center
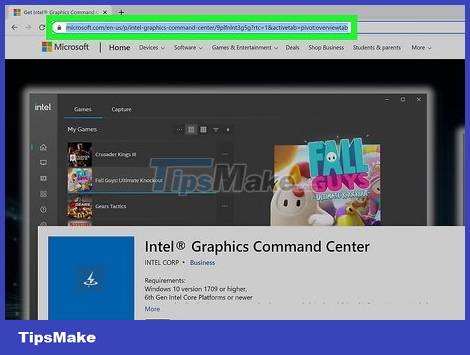
Visit the Microsoft Store website. To control the graphics card and display on Windows 10, you need to use the Intel® Graphics Command Center software. To install, visit the Microsoft Store page of the Intel® Graphics Command Center.
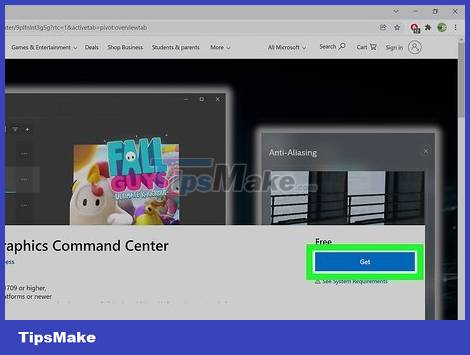
Click the blue 'Get' button. After redirecting to the Microsoft Store app, click 'Get' again.
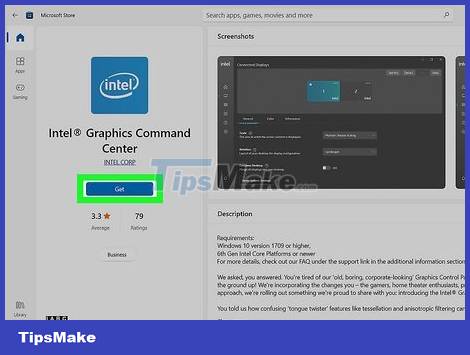
Click "Install". Once you click it, the "Get" button will change to "Install". Click here and wait for the app to download.
Change color saturation

Open Intel® Graphics Command Center. Click the 'Start' button with the Windows icon located in the bottom left corner of the screen. Proceed to scroll on the left menu to find the 'Intel® Graphics Command Center' software, then click to open it.
The software will be arranged in alphabetical order, so scroll down to the 'I' category to find it faster.

Click 'Display' located in the left menu, then select the 'Color' tab. Go ahead, click the 'Custom' button with the plus icon.
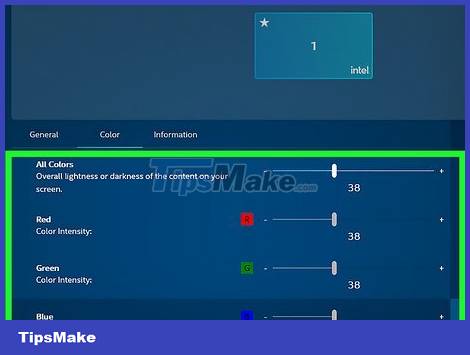
Adjust the 'Saturation' slider. Scroll down to find the 'Saturation' slider. Proceed to click and hold and drag the white rectangle above the slider to adjust. When you drag to the left, the color saturation will decrease, and if you drag to the right, the color saturation will increase.
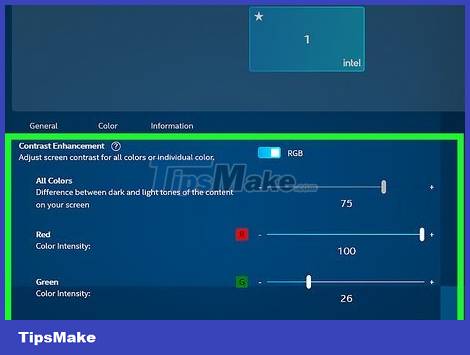
Adjust the "Contrast" slider (optional). Contrast will change the ratio between light and dark, and help you achieve the visibility you want. The Contrast slider is located just above the Saturation slider. Drag left to decrease contrast, and drag right to increase contrast.
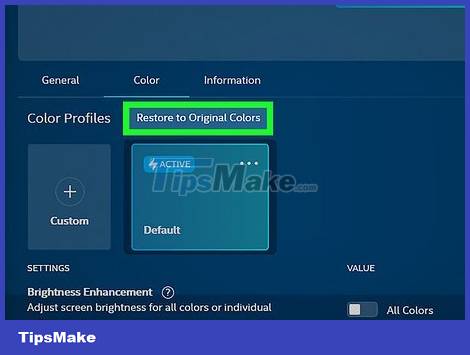
Undo the change made. If after the change the visibility is not satisfactory, simply click the 'Restore to Original Colors' button located below the 'Color' tab.
Was this article helpful?
Your feedback helps us improve.
Related Articles
 Easy guide to changing colors in Photoshop for beginners.3 minutes read
 How to change the color of Windows 11 computer screen suitable for the blind2 minutes read
 Compare Saturation and Vibrance in Photoshop Lightroom6 minutes read
 Instructions to change mouse cursor color on Windows 112 minutes read
 How to change the color of the Taskbar in Windows 73 minutes read
 How to change Windows Start Menu color?2 minutes read
Reader Comments 0
Sign in with email or Google to join the discussion.