How to fix Network discovery is turned off error on Windows 10
Network Discovery is a useful feature that you often use to share files and folders between devices. But, maybe for some reason you can't turn this feature on. So in this article we discuss some ways to fix the error.
What is Network Discovery?
Network Discovery is a feature in Windows 10 that allows users to discover other devices on the same network connection (provided that the other devices also have the feature enabled). It is mainly used to share files and folders between different devices. It also supports sharing printer usage for print jobs around the office.
When enabled, this feature makes the IP address and other information public on the local network. As a result, anyone who connects can access the files and folders on the computer. However, permissions and folders can be customized by the owner.
This is a convenient method to share files and documents when you are working in an office environment.
II. How to fix the error can't turn on Network Discovery
Restart the computer
While using the computer, some services may malfunction and need to be restarted. Restarting the computer ensures a fresh start with related services and features. Therefore, the basic step to solve the problem is to restart the system, then check if the problem is resolved or not?
Choose the appropriate sharing mode
Windows 10 offers 2 different profiles used for networks, Private and Public profiles.
These profiles provide their own level of security, if you set the network profile to Public, the security is higher. That may affect turning on the Network Discovery feature. So try to configure it as Private and enable Network Discovery again.
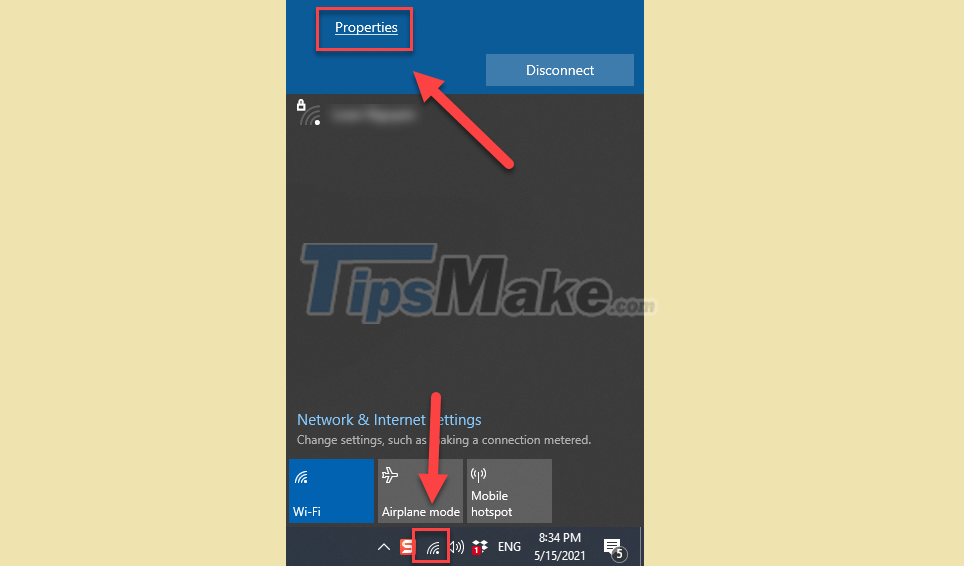
Step 1: Click the Wi-Fi icon in the bottom right corner of the screen.
Step 2: Select Properties in the network your device is connecting to.
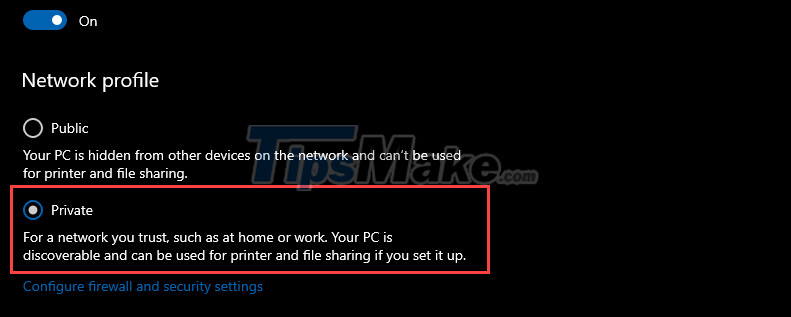
Step 3: In the Network profile, select Private.
Step 4: Now you click the back arrow in the top left corner of the window. Applying this will take you to Network Settings.
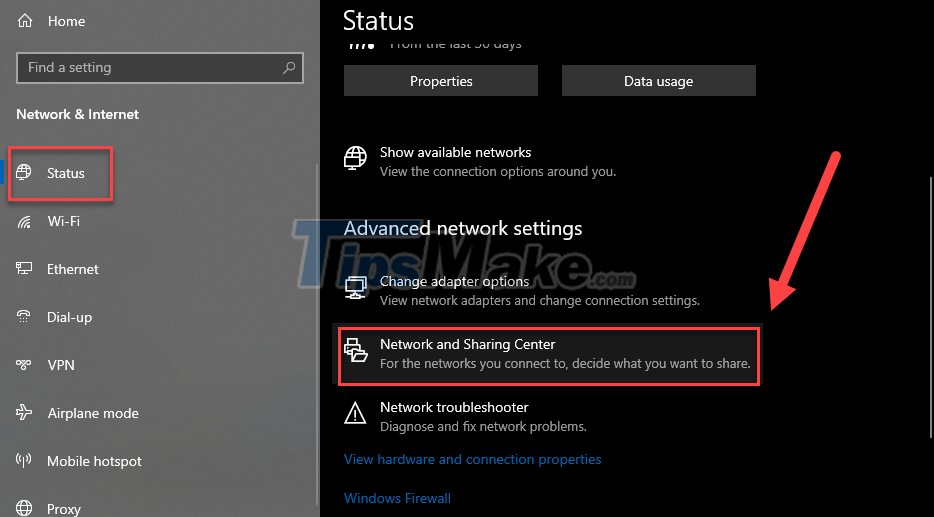
Step 5: Click the Status tab in the left column, then select Network and Sharing Center on the right.
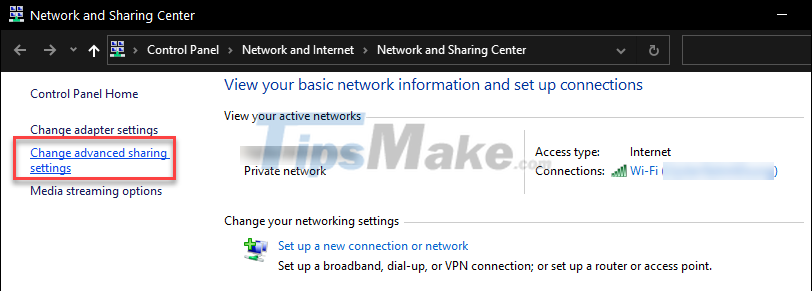
Step 6: The Network and Sharing Center window appears, click Change advanced sharing settings on the left.
Step 7: In the Advanced sharing settings window, expand the Private section, check the box Turn on network discovery, and Turn on automatic setup of network connected devices.
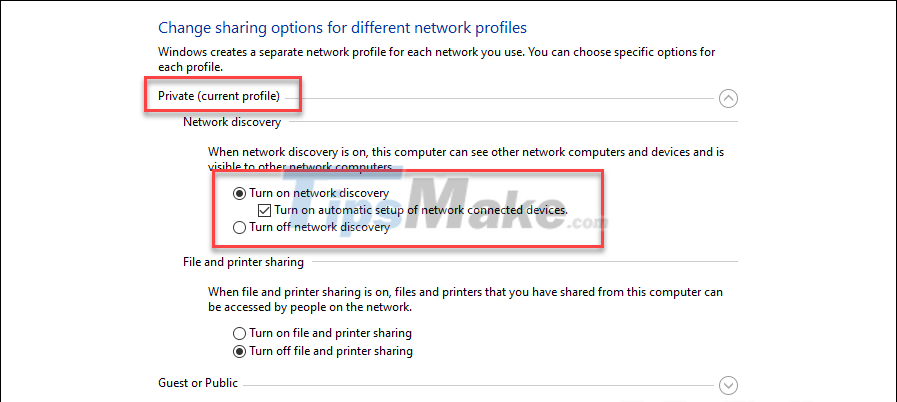
Step 8: Click the small Save changes button at the bottom to save the changes.
Now you check if the problem is resolved or not. If not, continue with the methods below.
Start related services
The services required to enable the Network Discovery feature need to be running in order for other devices to be able to access your computer. Follow the steps below to ensure that the related services are working.
Press Windows + R to open the Run dialog box, then you type Services.msc and press Enter.
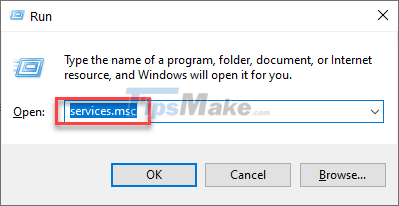
Here are 4 services that you need to pay attention to:
UPnP Device Host
Function Discovery Resource Publication
SSDP Discovery
DNS Client
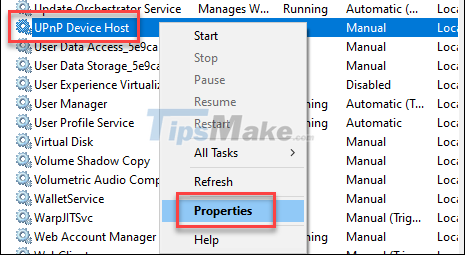
Let's start with UpnP Device Host, right click on it and select Properties.
In the General tab, expand the Startup type section and select Automatic. Then click Start.
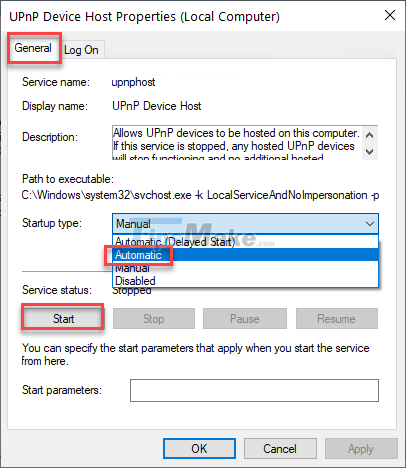
Click Apply and OK to save the changes.
When you return to the Services window, do the same for the services listed in Step 2.
Restart the computer when finished.
Firewall settings
To make sure that Network Discovery is allowed through the Windows Firewall, make some of the following settings:
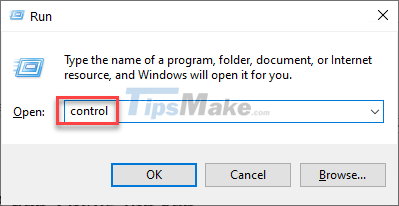
Step 1: Press Windows + R to open the Run dialog box, type control and press Enter. This will open the Control Panel.
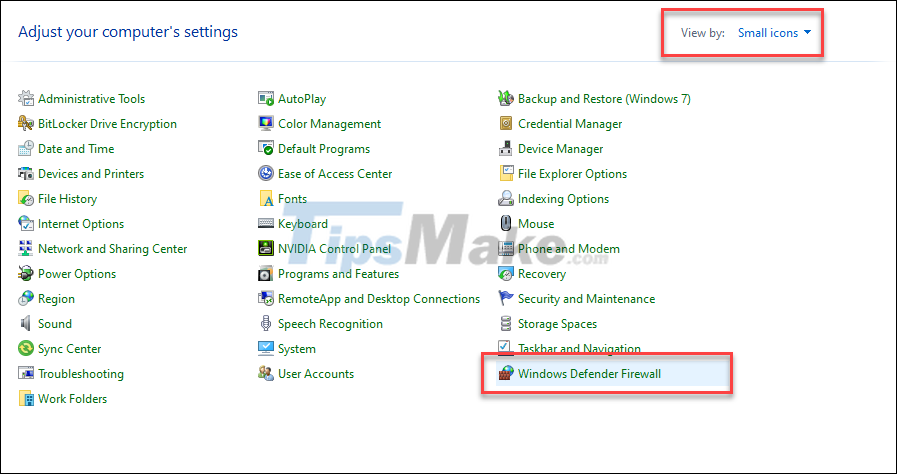
Step 2: Select Small icons in the View by section, then click Windows Defender Firewall.
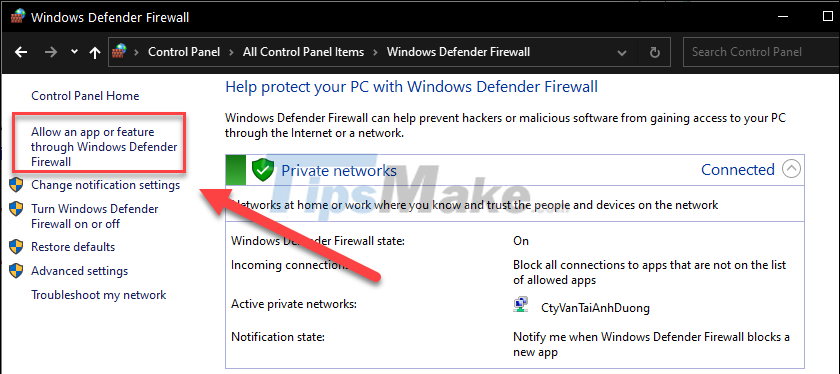
Step 3: In the left area, click Allow an app or feature through Windows Defender Firewall.
Step 4: Click Change settings. Then, you check the 2 boxes Private and Public next to Network Discovery.
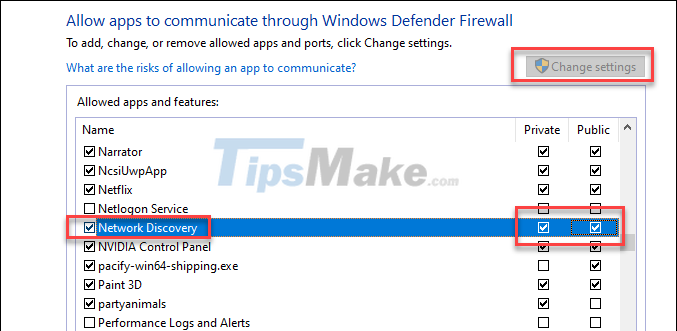
Step 5: Click OK when done and restart the computer.
Reset Network Stack
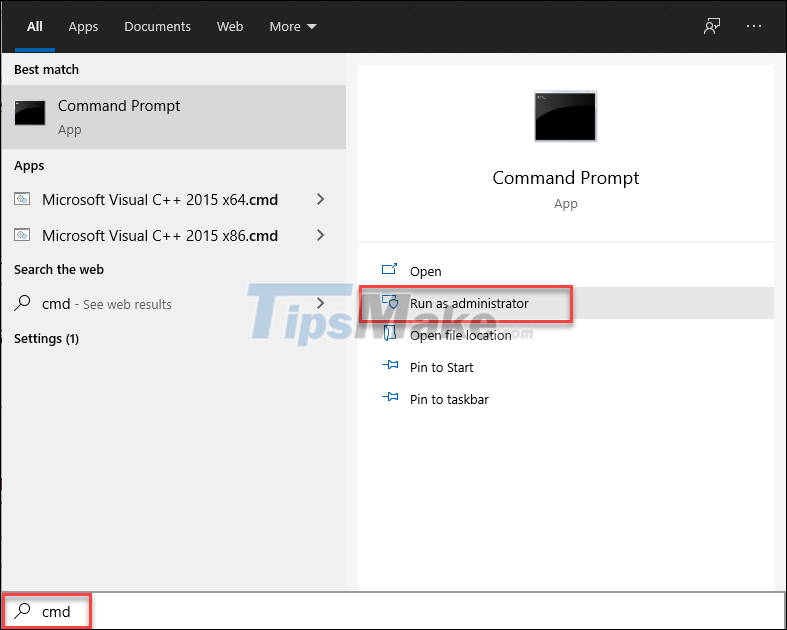
Step 1: Enter cmd in the search box and run Command Prompt as administrator.
Step 2: Run the following commands in turn.
ipconfig /release
ipconfig /flushdns
ipconfig /renew
netsh int ip reset
netsh winsock reset
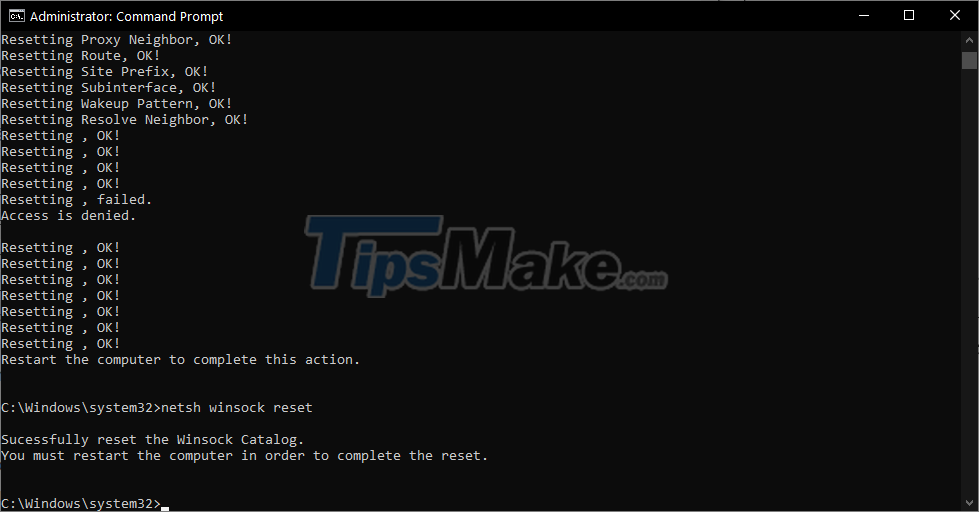
When all the commands are executed, please restart the computer and the error should be resolved.
You should read it
- ★ How to fix the error that cannot access another machine in Windows 10 LAN
- ★ 7 best network troubleshooting tools 'save' your home network
- ★ Fix 'A Duplicate Exists Name on the Network' error
- ★ Instructions for fixing errors do not turn off Windows 10 computers and laptops
- ★ Network sharing settings in Windows 7