How to take screenshots on Windows 10 computer easily without installing software
You want to share screenshots with friends and colleagues but don't want to install additional software that makes your computer heavier. The 4 simple ways to take screenshots without installing software below will help you do that!.
In the process of studying and working, when wanting to share information on the screen with others, most people will use the method of taking a screenshot. It can be said that this is a basic computer operation that everyone knows. But for some people who are not proficient in computers, especially for women who are mostly illiterate in technology, this is still a question. And to help women solve this problem, today Hanoicomputer will share some of the simplest ways to take a screenshot of the computer screen that anyone can do.
Take a screenshot of your computer using the PrintScreen (PrtScr) shortcut key
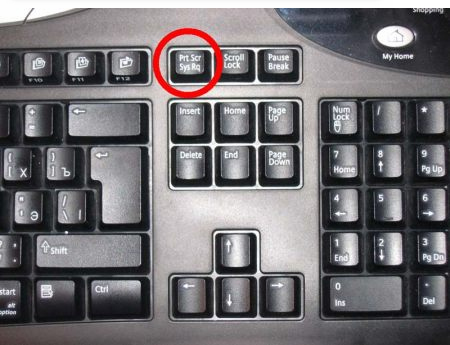
As the father of personal computers, Microsoft understands everything that users want to do on their computers. Therefore, with any Windows operating system from Windows XP, Windows 7, Windows 8/8.1, to Windows 10, you are also supported with the ability to quickly take screenshots of your computer screen . The way to take screenshots is extremely simple, you just need to press the Print Screen key once. Usually this button is often located in the upper right corner of the computer keyboard with many different abbreviations such as: PrtScn, Prnt Scrn, Print Scr, .
As soon as you press the PrintScreen (PrtScr) key , the entire screen displayed before you will be saved in the Clipboard. To save the image or edit the size, add text, you must open Paint or Photoshop to paste them. Normally, after taking a screenshot with this method, most people will use Paint to paste the image. To open Paint, do the following:
Press the Windows key on the keyboard (the key with the window icon), then type in the search keyword Paint > Open the software called Paint.

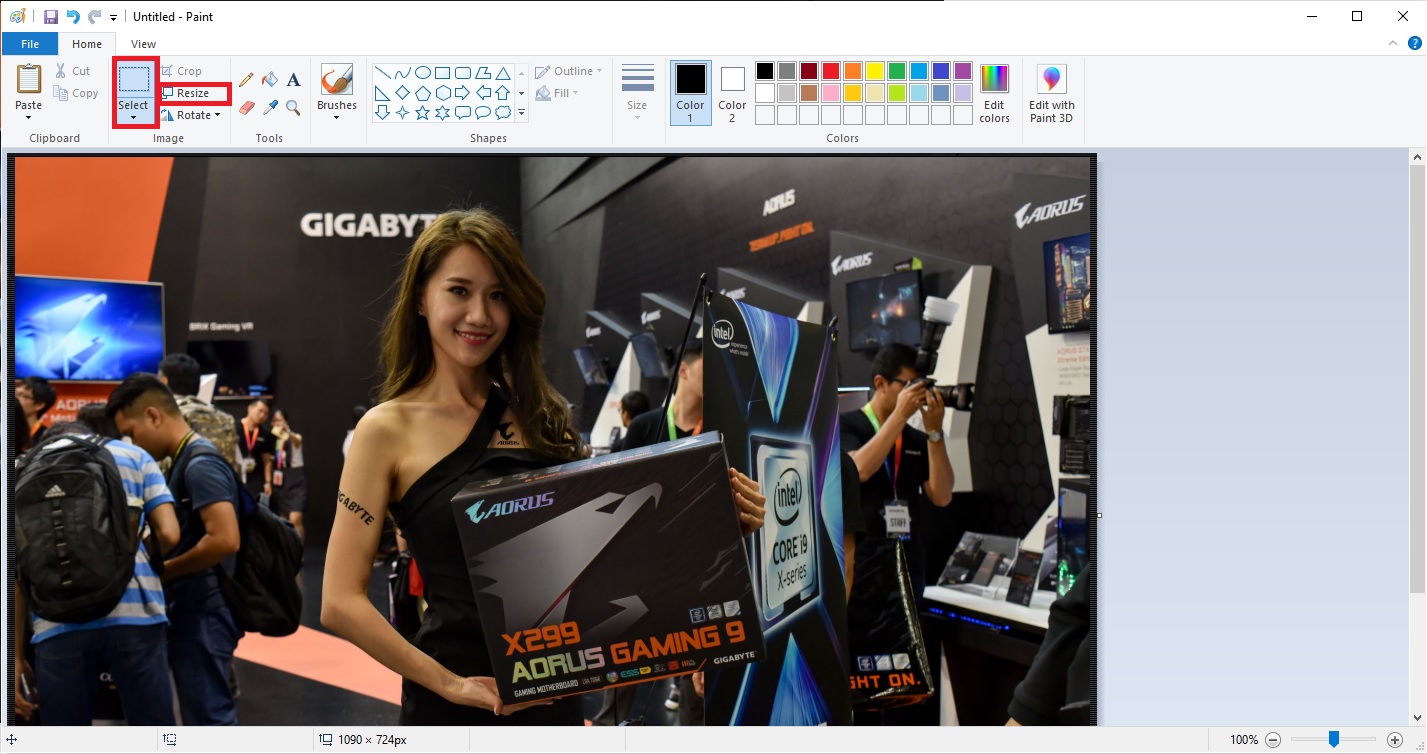
The Paint interface window appears, press Ctrl + V to paste the image you just took.

If you just want to take a part of the screen you just captured, click Select, create a selection on the captured image by clicking and dragging the mouse, then click on the crop tool, finally you just need to press Ctrl + S (or File > Save) to save the image.
Take screenshots and save them automatically.
If the above method of taking screenshots requires an extra step to save in Paint, which is too cumbersome for you, let's learn about the second method. With this method, your screenshots will be automatically saved in the Pictures folder. A small note is that this method only supports 2 versions: Window 8.1 and Window 10.
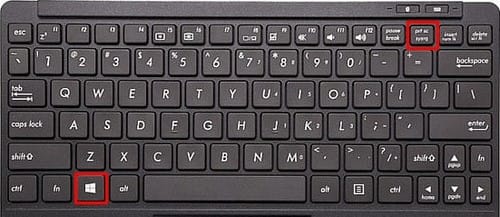
To take a screenshot and save it automatically , press the Windows + PrtSc (Print Screen) key combination .
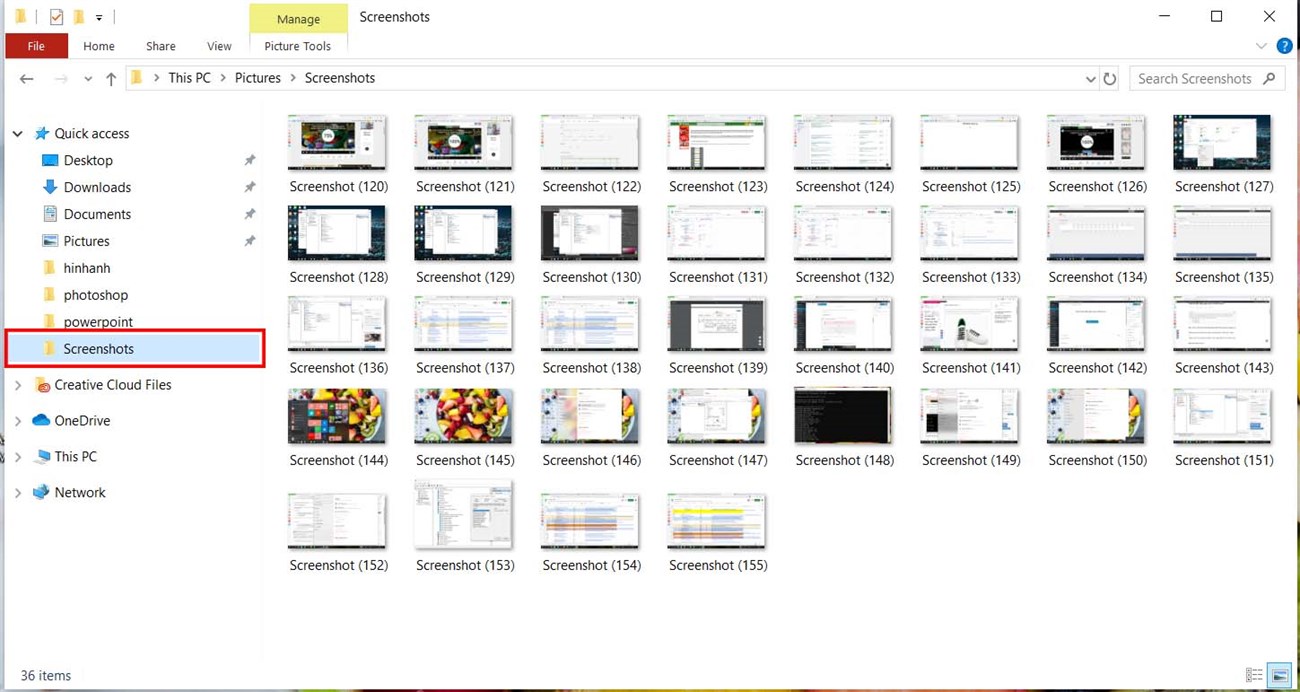
The screenshot will now be automatically saved to Pictures > Screenshots on your computer.
To open the folder containing automatic screenshots, go to My Computer (This PC) > Select the Pictures folder > Screenshots. All screenshots taken using the above method will be saved here.
Take a screenshot of only the active window (Tab)
If the two key combinations PrtSc and Windows + PrtSc that Hanoicomputer just instructed above will take a picture of the entire screen, then the operation of using the key combination Alt + PrtScn is used to take a picture of the window that is open and working on Windows only. With this method, you can take a picture of any window without having to take the entire image on the screen (browser window, software window).
To take a screenshot, press Alt + Print Screen, then open Paint and press Ctrl + V to paste the captured image, similar to taking a screenshot with the PrintScreen (PrtScr) key. To save, just click File > Save or press Ctrl + S.
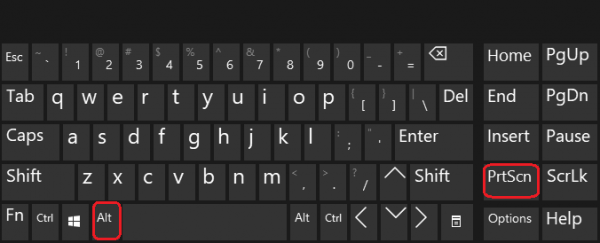
Take a picture of the active window on the screen with the key combination Alt + Print Screen
Take screenshots of your computer screen by region using Snip & Sketch
The three methods above are all fixed screenshot methods. So what if you just want to capture a random area of the screen? Starting with the October 2018 update, Windows 10 is modernizing the experience of taking screenshots with the new Snip & Sketch app. This is an app that allows you to capture a photo of any area of the screen you want. To take a screenshot on a Win 10 computer with Snip & Sketch, press the shortcut key combination Windows + shift + S . Your entire screen will darken, and a mouse cursor will appear in the form of a "+" sign. Your job now is to drag the mouse to the area you want to take a screenshot and hold the left mouse button to drag and select that area.
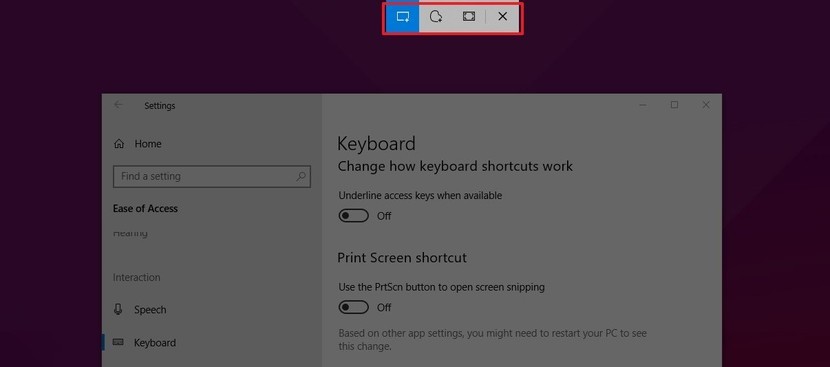
Take a screenshot with the Windows + shift + S key combination with the Snip & Sketch application
In addition, Snip & Sketch also supports screenshots with 3 options.
- Take a screenshot with a rectangular frame.
- Take a screenshot with the free drawing canvas
- take full screen photo
Screenshots taken with Snip & Sketch are also saved to the clipboard, and your job now is to open Paint to paste them in and then Save them for use.
Above is an article instructing 4 ways to take screenshots without installing software extremely easy on Win 10. Hopefully this article of Hanoicomputer has provided useful information to help you take screenshots on your computer more quickly and conveniently!