Table of Contents
This guide provides a clear overview of use screenshot hd to take screenshots, including how to Use Screenshot HD to Take Screenshots. Use it to understand the topic, compare the available options, and make a more informed decision.
How to Use Screenshot HD to Take Screenshots
Step 1:
First of all, install the Screenshot HD application for your computer according to the link below.
Step 2:
After installing the Screenshot HD application, users will see the application icon in the system tray.

Step 3:
Next, the user selects the area of the screen you want to capture with the Screenshot HD application by moving the mouse to the area of the screen you want to capture.
In addition, users can enter keyboard shortcuts to take screenshots. Ctrl + Alt + F takes a picture of the full screen and the image will be saved immediately and without editing. Ctrl + Alt + S to select and take a picture of any area of the screen.

Step 4:
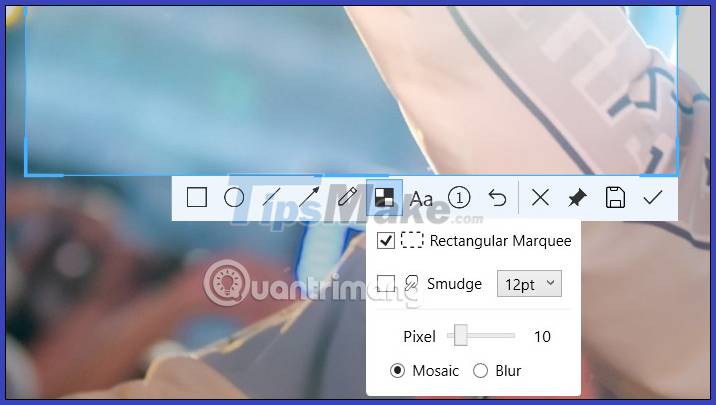
As soon as the screenshot of the screen area is successful, the user will see an editing toolbar displayed right below the capture area. We can enter text, number, blur areas, draw on images, add shapes, etc.
Step 5:
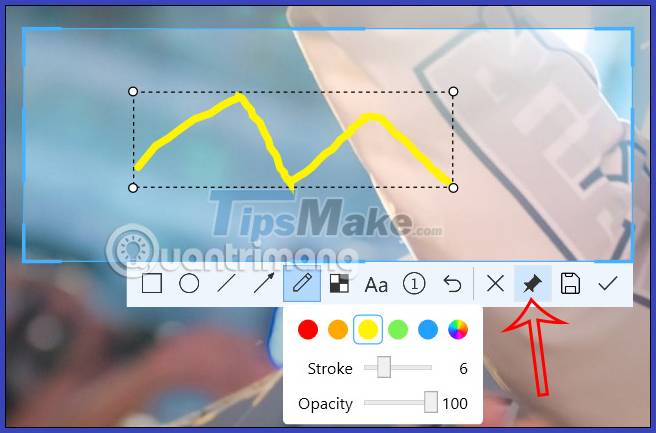
In particular, the application also has the option to pin screenshots on the computer screen. You click on the pin icon to pin the image to the computer screen. Click the floppy disk icon to save this image on your computer.
Step 6:
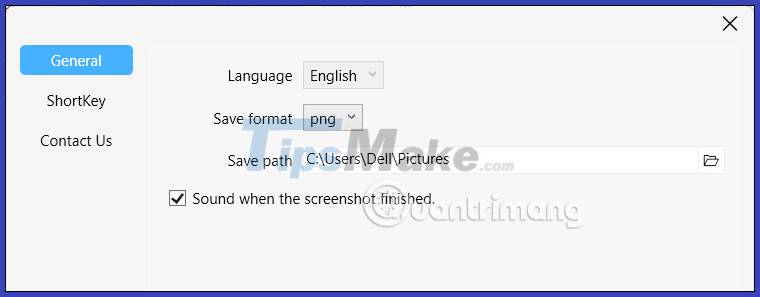
Click on the application icon and then select Settings to change the settings. At this interface, you adjust items such as image saving format, screenshot shortcut.
Conclusion
Understanding Use Screenshot HD to Take Screenshots makes it easier to compare options, avoid common mistakes, and apply the information in this guide more effectively. Review the relevant requirements before making changes or choosing a solution.
FAQ
What is Use Screenshot HD to Take Screenshots?
Step 4: As soon as the screenshot of the screen area is successful, the user will see an editing toolbar displayed right below the capture area.
Why is Use Screenshot HD to Take Screenshots important?
Understanding Use Screenshot HD to Take Screenshots helps you evaluate features, compatibility, performance, and potential limitations before you choose a product or follow a procedure.
What should you consider when using or choosing Use Screenshot HD to Take Screenshots?
Consider your specific goal, compatibility requirements, available features, cost, security, and the practical recommendations described in this guide.
Related Articles
 How to Take Screenshots in BIOS2 minutes read
 How to Take a Screenshot on Mac OS X: Step-by-Step Guide8 minutes read
 How to Save a Screenshot15 minutes read
 How to Creating Screenshot Shortcuts Using ChatGPT3 minutes read
 How to Take a Screenshot on a Mac Without Using the Keyboard5 minutes read
 18 Tips for Screen Capture Tool on iOS 11 You Should Not Ignore10 minutes read
Reader Comments 0
Sign in with email or Google to join the discussion.