5 easiest and fastest ways to take screenshots of Windows 10
Microsoft no longer sells Windows 10, but you can still use the operating system until Microsoft stops supporting it in October 2025. Until then, you'll have to switch to Windows 11 on new devices . What the two operating systems have in common is that you will have some common ways to take screenshots.
Taking a screenshot is quite important, such as capturing an invoice or document that needs verification, an online purchase receipt. Especially when you can't copy and then send the photo to friends, colleagues or your loved one, or that email or application or web information is not working. Whether you are using Windows 10 or Windows 11.
Here's how to use the built-in tools and other keyboard shortcuts to take screenshots in Windows 10 and Windows 11, so you can decide which works best for you.
How to take a full screenshot of Windows 10 or take a partial screenshot with keyboard shortcuts, using Windows 10 computer screen capture software or built-in tools in the operating system. In the article below, we will tell you the most common ways to take screenshots of Windows 10 computers.
1. Take screenshots of Windows 10 with keyboard shortcuts
Capture full screen of Windows 10 with PrtScn
This is the simplest and fastest way to take photos on Windows. The entire screen will be captured when we press the PrtScn key and saved in the Clipboard memory. You can paste it into chat software or open photo editing tools like Photoshop, Paint and paste the image to save or edit if you want.
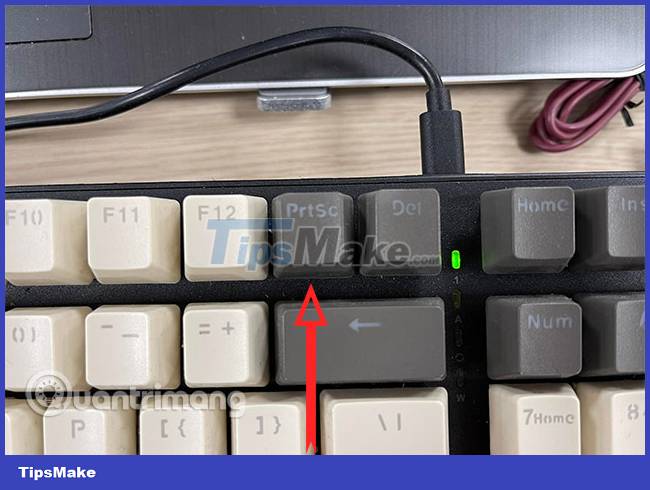
Capture full screen of Windows 10 to save with Windows + PrtSc
To take a screenshot of the entire Windows 10 screen, press Windows + PrtSc, the photo will automatically be saved to Pictures > Screenshots on your computer.
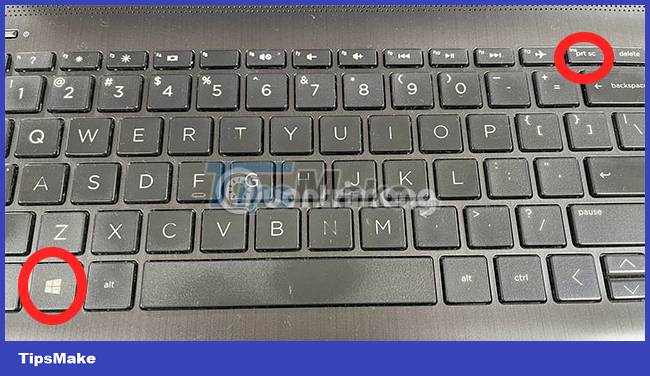
You just need to open the folder above and find the screen image you just took.
Capture open windows with Alt + PrtScn
To take a screenshot of an open window while working on Windows 10, press Alt + PrtScn. The image will be saved to the Clipboard, so you also need the support of photo editing software on your computer such as Paint, Photoshop to save the image.
Capture custom Windows 10 screen area with Windows + Shift + S
If you just want to capture a custom area on Windows 10, use the key combination Windows + Shift + S. When you press this key, the mouse cursor will turn into a + sign, allowing you to draw a rectangle over the area to capture. screen to select the area to capture.
After taking the photo, it will be saved to the Windows 10 clipboard. You just need to press Ctrl + V to paste the photo into chat applications, Word, Photohop to share and edit further if necessary. Or easier, open Paint and paste the image there to save.
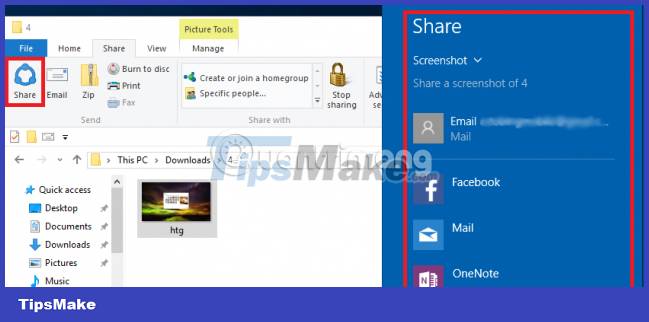
How to take a screenshot of a Windows 10 computer and share with Windows + H
Windows 10 Windows + H screenshot shortcut provides additional sharing features, in addition to capturing the entire interface on the computer. After pressing the key combination, the Windows Share interface appears on the right side of the screen asking if you want to share the photo you just took via email, Facebook, OneNote or not.
Windows key + volume down button
If you own a Microsoft Surface computer, you can immediately use the physical key to take a screenshot, just like you would on a smartphone or tablet. First, press and hold the Windows logo on the touch screen, then press the volume down key located on the side of the device. The screen will darken and the photo will be captured. To take photos, go to Pictures > Screenshots.
2. Take a screenshot of Windows 10 with Snipping Tool
The Snipping tool has been around since Windows Vista. Windows has been teasing for a few years that the Snipping Tool would stop working, but for now it still works in Windows 11. The Snipping Tool has been removed from the list of apps in the Start menu, but you It can still be easily accessed through search.
Snipping Tool on Windows 10 doesn't automatically save your screenshots - you'll need to save them to the tool manually before exiting - and it automatically copies your captures to the clipboard.
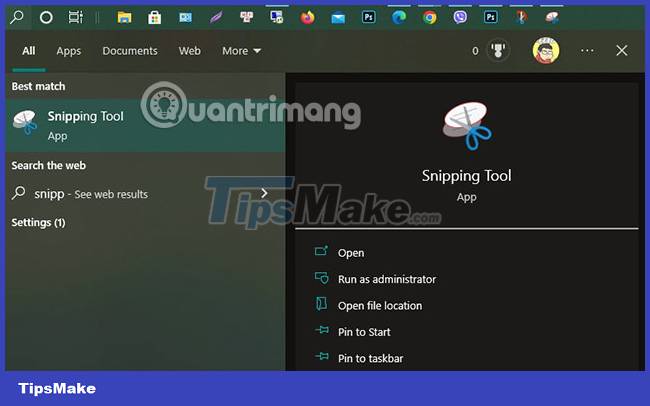
Step 1: To use Snipping Tool, you just need to select a search engine, then find the keyword Snipping Tool and select that tool.
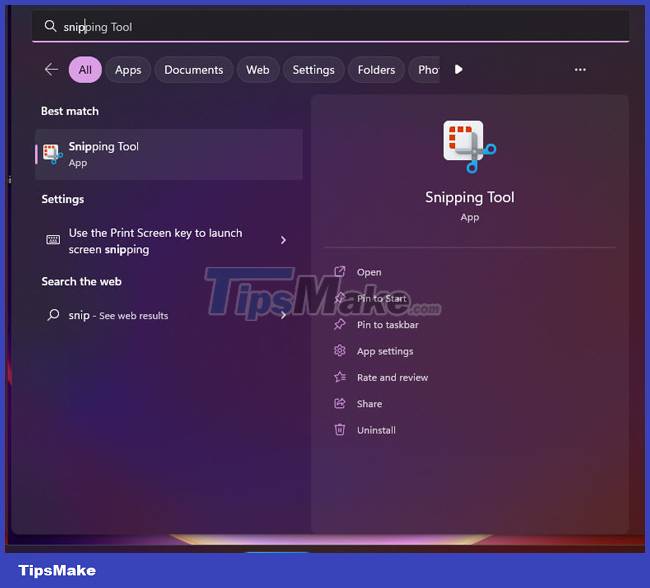
Step 2: Do the same on Windows 11.
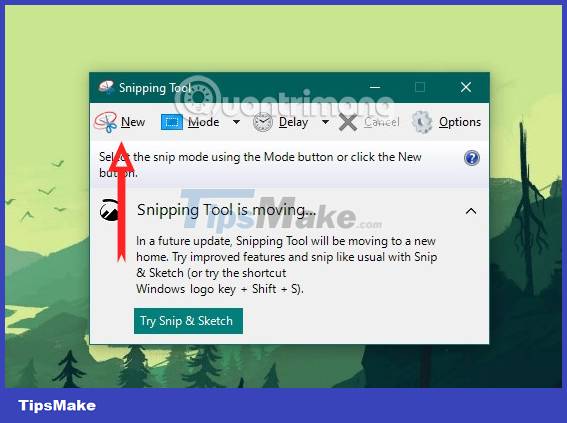
Click the New button to start the screenshot process. The default snapshot type is rectangular, but you can also use windowed, full-screen, and freeform snapshots.
After being taken, the photo will be transferred to the photo editor, you can edit the photo with tools before saving it to your device. Click the floppy disk image saving icon next to Delay to save the image.

3. Take screenshots of Windows 10 with Snip & Sketch
The Snip & Sketch Tool is easier to use, share, and annotate screenshots than the old Snipping Tool above. It can now take screenshots of a window of your software, which was a surprising omission when the app was first introduced.
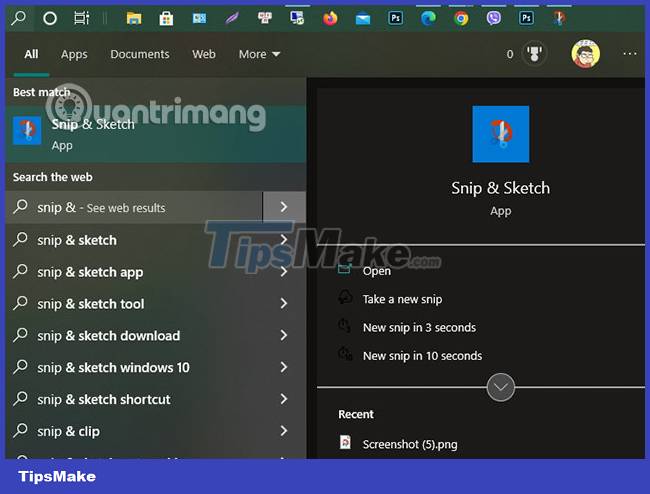
The easiest way to use Snip & Sketch is to use the keyboard shortcut Windows + Shift + S. You can also find the Snip & Sketch tool listed in an alphabetical list of applications accessed in Start icon as well as in the notification panel where the tool is listed as Screen snip. Or you can just search for it if you don't have the shortcut assigned to memory. If you are someone who often takes screenshots, it is recommended that you pin Snip & Sketch to the taskbar.
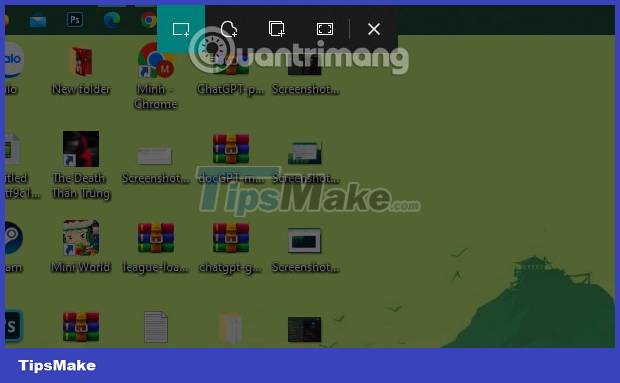
This is a tool available in new versions of Windows 10, intended by Microsoft to replace the Snipping Tool. You can enter the name of this tool in the search section, to open and use it. Snip & Sketch can take full screen or rectangular photos or take them at your discretion. In addition, there are many photo editing tools, such as a notepad for photos, voice recording, or a timer to take photos after 3 or 10 seconds.
4. Use Xbox Game Bar
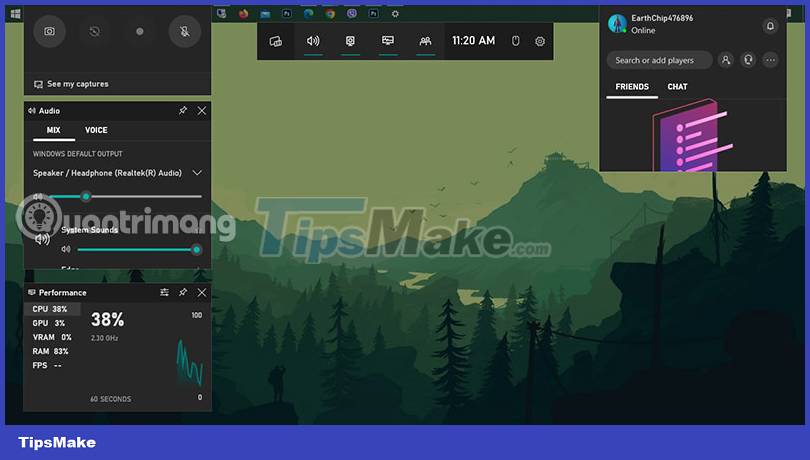
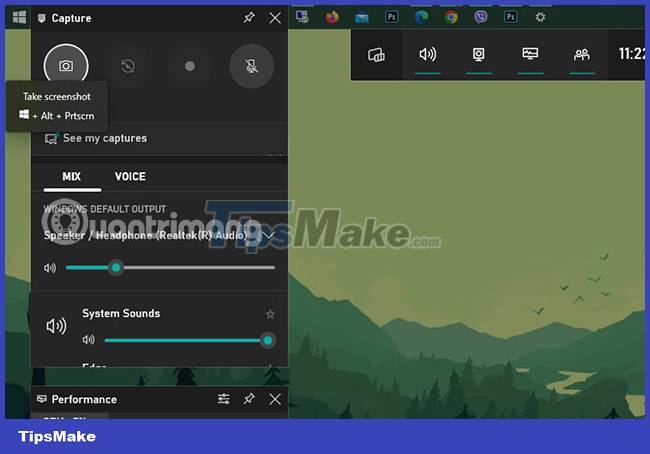
Xbox Game Bar is a tool that helps you take screenshots easily but will support more games. First, you need to turn on the Xbox Game Bar with the keyboard shortcut Windows + G and the Xbox Game Bar interface will appear.
From here, you can click the screenshot button in the Game bar or use the default keyboard shortcut Windows + Alt + PrtScn to take a full-screen screenshot. To set keyboard shortcuts for your own Xbox Game Bar screenshots, go to Settings > Game > Xbox Game Bar.
5. Use 3rd party software to take screenshots of Windows 10
Icecream screen recorder tool
If you want to take screenshots to highlight specific areas or sections, you will find this tool very innovative. Icecream Screen Recorder is a professional, streamlined screen capture software.
Icecream Screen Recorder is an alternative to typical screen capture applications on the market. This tool is ideal if you use multiple browsers in your daily Internet browsing sessions.
Best features of Icecream Screen Recorder:
- Icecream Screen Recorder gives you the ability to capture a portion of a page, or an entire window.
- It comes with all the standard screenshot features.
- You can also record videos online.
- You can capture different video formats from YouTube, Vimeo or Dailymotion.
- You will be able to record videos by clicking a simple button.
- You can add annotations, such as arrows and circles, on your videos.
- You can save screenshots straight to your hard drive or any location of your choice.
- You will be able to store screenshots in different file formats.
Icecream Screen Recorder is the world's best-selling app and you can try the free version now.
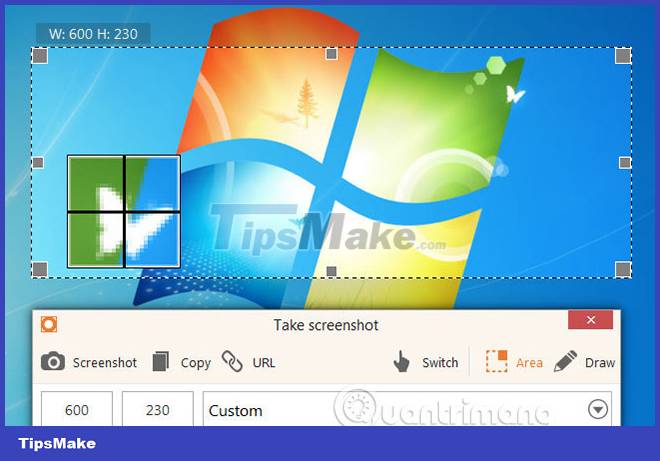
4.2. Win 10 PicPick screenshot software
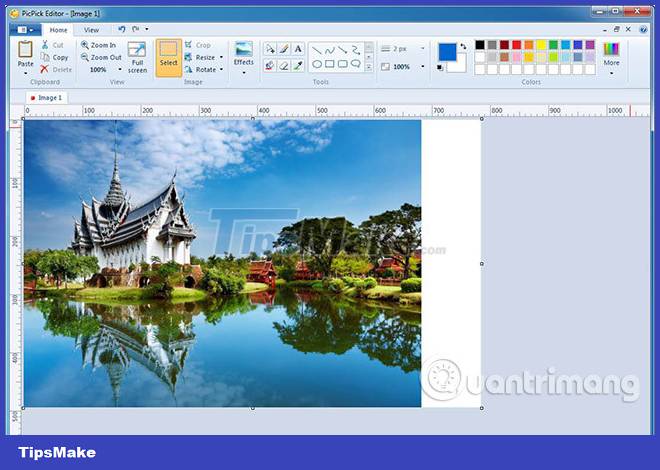
PicPick is a user-friendly and feature-rich tool for taking and editing screenshots. This tool comes with a lot of editing features placed in a convenient interface. Simply choose from a list that includes a screenshot tool, image editor, color picker, palette, whiteboard, protractor, and pixel ruler. The built-in editor lets you add text annotations, draw arrows and shapes, and apply advanced editing. Additionally, PicPick is portable and free, so you can store it on a flash drive and use it anywhere without having to install it.
4.3. Snagit tool
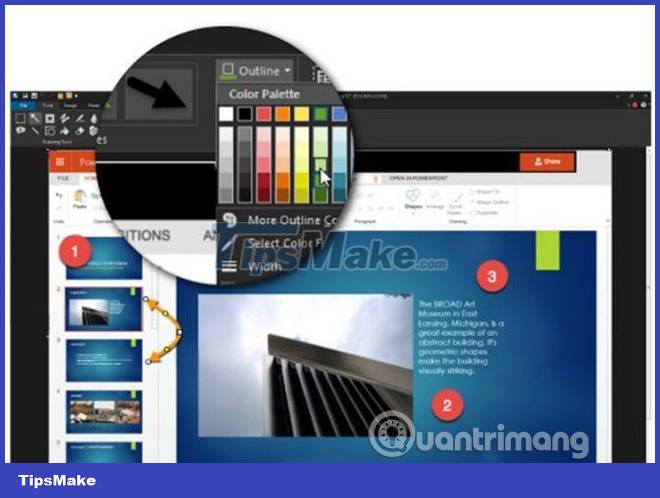
Snagit is not free, and it is not cheap either. But the convenience you get will be worth the $50. Snagit is screen capture software and it gets even better with the new version 11, with support for Windows 10. It comes with Smart Window Detection to crop the image and you can automatically choose to capture the entire window or part of the window.
Snagit also comes with a OneClick tool that can be pinned at the top, making it easy to take screenshots and add a wealth of annotation tools. Add to the long list of organizing, tagging, and screen sharing features if needed. This is a potentially useful tool for any user.
4.4. Greenshot Tool
Download Greenshot
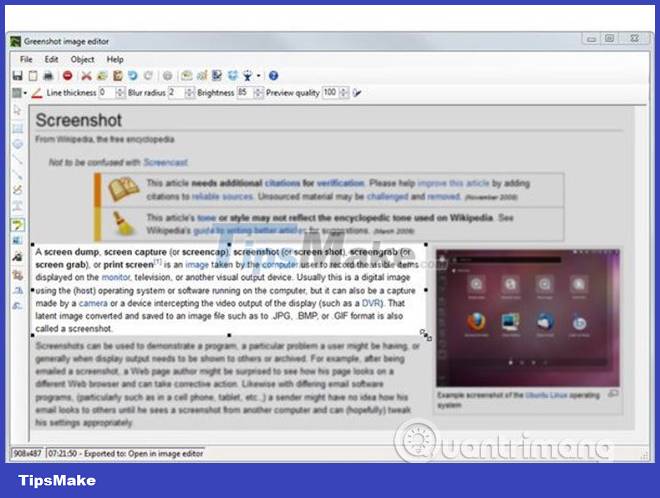
Greenshot is a free, open source screenshot tool for Windows operating systems that optimizes productivity. This tool allows you to quickly take screenshots of a selected area, window, or entire screen as well as capture scrolling web pages from Internet Explorer.
After taking a screenshot, you can make notes and change the order of parts of the screenshot. Greenshot has no restrictions on exporting screenshots: You can copy to clipboard, send to a printer, save as a file, send to Office programs, attach to email, or upload to photo sites like Flickr and others. another page.
4.5. SnapCrab tool
Download SnapCrab
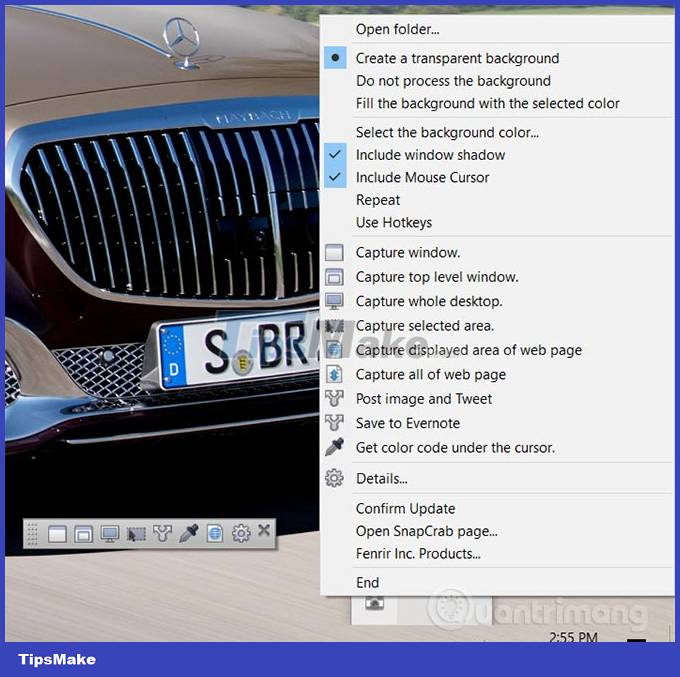
SnapCrab is a handy screen capture software that allows you to take pictures anywhere on your desktop and save them in JPEG, PNG or even GIF format. You can highlight an area of the screen you want to capture or capture the entire screen.
Snapcrab allows you to capture blurred windows and web pages from your browser by linking through Sleipnir. It also has a timer feature that ensures you don't miss a moment. And with the help of inbuilt features, you can share your screen on social networking sites. SnapCrab version 1.1.1 is compatible with Windows 10/8/7/Vista and XP.
4.6. Fireshot Tool
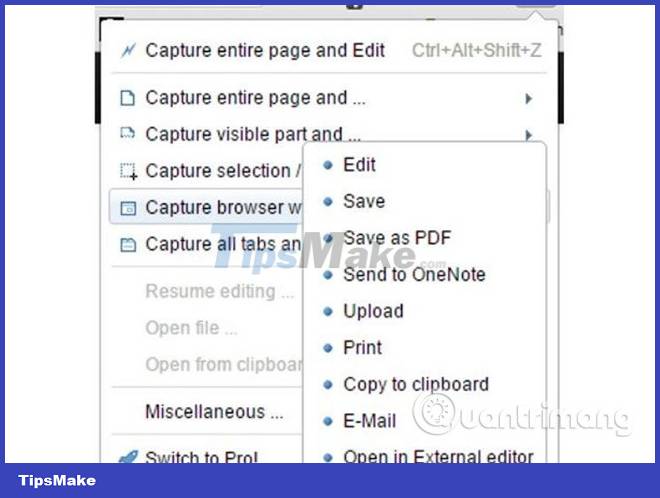
The Fireshot extension for Firefox, Chrome and Internet Explorer allows users to take screenshots in just a few clicks. You can take screenshots of web pages, add text annotations, make quick edits, and save the screenshot as an image file or PDF.
Fireshot allows you to take screenshots of part or all of your browser window, a selected area on the page, or even the entire page in just a few clicks. Screenshots can be copied to the clipboard, saved as an image file or PDF, printed, sent to email or uploaded to some social networking sites. Additionally, Fireshot has an internal editor that allows users to add arrows, text, shapes, or even draw on images.
4.7. LightShot Tool
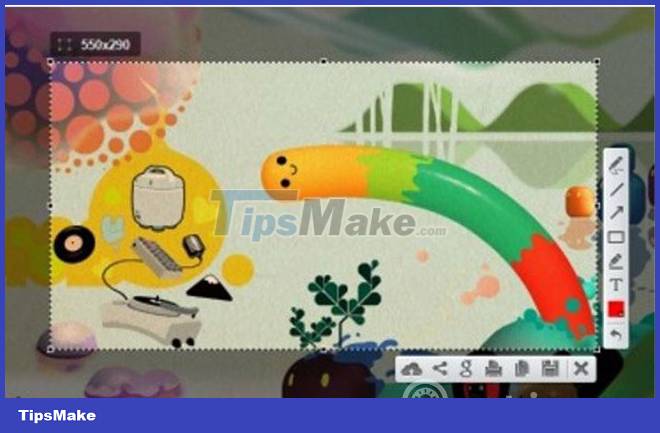
Lightshot is another free screenshot tool that does magical things on your system. It comes with an easy-to-use interface that allows you to take screenshots within 2 clicks. Just press the hotkey and the program will take a picture of part of the screen or the entire screen. Just like other premium screenshot tools, Lightshot also comes with an editor for adding text annotations and other edits. Additionally, users can create a free account that allows them to have an online library for easy reference, link sharing, and online backup.
4.8. ShareX tool
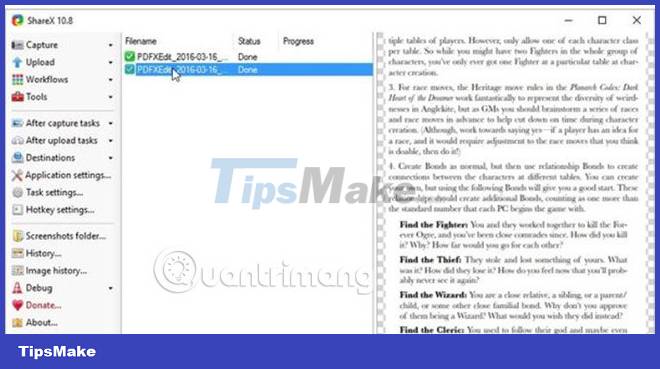
ShareX is a feature-rich open source screenshot tool. ShareX takes a different approach than that of the tools discussed above. Instead of uploading your files to the software's servers, you can configure the program to upload to one of your accounts, on other third-party services. ShareX does more screenshot taking. You can use it to shorten URLs, record screens, upload text, and convert your recordings to GIF format.
ShareX also comes with a wide range of automation features and integrations with over 80 image hosting platforms such as Flickr, Imgur, Dropbox, Sendspace, Pastebin, Photobucket and a variety of cloud storage providers. . You can also configure ShareX to perform other tasks such as annotating images, watermarking images, and more.
4.9. Gadwin PrintScreen Tool
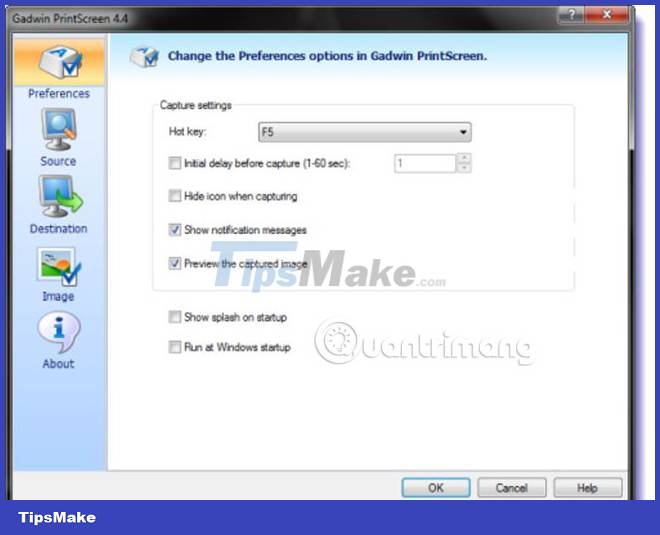
Gadwin PrintScreen is one of the most popular screen capture tools and it comes with advanced image annotation and editing features in an easy-to-use interface. PrintScreen is the default, but there are a dozen hotkey combos to choose from.
You can use the tool to capture the entire screen or capture a specific window. Once you have chosen your favorite combo, you can go to the Destination tab to get an instant screenshot, copy to clipboard or save it to a specific folder. Gadwin PrintScreen gives you the option to choose from 6 customizable image formats. You can even send screenshots via email.
The importance of getting a feature-rich program is that it saves you time. Listed above are the most powerful screenshot tools on the Internet for Windows 10, allowing you to take and edit screenshots, will even let you record short videos and shorten URLs. Depending on the purpose and need for taking photos, we can immediately use the camera key combination available on the computer, or tools installed on the Windows operating system accordingly.
Have you used any of the tools above? Please leave your opinion in the comments below!
Refer to the following articles for more information:
Wishing you success!

