Table of Contents
This updated guide examines How to Take a Screenshot on a Mac and organizes the essential facts, background, and practical takeaways in clear American English.
Method 1of 5:
Screenshot the Entire Screen
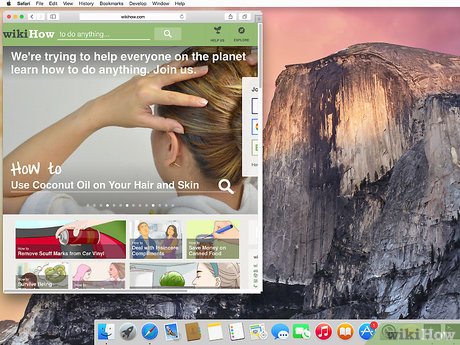 Make sure your screen displays exactly what you want to show in your screenshot image. Ensure all the relevant windows are visible.
 Press Command + Shift + 3 . If your sound is on, your computer should make a brief camera shutter noise.
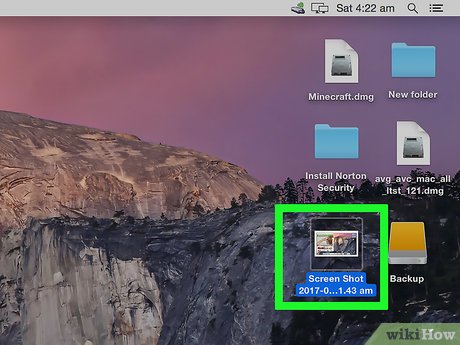 Find your screenshot on your desktop. It will be saved as "screenshot" labeled with the date and time.
- Earlier versions of OS X will save it as "Picture #"—for example, if it's the 5th screenshot on your desktop it will be labeled "Picture 5".
Method 2of 5:
Screenshot a Portion of Your Screen
 Press Command + Shift + 4 . Your cursor will turn into a small cross-hair reticle.
 Click and drag your cursor to highlight the area you'd like to take a picture of. A grayed rectangle should appear where you drag your cursor. If you need to adjust your windows at all, press Escape to return to a regular cursor without taking a picture.
 Let go of the mouse. You should hear a brief camera shutter noise if your computer's sound is turned on. That signals that your screenshot has been taken.
 Find your screenshot on your desktop. It will be saved as a.png file named "screenshot" labeled with the date and time.
- Earlier versions of OS X will save it as "Picture #"—for example, if it's the 5th screenshot on your desktop it will be labeled as "Picture 5".
 Use the screenshot. Once you have taken your screenshots, they are now ready to be used as needed. You can attach them to an email, upload them to the internet, or even drag them straight into an application such as a word processor.
Method 3of 5:
Screenshot an Open Window
 Press Command+Shift+4 then hit the Space bar . The cross-hair will turn into a small camera. You can press Spacebar again to switch back to the reticle.
 Move your cursor over the window you want to capture. The camera will highlight different windows blue as it moves over them. You can use keyboard commands such as Command+Tab to shift through your windows while still in this mode.
 Click on the window. The picture of the window you selected will be saved to the desktop by default just like the other screenshot methods.
Method 4of 5:
Save a Screenshot to the Clipboard
 Press Command + Control + Shift + 3 . This method works exactly like the one above, except the screenshot does not immediately create a file. Instead, the image is saved to the clipboard, the same temporary storage area where your computer remembers the text that you have copied.
- You can also take a portion screenshot with this method using Command + Control + Shift + 4 and dragging your reticle over the appropriate part of your screen, exactly as the portion screenshot method.
 Use Command + V or Edit > Paste to paste your image. Your screenshot image can be pasted straight into any compatible application, such as a Word document, an image editing program, and many email services.
Method 5of 5:
Use the Grab Utility Tool
 Go to Applications > Utilities > Grab . This opens the Grab application. You will see the menus shown in the upper left of your screen, but no windows will open.
 Click the Capture menu and choose between the four different options.
- To take a picture of your entire screen, click on Screen (or just use the keyboard command Apple Key + Z ). A window will pop up telling you where to click and letting you know that the window will not appear in the shot.
- To take a picture of a portion of your screen, click on Selection . A window will pop up instructing you to drag your mouse over the portion of your screen you'd like to capture.
- To take a picture of a specific window, select Window . Then, click on the window you'd like to take a picture of.
 When the new window opens, choose Save . You can also choose Save As to give it a different name and/or move it to a more appropriate location, but note that it can only be saved as a.tiff file. Note that the file is not automatically saved.
FAQ
What is How to Take a Screenshot on a Mac about?
It provides a structured overview of screenshot, explains the main context, and highlights practical takeaways for readers.
Why does this topic matter?
Understanding the main concepts helps readers evaluate the issue, avoid common mistakes, and make better-informed decisions.
How should readers use this information?
Use the guidance as a practical starting point, confirm details that may have changed, and follow current product, safety, or security recommendations.
Related Articles
 How to Take a Screenshot on Windows 118 minutes read
 How to Take a Screenshot?: Step-by-Step Guide18 minutes read
 How to Creating Screenshot Shortcuts Using ChatGPT3 minutes read
 How to Take a Screenshot of Only the Dock on a Mac4 minutes read
 Top Ways to Take Screenshots on PC Simply and Easily8 minutes read
 How to Take Screenshot on HP Windows 10 Computer7 minutes read
Reader Comments 0
Sign in with email or Google to join the discussion.