Table of Contents
This guide explains how to sharpen Images in Photoshop, with clear steps, practical tips, and important checks before you begin.
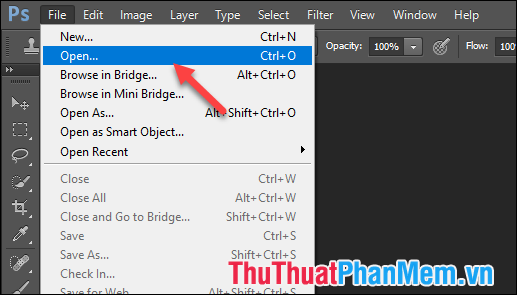
Step 1: Open photoshop then open your blurred image by selecting File -> Open
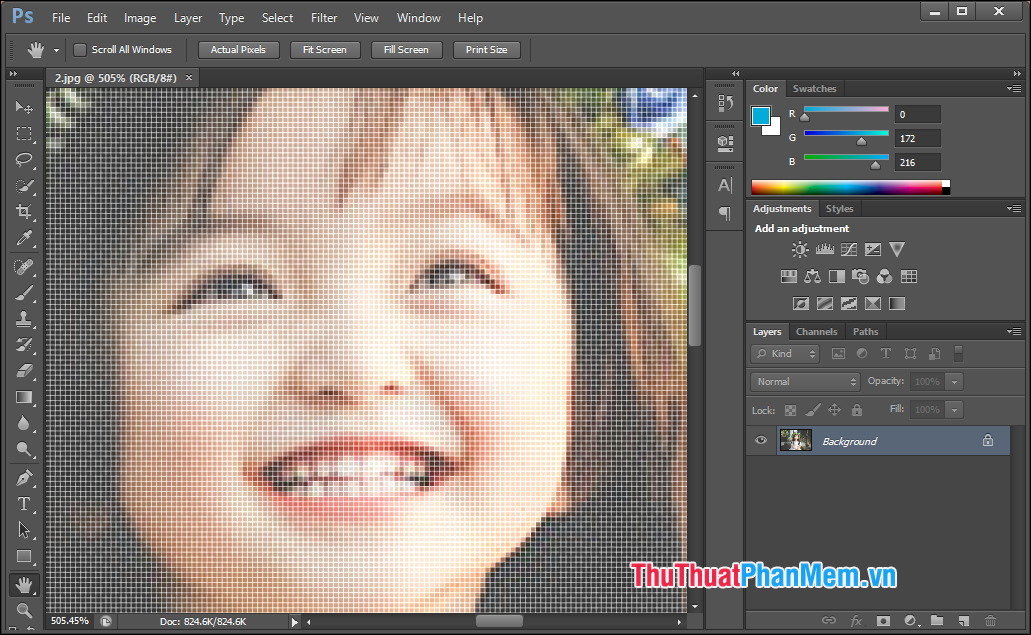
For example, here we have a fairly blurry image when zoomed up as shown below:
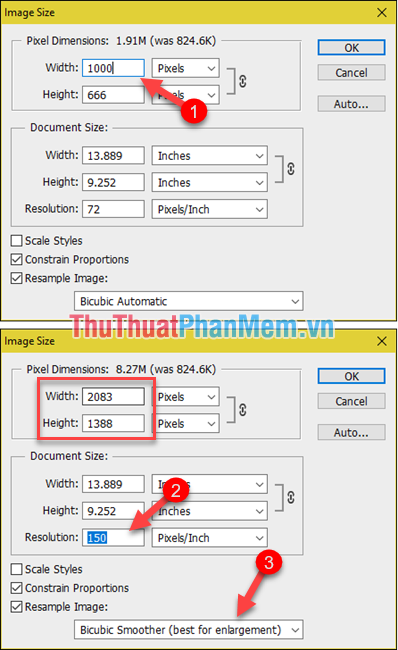
Step 2 : Choose Image -> Image Size

Step 3: A new window appears, first adjust the resolution parameters of the image in Pixel Dimension (increase Width to about 1000). Next, you adjust the pixel ratio to about 150 in the Resolution section .
Note: when you increase the pixel ratio, the image resolution will increase automatically.
Finally, select the section Bicubic smoother (best for enlargement) in the last line and click OK.
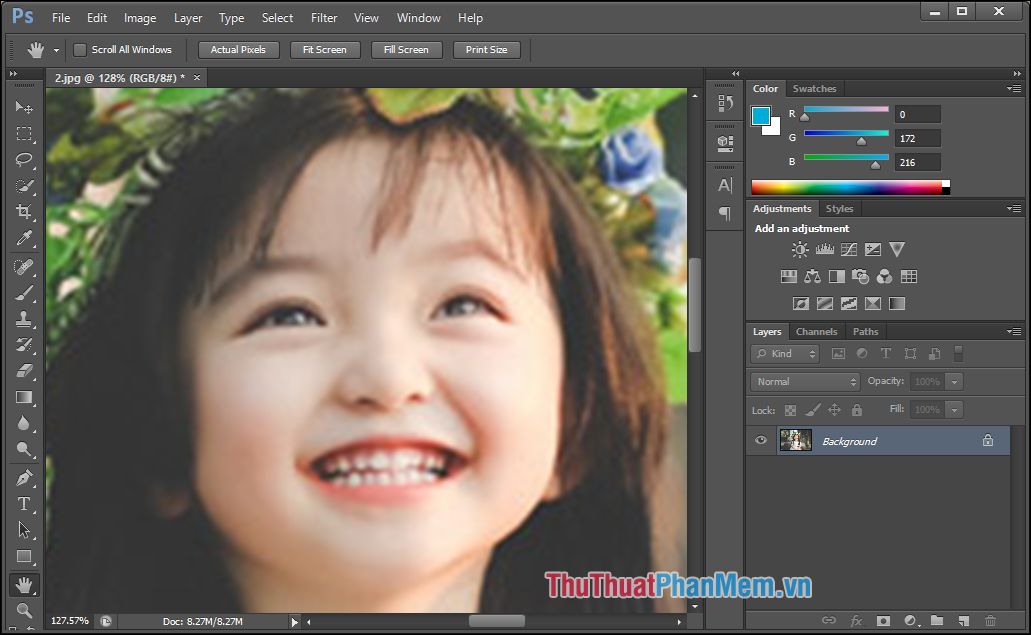
Step 4 : Now you zoom in on the image to see that there are no more broken images as at first, but still not very sharp:
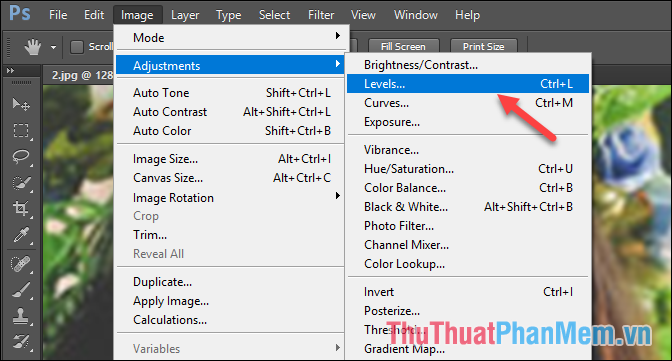
Step 5 : We increase the sharpness for the image by selecting Image -> Adjustments -> levels.
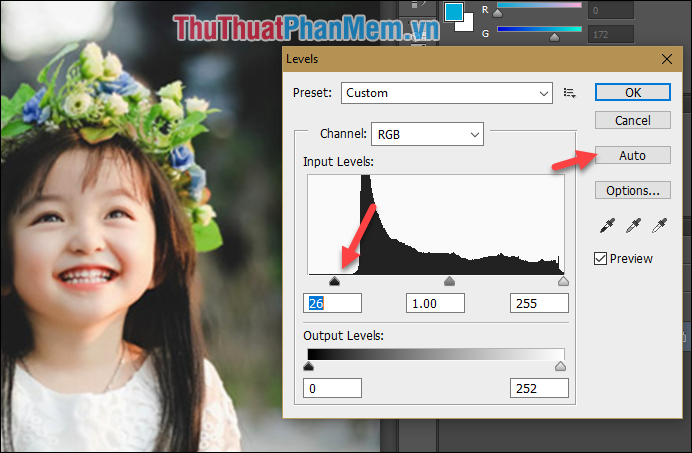
Step 6: In the new window, adjust the Input levels so that the image does not appear blurry and sharper. Or you can press Auto to let the software adjust for you.
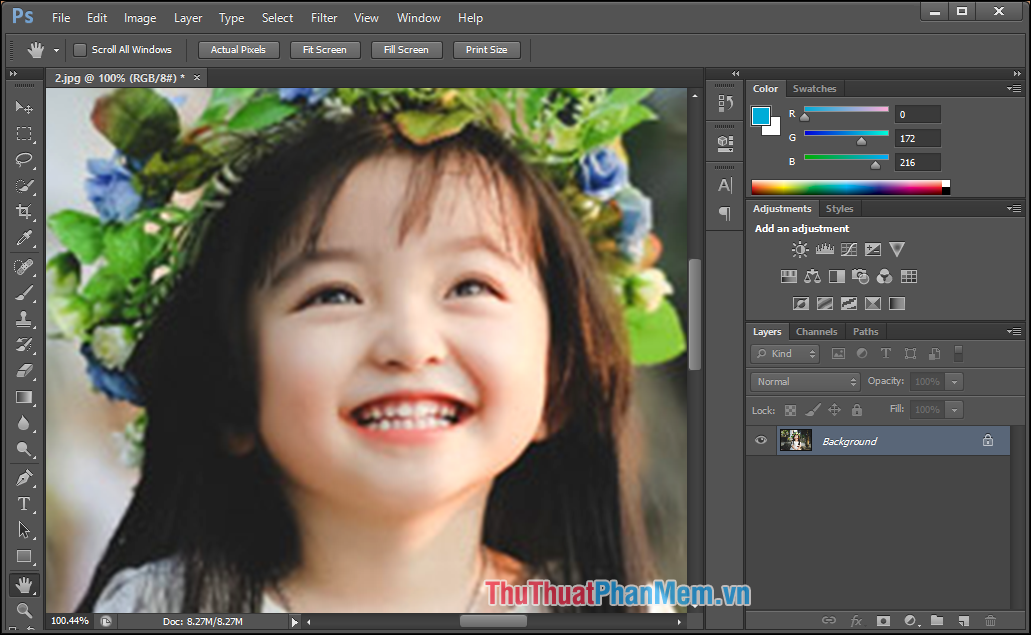
Now you can see that the image is much sharper than the original image:
And here is our result:
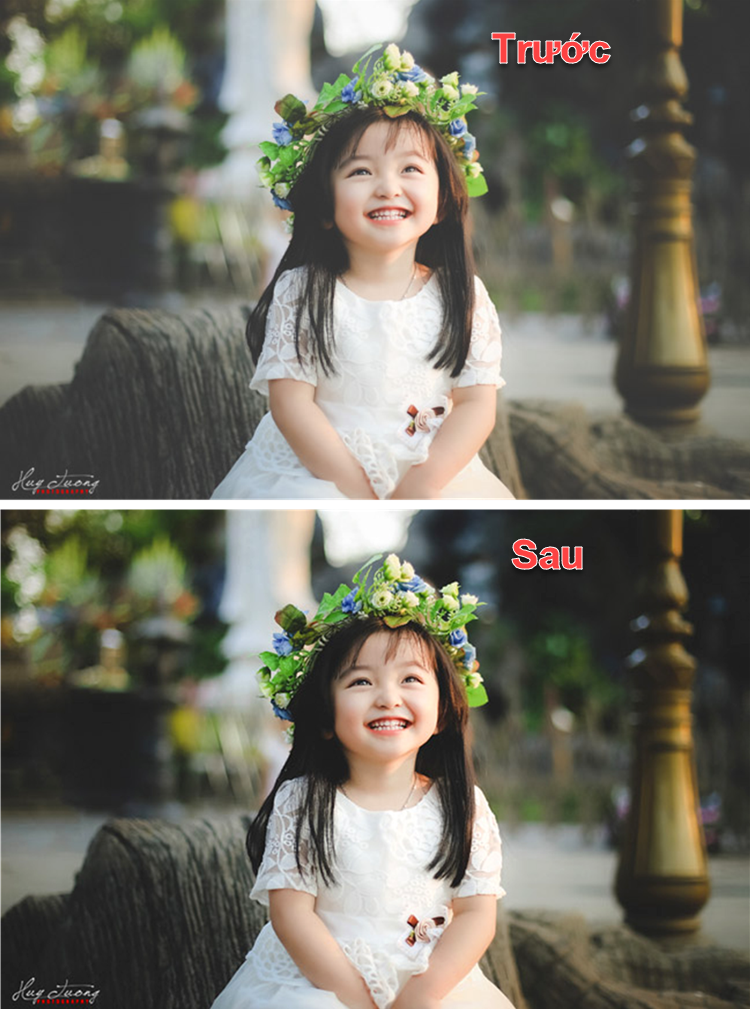
So with just a few simple steps we can sharpen the blurry image using Photoshop. Thank you for watching this article, wish you success!
FAQ
What should I know about Sharpen Images in Photoshop?
Focus on the key features, requirements, limitations, and practical use cases explained in this guide.
How do I get the best results with Sharpen Images in Photoshop?
Follow the recommended steps, use current software or information, confirm compatibility, and review settings before major changes.
Are there any risks or limitations?
Potential limitations depend on compatibility, data quality, cost, privacy, support, and how the product or method is used.
Related Articles
 How to Sharpen Images in Photoshop in 2 Ways5 minutes read
 How to Sharpen an Image in Photoshop7 minutes read
 How to Sharpen Images Using Photoshop3 minutes read
 How to Resize Images Properly in Photoshop9 minutes read
 5 Easy Ways to Handle Low-Light Photos in Photoshop10 minutes read
 Steps to Save Photoshop Files as PDF3 minutes read
Reader Comments 0
Sign in with email or Google to join the discussion.