How to Make a Simple Proximity Sensor Using Arduino
This article discusses how to make a simple proximity sensor constructed using LEDs and Arduino which is able to detect the distance between the sensor and the object in front of it without any physical contact. The sensor will give a....
Steps
-
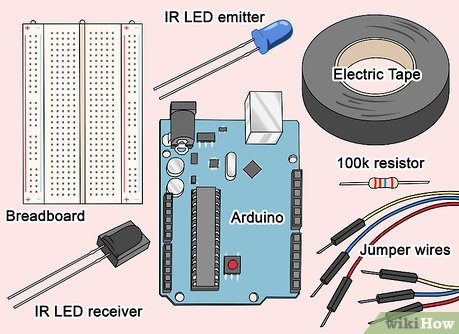 Start off by setting aside the required materials
 -
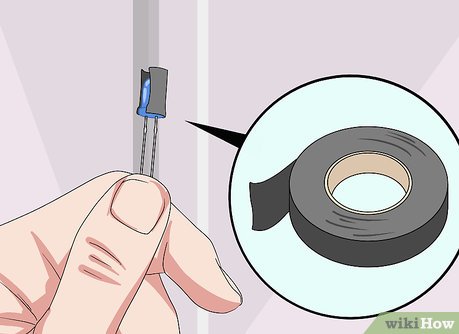 Prepare the IR LED by cutting a small piece of the electric tape and then wrapping it around the LED to form a tube as shown above.
 -
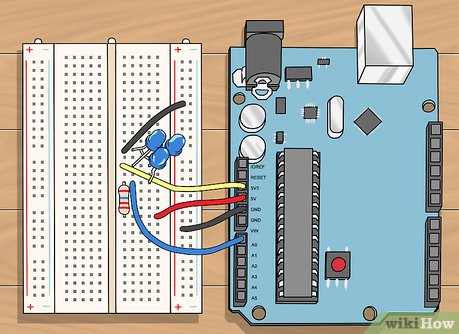 Using the breadboard, jumper wires, resistor & LED's set up connection as follows.
- Connect the resistor from 5v to the positive( big pin) on the IR receiver.
- Connect all the IR LEDs to the 3.3v pin on the Arduino.
- Connect a jumper from A0 on the Arduino to the positive leg on the IR receiver.
- Connect all of the negatives of both the receiver and the LEDs to the GND on Arduino.
- Make sure none of the wires or LEDs are shorting as LEDs are very sensitive and can burn.
-
 Build your code. This is a simple code that will print out the IR data on your computer screen, these variables can then be used to control almost anything. This code will allow for a simple analog read of the IR sensor.
- int IRreceiver = A0; // initialize

- int IRval;

- void setup()
- {
- pinMode(IRreceiver, INPUT); // declare its an input
- Serial.begin(9600); // speed at which the communication will happen
- }
- void loop()
- {
- int IRval= analogRead(IRreceiver); // declare data
- Serial.println(IRval); // print the data
- delay(10); } // add a delay to smoothen things out
- int IRreceiver = A0; // initialize
- Make sure all the connections are safe and then upload the code to your Arduino. After it's uploaded bring up the serial communication.
- Examine the data. The data should vary as the distance between the sensor and the object varies.
-
 Finished.