Table of Contents
This guide explains how to reduce the File Size Cad, with clear steps, practical tips, and important checks before you begin.
To reduce the size of the CAD file, follow the instructions in the following order.
Step 1: Use the audit command
First, click on the interface of AutoCAD and enter the audit command and press Enter .

Announcement Fix any errors detected? appears, enter Y and Enter to let the software automatically fix related errors after entering the command.

Step 2: Use the dxfout command
Next, enter the dxfout command to save the new cad file as DXF.

Then you choose where to save the new file with DXF format is finished.

Step 3: Use the PU command
After saving the DXF file, go back to the desktop or open a new file with DXF extension and type pu and press Enter from the AutoCAD main screen.
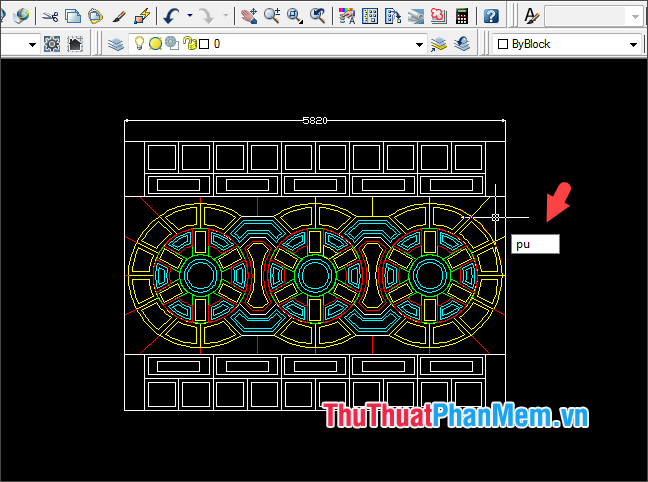
Next, the Purge dialog box appears. Click on Purge All to save the file and the settings are complete.

Step 4: Check and compare files when reduced capacity
Please check the file after implementation has reduced the size or not? If the file size reduction than the original file is successful. Through the process of performing the above steps, my CAD file from 26 MB reduced to 6 MB.

By reducing the size of CAD files in the article, we can significantly reduce the amount of CAD files used to save memory or easily share them on social networking sites. Good luck!
FAQ
What should I know about Reduce the File Size Cad?
Focus on the key features, requirements, limitations, and practical use cases explained in this guide.
How do I get the best results with Reduce the File Size Cad?
Follow the recommended steps, use current software or information, confirm compatibility, and review settings before major changes.
Are there any risks or limitations?
Potential limitations depend on compatibility, data quality, cost, privacy, support, and how the product or method is used.
Related Articles
 How to Reduce the Size of Excel Files3 minutes read
 How to Reduce the Size of JPG Files in Windows 106 minutes read
 How to Reduce PDF File Size: Complete Guide6 minutes read
 Tips to Reduce the Size of Powerpoint Files Should Be Known11 minutes read
 How to Reduce PDF File Size by Software6 minutes read
 How to Reduce the Size and Size of Word Document Files Containing Images3 minutes read
Reader Comments 0
Sign in with email or Google to join the discussion.