Table of Contents
This updated guide examines How to Recover Accidentally Deleted Files in Os X and organizes the essential facts, background, and practical takeaways in clear American English.
Method 1of 3:
Using the Trash Can
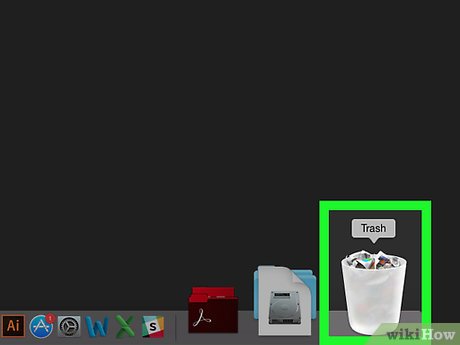 Open the Trash Can app. Double-click the wastebasket-shaped app icon in your Mac's Dock. This will open the Trash Can window.
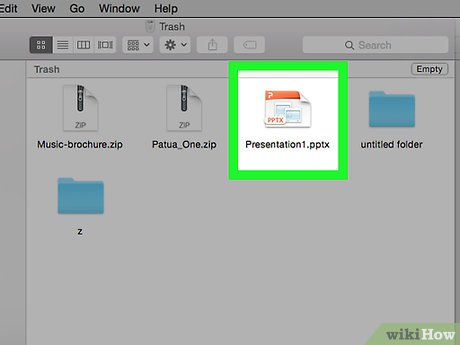 Look for your deleted files. Scroll through the Trash Can to look for the files, or type a file's name into the search bar that's in the top-right corner of the window.
- If you can't find your deleted files, you'll need to use Time Machine to attempt to restore them.
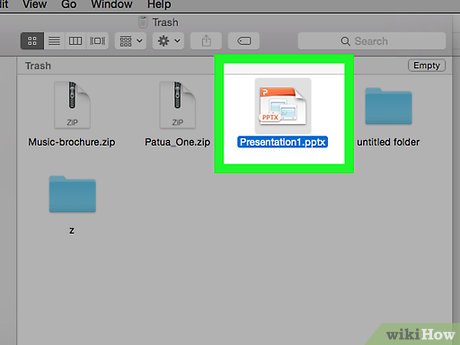 Select deleted files. Click and drag your mouse across a group of files to select them all, or hold⌘Commandand click individual files to select them independently.
- If you want to select every file in Trash Can, click a file, then press⌘CommandandAat the same time.
 ClickFile. It's a menu item in the top-left corner of the screen. A drop-down window will appear.
 ClickPut Back. This option is in the File drop-down menu. Doing so will send your selected files back to their original location(s).
- If the Put Back option is greyed out, you'll need to click and drag the selected files from the Trash Can window onto the desktop and then drop them there.
Method 2of 3:
Using Time Machine
 Open Spotlight
 . Click the magnifying glass icon in the top-right corner of the screen. A search bar will appear.
 Typetime machineinto Spotlight. Doing so searches for the Time Machine app on your computer.
 ClickTime Machine. It's a teal app with a clock on it. You should see this option near the top of the Spotlight search results. Time Machine will open.
 Select the files' location. Click the folder that contained your file(s) on the left side of the Time Machine window. Doing so will show you the folder's contents.
 Go to a backup during which your files were still on your Mac. Click the upward-facing arrow to the right of the Time Machine window to scroll through backups until you see your deleted files appear.[1]
- If you scroll past the files' creation date and they still aren't showing up, you can't use Time Machine to restore the files.
 Select the files that you want to restore. Click and drag your mouse across a group of files to select them all, or hold⌘Commandand click individual files to select them independently.
 ClickRestore. It's a grey button near the bottom of the Time Machine window. This will restore your selected files.
- You may have to repeat this process for different folder locations in Time Machine.
Method 3of 3:
Using a Data Recovery Program
 Stop using your Mac for now. The key to recovering files using a data recovery program is to stop using the Mac's hard drive immediately. Don't download any software or create any folders or backups now, since doing so may overwrite the space where the file that you want to recover was stored.
 Download a file recovery program. You will most likely have to pay for your selected program. Make sure to download the program on another computer or drive so that you don't accidentally overwrite the file you are trying to recover. Popular programs include the following:[2]
- PhotoRec (Free)
- Disk Drill (paid)
- Data Rescue (paid)
- EaseUS (paid)
 Install the data recovery programon a USB drive. If you can do this, you'll cut down on the risk of overwriting your Mac's files.
- If you aren't able to install the recovery program on a USB flash drive, you can at least move the program's setup file onto your Mac from the USB drive. This isn't ideal, but it may be necessary.
 Scan your drive. The process will vary depending on the program you choose, but generally you will be able to select the drive that you want to scan. Select the drive that contained the files you accidentally deleted, then select the Scan option.
- Your selected program may have additional options to select before continuing.
 Select the files that you want to recover. After scanning your drive, you will be presented a list of files that can be recovered. You can select these to restore them.
- File names will often be destroyed, so you may have to preview each file individually to find the one you want.
- Not all files can be restored.
 Save your files. After selecting the files you want to recover, you will be prompted to save the files somewhere. If you still have more files to try to find, do not save them to the drive they were deleted from. Instead, save them to an external drive or another connected drive.
- If trying to recover a large number of files, recover the most important ones first. Even the recovery process can overwrite and corrupt deleted files, so make sure you grab the ones you need the most first.
FAQ
What is How to Recover Accidentally Deleted Files in Os X about?
It provides a structured overview of files, explains the main context, and highlights practical takeaways for readers.
Why does this topic matter?
Understanding the main concepts helps readers evaluate the issue, avoid common mistakes, and make better-informed decisions.
How should readers use this information?
Use the guidance as a practical starting point, confirm details that may have changed, and follow current product, safety, or security recommendations.
Related Articles
 How to Recover Deleted Data or Secure Format11 minutes read
 Recover Deleted Data with Recuva4 minutes read
 Recover Accidentally Deleted Data in USB3 minutes read
 Trick to Recover Android Data Is Lost5 minutes read
 How to Recover Deleted Files on Linux8 minutes read
 Recover Deleted Files from the Cloud Service: Restore Files5 minutes read
Reader Comments 0
Sign in with email or Google to join the discussion.