How to record audio/narration in DaVinci Resolve 18
With a built-in audio editing workstation called Fairlight , you don't need to use another software to process the audio separately. A feature like this is enough for a simple audio recording or voiceover.
At first, understanding how audio inputs and outputs work can be confusing. But it only takes a few tries and you'll get the hang of the process. Here's how to record audio in DaVinci Resolve 18.
What you need to record audio in DaVinci Resolve
You can record audio in DaVinci Resolve 18 whether you use the free version or the studio, you just need the following:
- One micro
- DaVinci Resolve 18
If you don't already own a microphone, you should explore the options available. Recording good quality audio is essential for professional video production.
Thanks to the popularity of podcasting, there are many affordable mics available in the market. For the simplest solution, without the need for additional audio equipment, look for a micro USB.
How to record audio in DaVinci Resolve 18
1. Create audio tracks
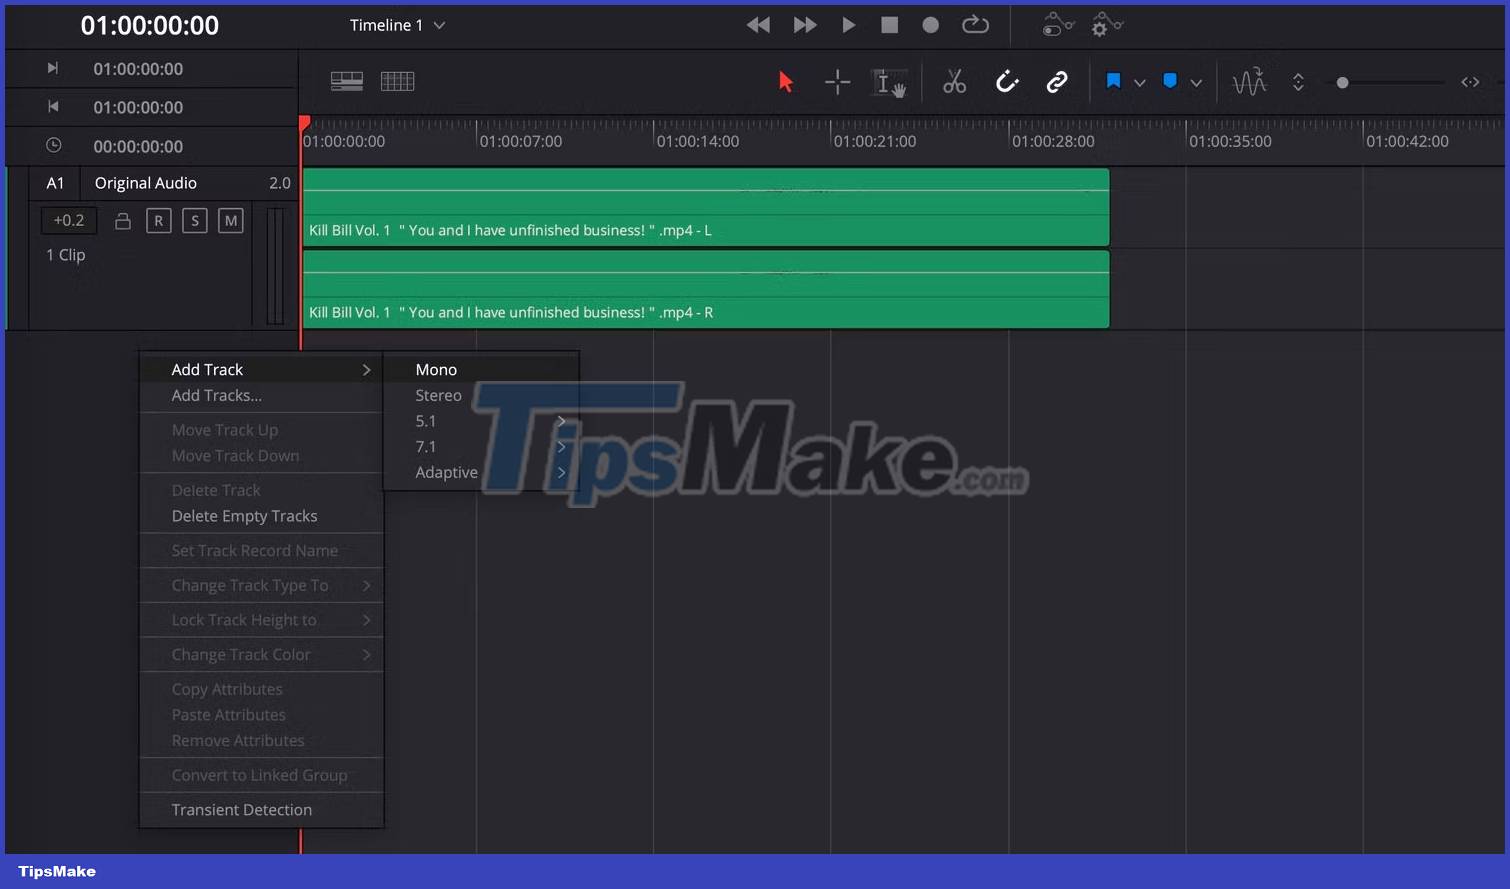
Start by navigating to the audio editing workstation by selecting the Fairlight tab from the bottom of the screen. If your project already has audio, you will be able to see the audio track displayed in the timeline.
To create a new audio track for recording, right-click an empty spot in the track title area and select Add Track > Mono . If you have a stereo microphone, choose Stereo instead.
This is a good time to change the name of the audio track. Just double click on the title of the audio track and enter a new name.
2. Select audio input
Next, set up the microphone and make sure it is connected to the computer. Once that's done, look for the Mixer panel in DaVinci Resolve. By default, it will be on the right side of the screen.
In Mixer , there is a channel strip for each audio track in the session. The information is arranged vertically and starts with the track number at the top, i.e. A1, A2, Bus1.
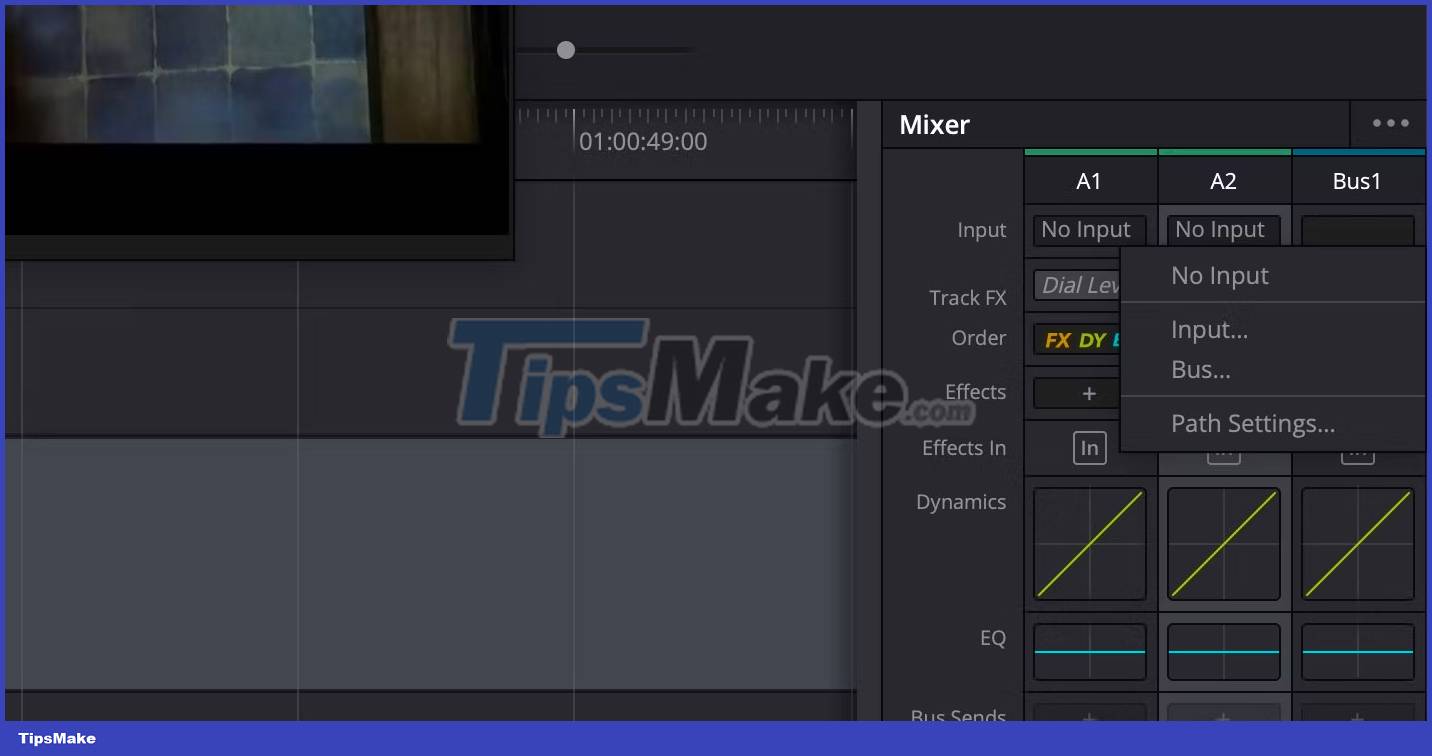
To use the microphone you previously connected, you will need to add the Input microphone to the audio track created in step 1.
Find the track number in the Mixer (eg A2 ), then click on the input slot that says "No Input" and select Input from the menu.
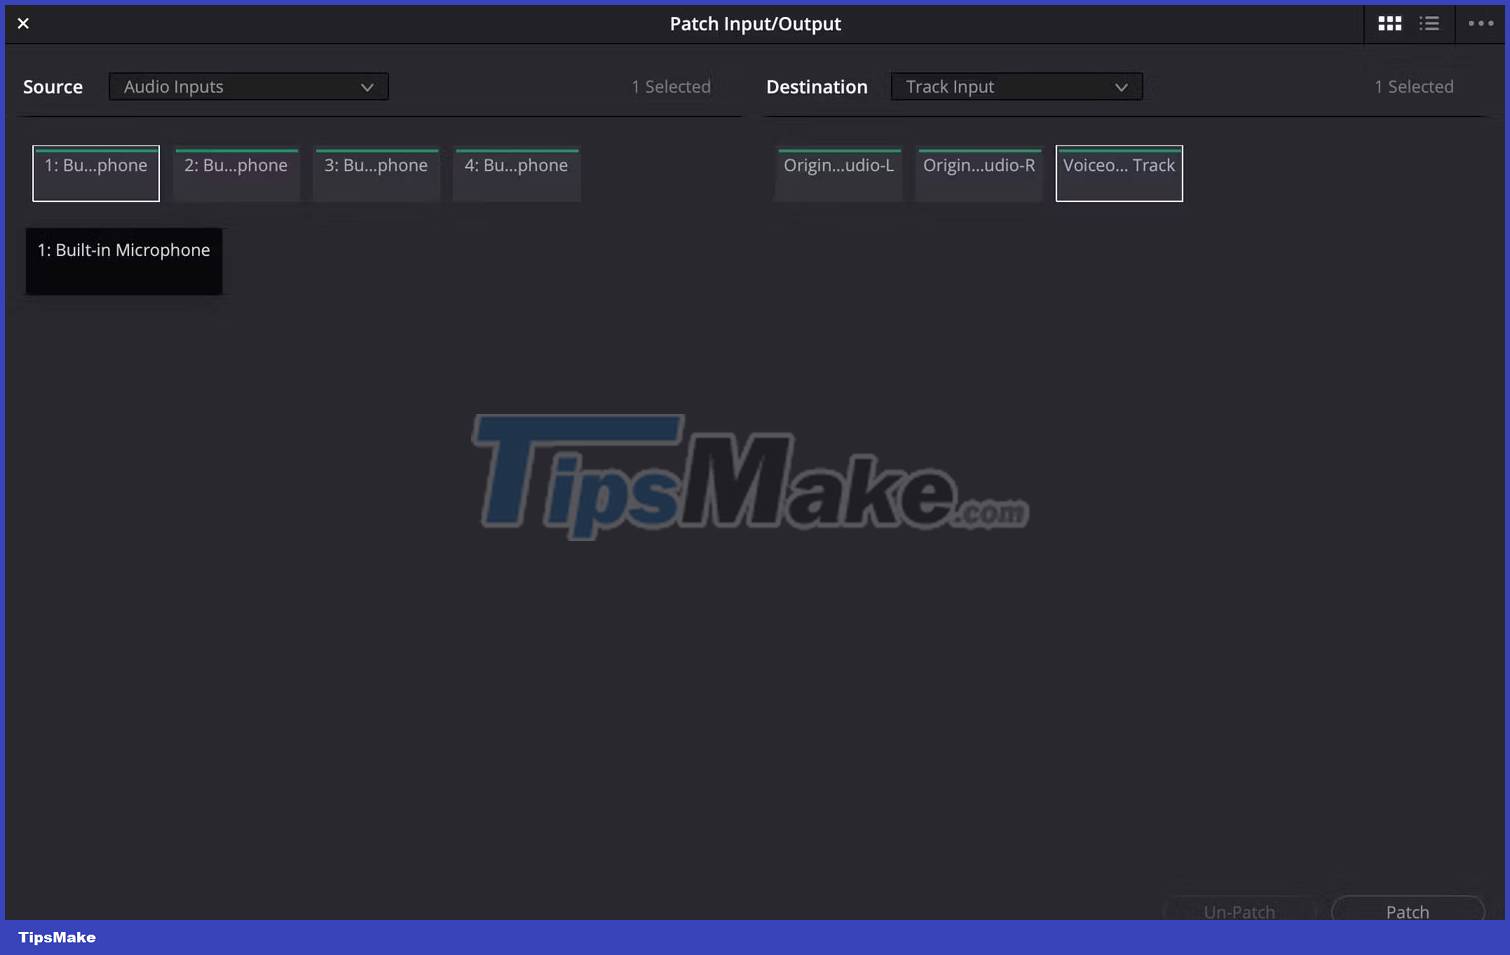
Then the Patch Input/Output window will appear and you will see the audio input options listed under Source on the left side and a list of audio tracks on the right under Destination .
Find the microphone name in Source and make sure it's selected. This example selects Built-in Microphone from the computer. Make sure to hit the Patch button , then close the window.
3. Activate track for recording

Before pressing the record button, you first need to activate the track to record. You can do this by pressing the R button on the track title. Doing this will also allow you to check if your microphone is working.
If everything is connected correctly you should see the gain meter light up green when you output sound. This signal is also displayed in the Mixer with more precise markings from 0 dB to -50 dB.
4. Record audio
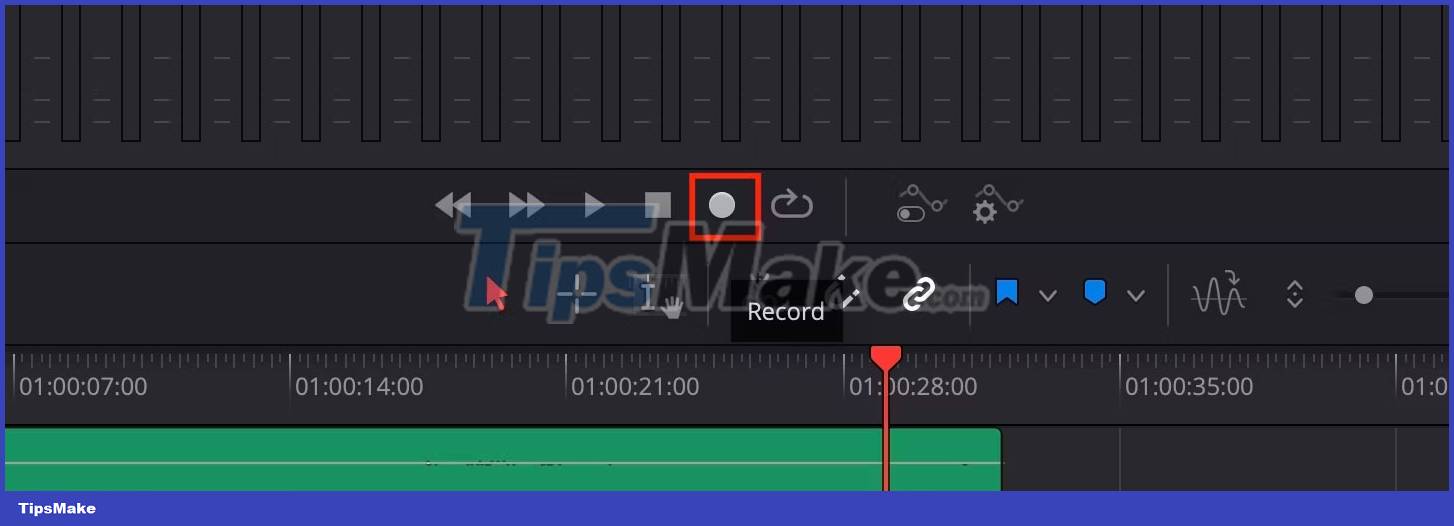
Once the microphone is up and running, it's time to record the sound. Move the red player to where you want to start recording, then press the Record button in the play controls. To stop recording, press the spacebar on your keyboard.
5. Record multiple times using layers
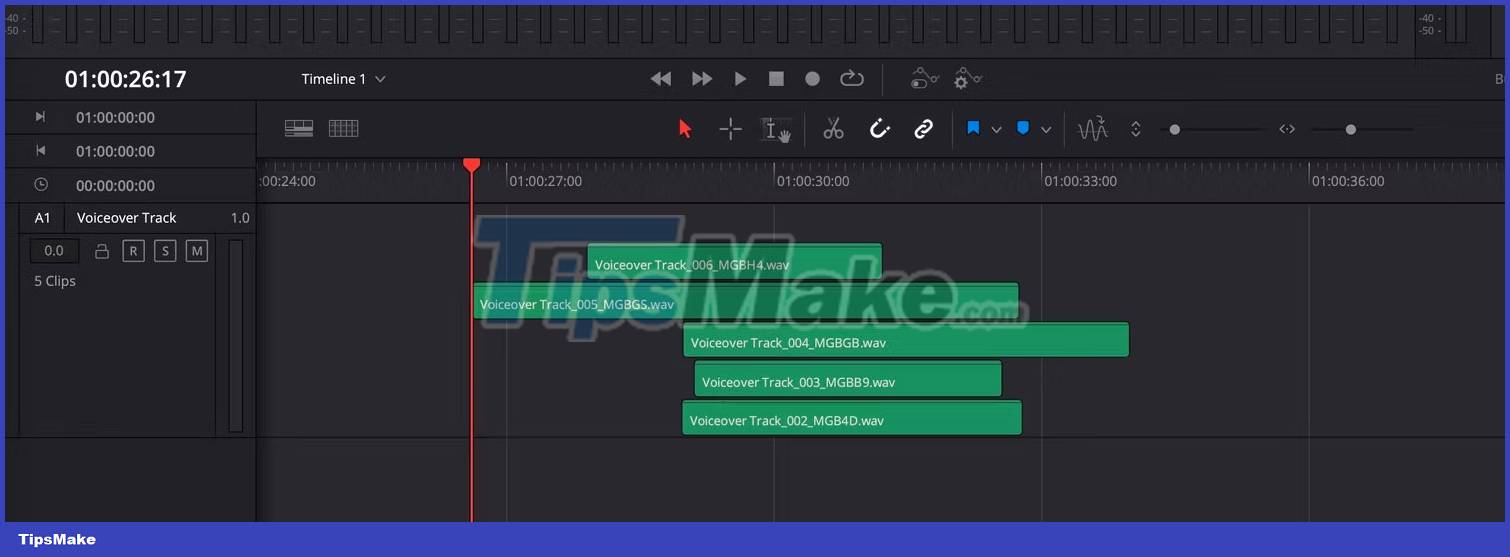
DaVinci Resolve makes it easy to redo sections if you need to re-record them. This is especially useful when you're recording voiceovers and need to correct errors, or if you just want to change the way dialogue is delivered.
Instead of overwriting the existing audio file, the tool will create a new audio file and place it on top of the original file. You can view these layers by going to View > Show Audio Track Layers .
The audio track at the top of the stack is the one you'll hear while playing. If you want to use another clip, click and drag the clip to the top of the stack.
6. Export video
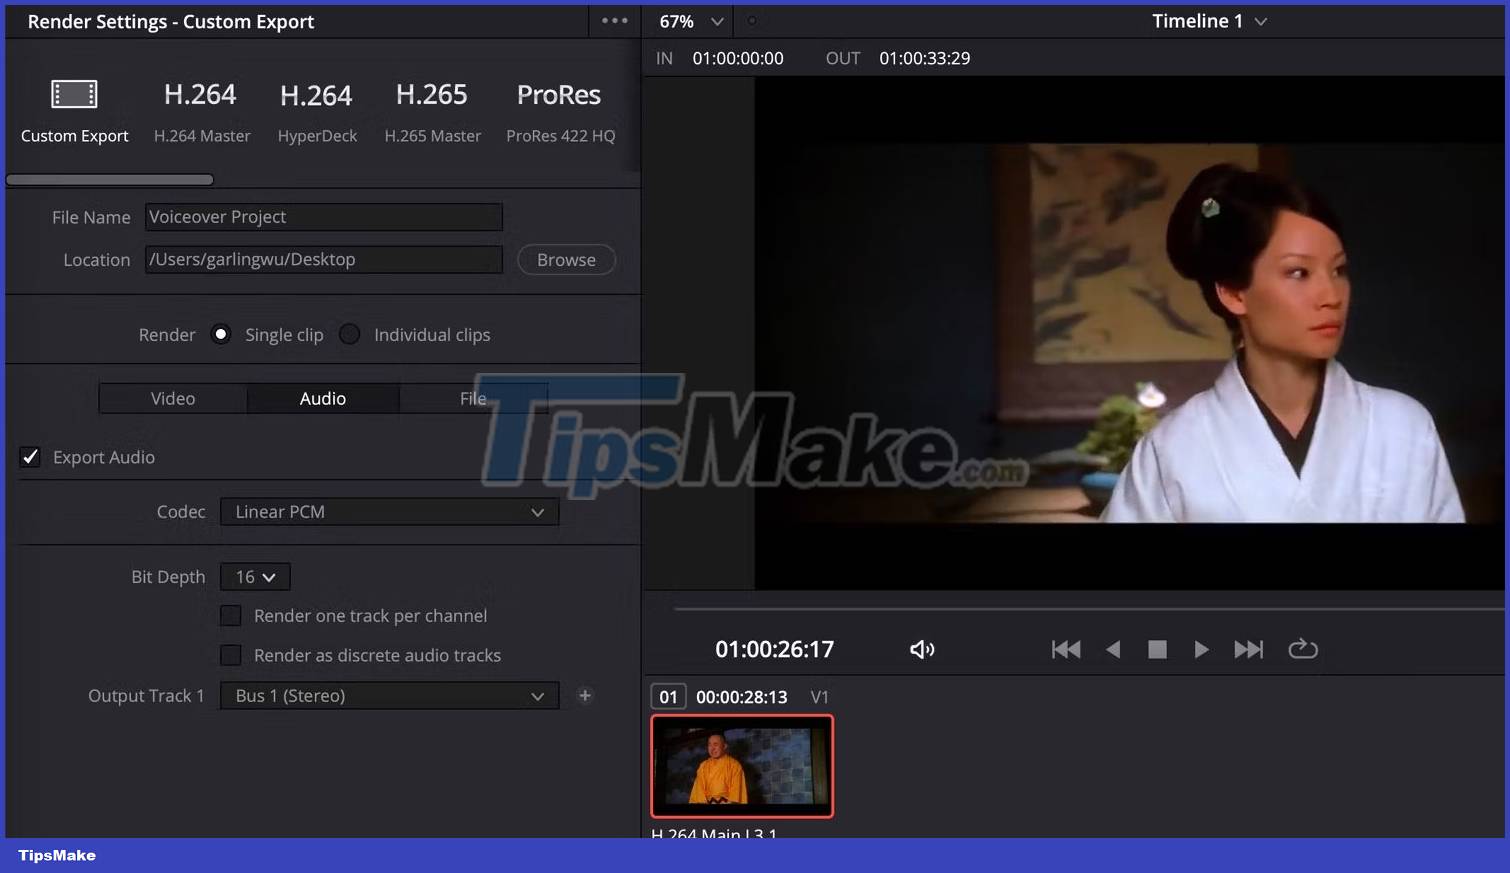
Once you've finished recording the audio or narration, you can export your video as usual by switching to the Deliver tab at the bottom of the screen.
On the left side of the screen are the export settings. Here you can click the Audio button to change the audio output settings. Make sure that the Export Audio check box is selected, then adjust the codec and bit depth to suit your needs.
Resovle problem
Not being able to hear anything from the microphone is a recurring problem, whether you're new to audio production or an expert.
The best way to troubleshoot is to trace the signal from the start to the end, testing the signal at various points.
Here's a checklist you can take to spot the problem:
1. Check that the microphone is properly connected to the computer.
2. Open Sound settings on your computer and find Input and Output . Check that your microphone's name appears under Input and make sure it's selected.
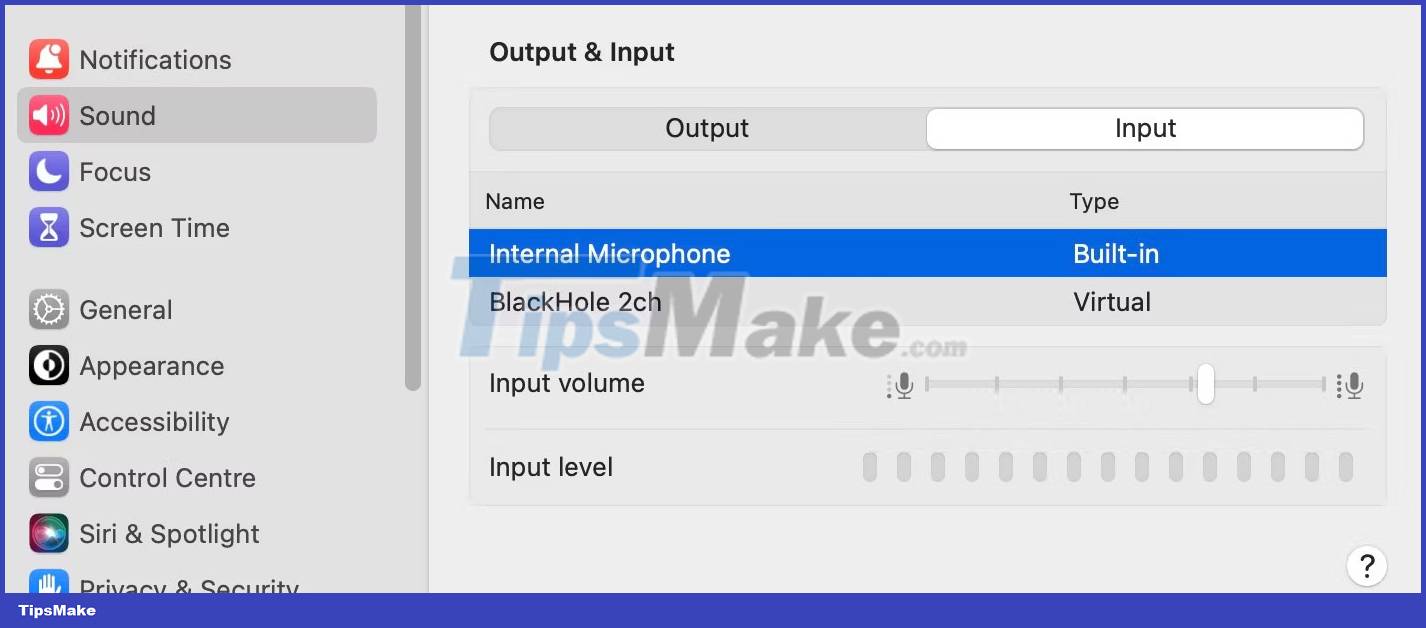
3. Check that the track is not muted in DaVinci Resolve.
4. Check if your microphone appears in the Patch Input/Output window (see step 2). Also, make sure that Source is set to Audio Inputs and Destination is set to Track Input . If done correctly, the microphone will appear in the Input slot for the selected track in the Mixer control panel.
5. Activate the track before recording by pressing the R button in the title of the track. This feature should always be enabled if you want to listen to the microphone input.
6. Make sure that you have selected the input monitor option. From the navigation menu, select Fairlight > Input Monitor Style > Input .

There are a lot of mistakes beginners make when using DaVinci Resolve, but with a little patience, you can easily fix the problem.
You should read it
- ★ How to create attractive thumbnails in DaVinci Resolve 18.5
- ★ DaVinci Resolve - Full-featured video editing software
- ★ How The DaVinci Resolve Speed Editor Improved Video Editing
- ★ What are Compound Clips in DaVinci Resolve? how does it use?
- ★ How to use the Versions feature in DaVinci Resolve 18.5