How to Export Video in DaVinci Resolve
You've just completed the final edit of your video in DaVinci Resolve and now it's time to export it. There are a few ways you can do this - by selecting each render option separately or doing a simple and quick export. This article will show you how to export video using both methods so you can choose which is best for your project.
How to Export Video in DaVinci Resolve
When you're done editing and ready to export your video, click the Deliver tab on the bottom toolbar.
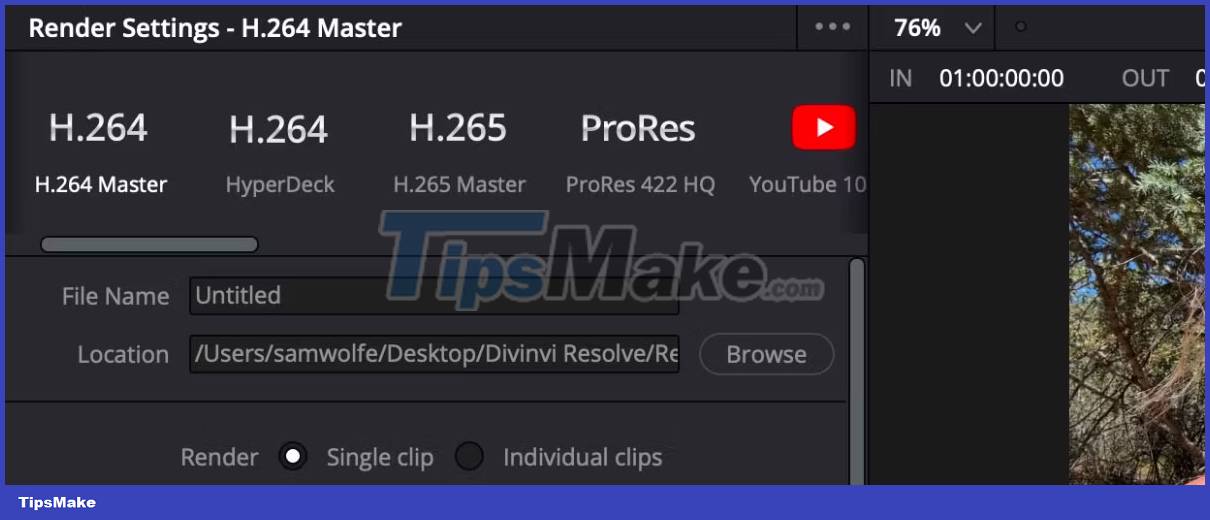
From there, you have H.264, H.265, and ProRes options along with several other preset settings. Many times, simply choosing H.264 or H.265 will work perfectly, unless you want to customize the settings to your personal specifications. Below that is where you title your video file and choose a location.
Let's say you have several edited clips with different frame rates. When exporting, DaVinci Resolve gives you the option to render the clips as a single clip, which will convert all clips to Timecode Calculated At frame rate and save them as one clip. But you also have the option to individually save clips at their original frame rate by selecting Individual Source Clips .

In Render , there are 3 tabs that give you more control over your export settings - the first is Video . In Video , you can change Format and Frame Rate , even turn horizontal videos into vertical videos at the last minute. Additionally, you can add Chapters from Markers placed on your video during the editing process.

If you've added subtitles to your video in DaVinci Resolve, you'll want to open the Subtitle Settings tab and select Export Subtitle . From there, choose whether you want to export the subtitles as a separate file or burn it into your video.
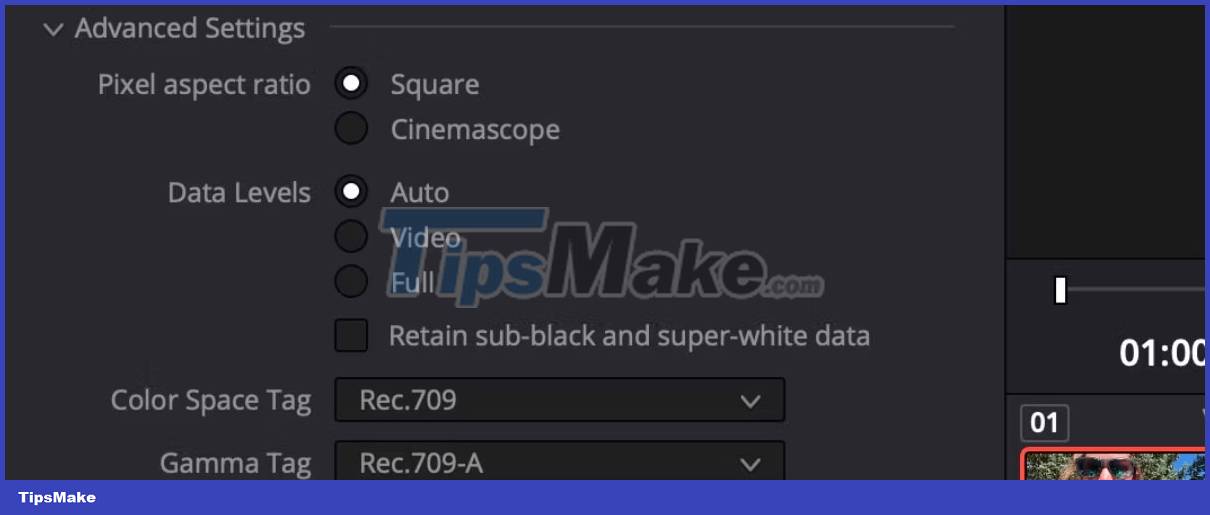
If you want to avoid gamma shift that makes your video look darker or lighter than the original, DaVinci Resolve has a setting to help with that. Open the Advanced Settings tab and go down to Color Space Tag . Open the drop-down menu and select Rec.709. Then, open the drop-down menu for Gamma Tag and select Rec.709-A.
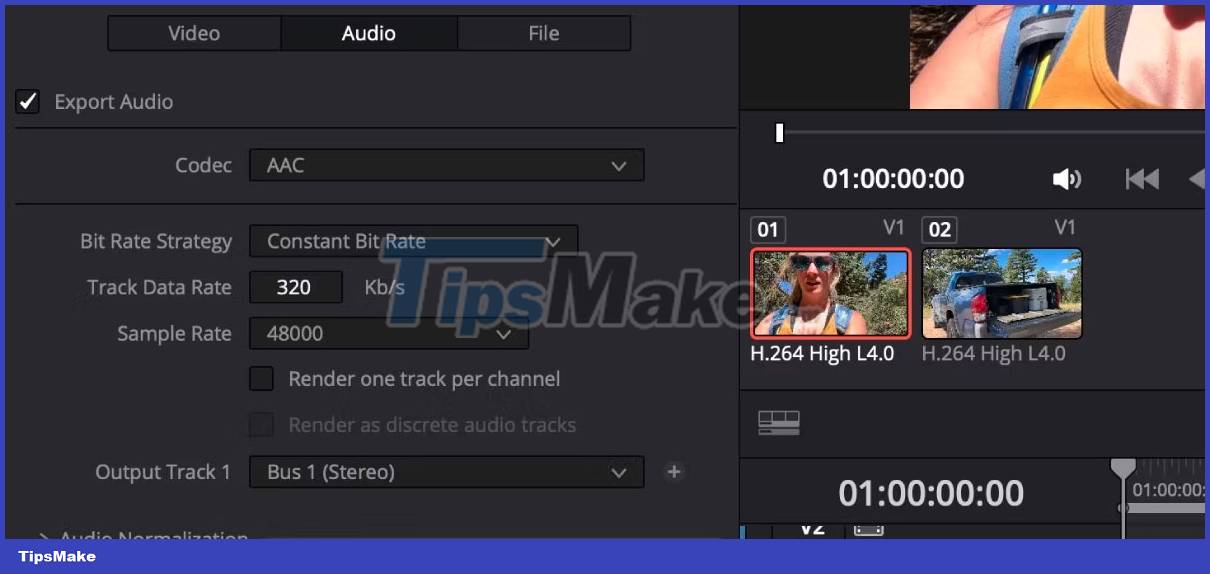
The Audio tab is where you'll go to change any settings for your video's audio. These include options like Codec and Bit Rate Strategy . You can also choose not to output audio if you want your video to have no sound.
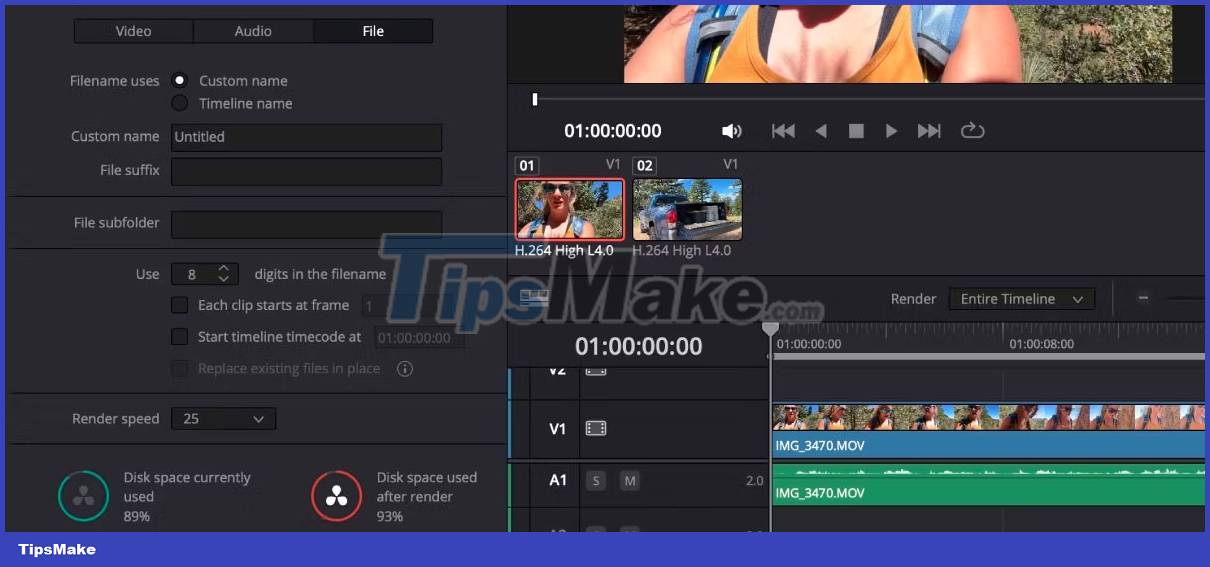
The File tab allows you to customize your file names a bit more, such as adding a File Suffix . It also tells you the current and post-dump disk capacity, which definitely helps. Additionally, you can change Render Speed . Typically, you'll leave it at Maximum , but if you find you don't have enough bandwidth, turning the speed down can help your video output clearer.

Once you are satisfied with all your export settings, click Add to Render Queue . You'll see your video ready to export in the upper right corner. If you have more videos to export from the project, follow the same guidelines as above. When you're ready to export, click Render All .
If you need more detailed instructions for each of the settings that DaVinci Resolve has for export, Blackmagic Design has a comprehensive user guide on the support page in Latest Support Notes .
How to use Quick Export in DaVinci Resolve
Although DaVinci Resolve lets you choose everything from format type to gamma tags, sometimes you may want a simpler export option.
To find Quick Export, go to File in the upper toolbar and select Quick Export . From there, you'll find a number of preset settings, including social media options.

If you select one of the main options like H.264 or ProRes and click Export , you will be guided to find a place to save and then DaVinci Resolve will export your video from there.
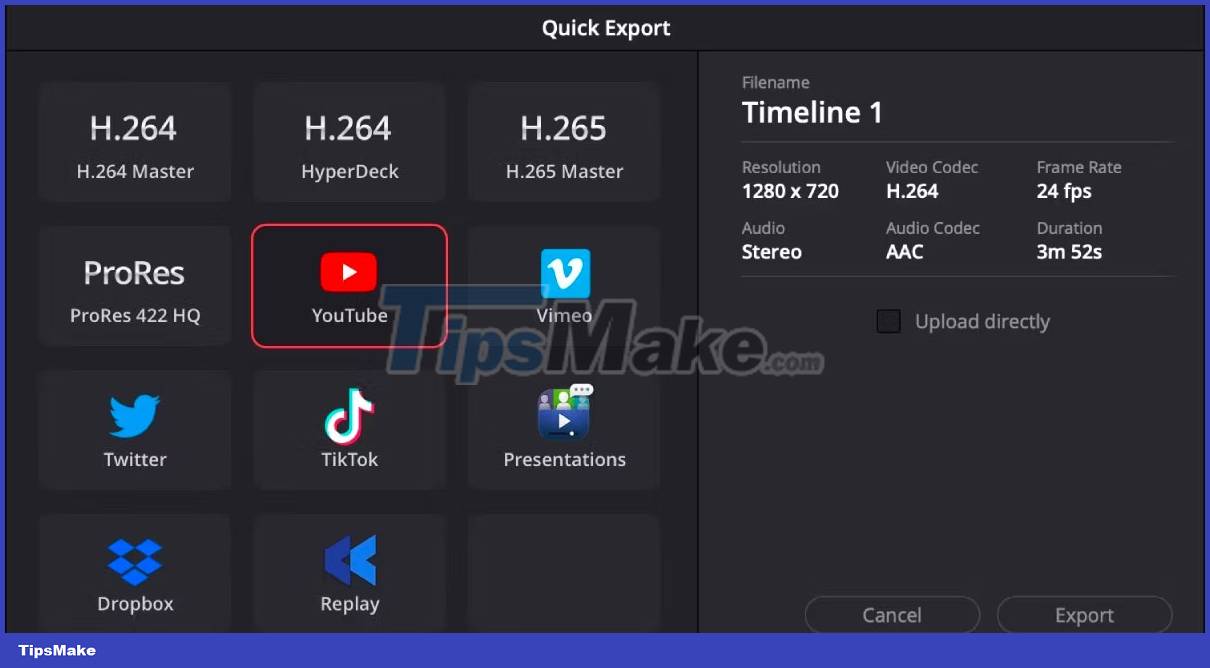
If you choose one of the other options, such as uploading videos directly to YouTube from Resolve, you will be asked to sign in to your account and then given the Upload Directly option . If you do, DaVinci Resolve will export your video and upload it to your chosen platform. Fast and convenient.
You should read it
- ★ How to Install and Configure DaVinci Resolve in Linux
- ★ How to create attractive thumbnails in DaVinci Resolve 18.5
- ★ DaVinci Resolve 16, a fast video cutter software designed specifically for YouTuber, offers download and experience
- ★ DaVinci Resolve - Full-featured video editing software
- ★ How The DaVinci Resolve Speed Editor Improved Video Editing