Table of Contents
This guide provides a clear overview of figma, including 1. Select the Scale Tool, 2. Select the Frame Tool. Use it to understand the topic, compare the available options, and make a more informed decision.
1. Select the Scale Tool
This simple one-key shortcut is a quick way to expand your items. Press the K key, then select the object you need to resize. All you need to do is click and drag an anchor point and your object will stay proportional while scaling to whatever size you need.
2. Select the Frame Tool

Frame is a much used tool in Figma when creating multiple frame boards for prototype designs. Pressing F on your keyboard brings up tools, allowing you to quickly draw or size your frame.
You can draw the frame directly by clicking and dragging the cursor, or when the Frame tool is selected, you can enter your desired dimensions in the size boxes on the menu to the right.
3. Switch Between Design and Prototype Mode
The keyboard shortcut Shift + E allows you to switch between Design mode and Prototype mode. The same shortcut works no matter what mode you start and switch to.
Also, there are more specific keyboard shortcuts for this purpose. Alt (Windows) / Option (Mac) + 8 can be used to switch from Prototype mode to Design mode, while Alt (Windows) / Option (Mac) + 9 switch from Design mode back to Design mode Prototypes. Obviously, it's easier to press Shift + E, but it's nice to have so many options.
4. Select Innermost Element with One Click
When designing in multiple layers or with embedded images, it can be difficult to select elements quickly. To save time clicking dozens of times to select the bottom layer, use this shortcut instead.
On a Mac, hold Cmd + Click on the element , and on Windows, Ctrl + Click . A simple shortcut saves a few minutes of mindless clicking to select the element on the bottom layer.
5. Move One Level Out After Selecting the Innermost Element
Once you've finished selecting the innermost element of your design, you may realize that you want to select the element one level ahead - it's that easy. Once you've found the innermost element, press Shift + Enter to go one level back. You can do this for all other levels.
6. Collapse All Layers
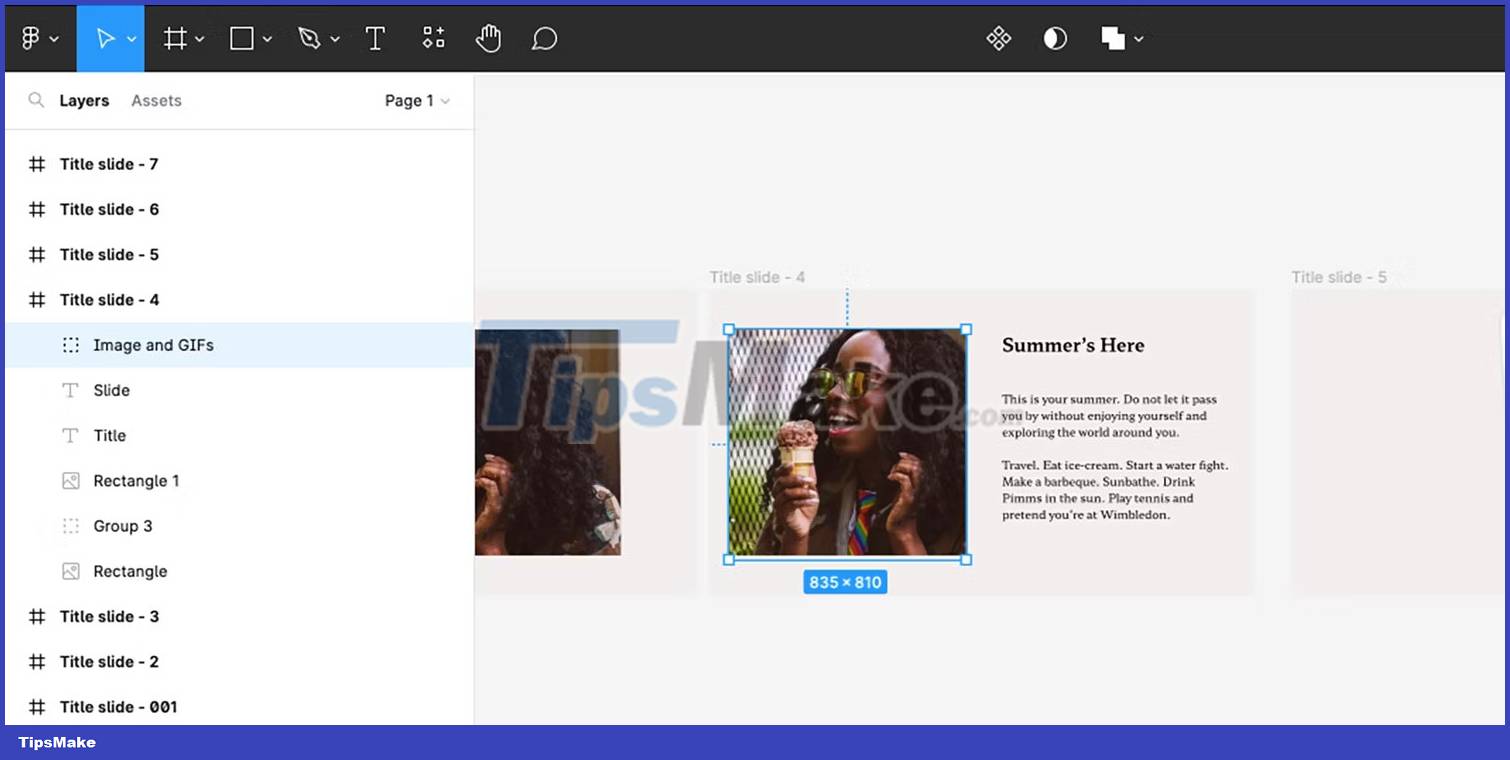
When designing in Figma, your layers panel will start to expand and can potentially look a bit cluttered, especially when you convert your HTML to a Figma design. To collapse layers, just press Alt + L (Windows) or Option + L (Mac) .
If you have an element selected while using this shortcut, the layer with that element will remain open. Select anywhere outside the artboard to deselect all elements and use keyboard shortcuts to collapse all layers.
7. Show or Hide Layout Grid

Using layout grids is the best way to ensure that your designs scale well and can scale correctly for a variety of devices. While they are useful, you don't always want the grids to be visible.
Enabling and disabling layout grids on a Mac is different on Windows. On a Mac, press Ctrl + G to turn it on or off. If you are using Windows, press 3 keys; Ctrl + Shift + 4 . Although the keystrokes are different, the function is the same.
8. Put Multiple Photos at Once in Figma

If you've designed layouts with placeholder shapes for images, inserting images one by one can be frustrating. This shortcut allows you to place multiple photos, and simply select a placeholder - or anywhere on the artboard - to place each image individually.
For Mac users, press Cmd + Shift + K to pull up the dialog window and find the image. On Windows, press Ctrl + Shift + K to find and place multiple photos in your Figma design. If you create a master template in Figma, this is a great shortcut to use.
9. Copy Any Image as PNG
When using images in your Figma design, you may have a variety of file formats, but perhaps your client requires PNG. You can copy any image as a PNG, regardless of its original format.
Select the image you want and press Cmd + Shift + C on Mac and Ctrl + Shift + C on Windows to copy it as PNG. You can easily use this shortcut to ensure a high standard image format, especially if you are creating a presentation using Figma.
10. Choose a Color from Anywhere
Eyedrop is a handy feature when you want to take color from one part of the design to another part of the design. This quick shortcut allows you to invoke the tool in seconds and pick up color from anywhere on the drawing.
On a Mac, press Cmd + C and on Windows, press Ctrl + I . Once you've pressed the shortcuts, move the eyedrop target over the color you want to use and click once to grab the color.
11. Open the Resources Tab
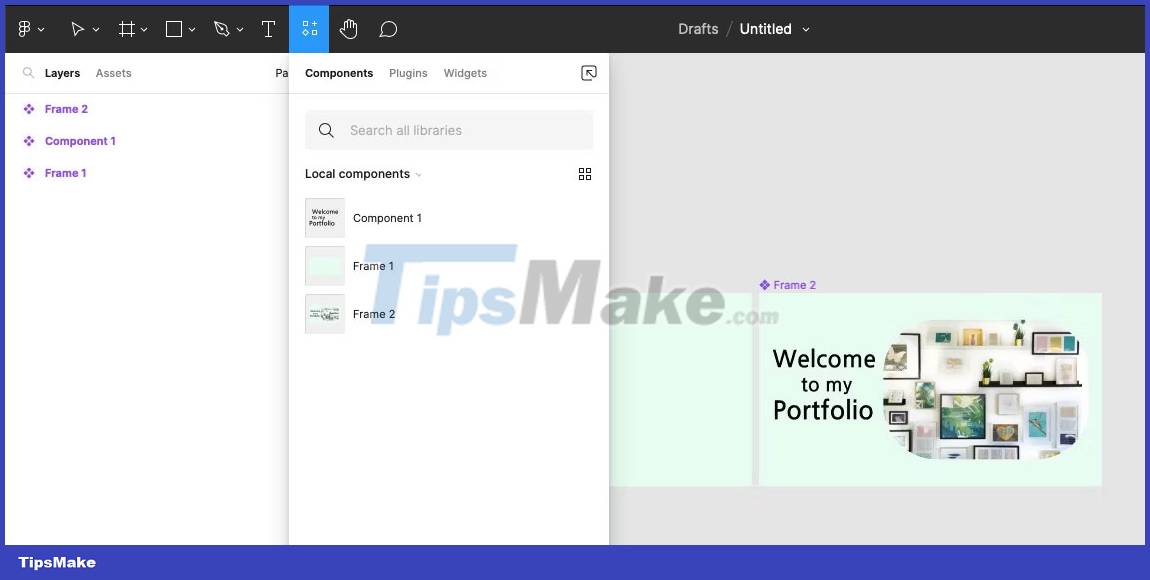
The Resources tab is where the Components, Plugins , and Widgets menus are located. While there's no shortcut to open those menus individually, the Resources shortcut - Shift + I - still saves time. You can use the plugin to create and add models to your Figma designs.
Conclusion
Understanding Figma makes it easier to compare options, avoid common mistakes, and apply the information in this guide more effectively. Review the relevant requirements before making changes or choosing a solution.
FAQ
What is Figma?
Select the Scale Tool This simple one-key shortcut is a quick way to expand your items.
Why is Figma important?
Understanding Figma helps you evaluate features, compatibility, performance, and potential limitations before you choose a product or follow a procedure.
What should you consider when using or choosing Figma?
Consider your specific goal, compatibility requirements, available features, cost, security, and the practical recommendations described in this guide.
Related Articles
 Figma - Free Multimedia Design Tool8 minutes read
 16 Useful Figma Plugins Free Downloadable9 minutes read
 The Most Useful Free Figma Plugins2 minutes read
 Figma Can Use Your Content to Train AI: How to Prevent It?6 minutes read
 All the Keyboard Shortcuts on Obscure Computers11 minutes read
 11 Useful Tips for a Productive Figma Workflow4 minutes read
Reader Comments 0
Sign in with email or Google to join the discussion.