Table of Contents
This guide provides a clear overview of gemoo snap utility to take screenshots, including Instructions for Using the Gemoo Snap Utility to Take Screenshots. Use it to understand the topic, compare the available options, and make a more informed decision.
Instructions for Using the Gemoo Snap Utility to Take Screenshots
Step 1:
First we download the Gemoo Snap utility on the computer according to the link below and then install it as usual.
Step 2:
After installing the utility, click the Gemoo Snap icon on the browser toolbar to log in or register for an account if you don't have one.

Step 3:
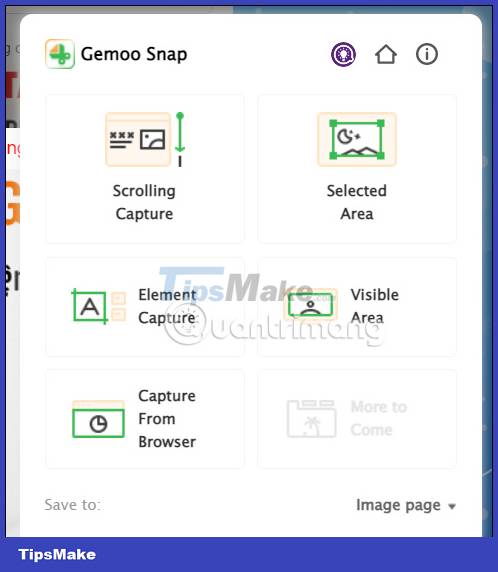
Once you have successfully registered to use Gemoo Snap, click on the utility icon again. Now we will see all the screenshot modes that the utility supports.
- Scrolling Capture: Site-wide image capture mode.
- Select Area: Optional screen area capture mode.
- Element Capture: Web page partial capture mode.
- Visible Area: Current screen capture mode of the page, with the option to edit the image.
- Capture Form Browser: Mode to capture other screens.
You click on the shooting mode you need to use.
Step 4:
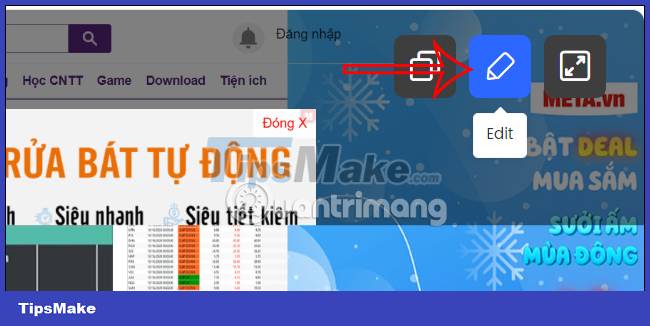
For example, with Scrolling Capture photography mode, you click and then the Gemoo Snap utility will automatically scroll the web page and take a screenshot. After completion, immediately display the photo editing interface as shown below. Press the pen icon to edit the screenshot .
Step 5:
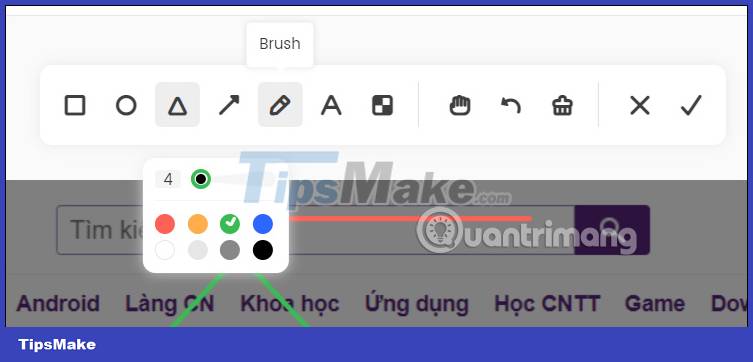
Here you will see options to change the image, add text, drawings or different lines depending on what you want to add. After editing, click the checkmark to save the new image .
Step 6:
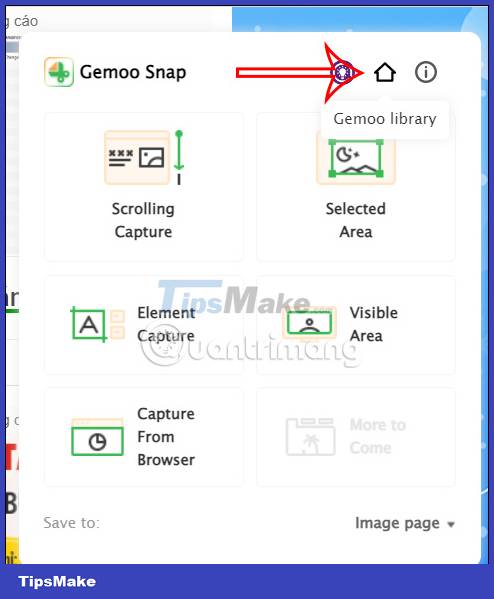
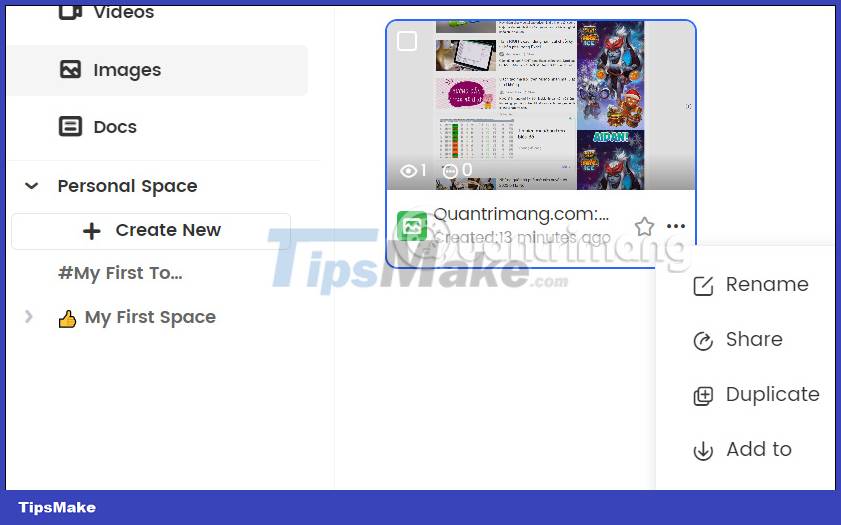
The images you have taken on your computer screen are saved in the Images section of your Gemoo Snap Gemoo Snap account. You click on the utility icon and then click on the Gemoo Library icon to access the utility's library.
When clicking on the 3-dot icon in the image, there will be more options as shown below.
Conclusion
Understanding Gemoo Snap Utility to Take Screenshots makes it easier to compare options, avoid common mistakes, and apply the information in this guide more effectively. Review the relevant requirements before making changes or choosing a solution.
FAQ
What is Gemoo Snap Utility to Take Screenshots?
Step 6: The images you have taken on your computer screen are saved in the Images section of your Gemoo Snap Gemoo Snap account.
Why is Gemoo Snap Utility to Take Screenshots important?
Understanding Gemoo Snap Utility to Take Screenshots helps you evaluate features, compatibility, performance, and potential limitations before you choose a product or follow a procedure.
What should you consider when using or choosing Gemoo Snap Utility to Take Screenshots?
Consider your specific goal, compatibility requirements, available features, cost, security, and the practical recommendations described in this guide.
Related Articles
 12 Quick and Simple Ways to Take Screenshots of Acer Computers9 minutes read
 Click: How to Take a Screenshot on a Mac Using Grab6 minutes read
 How to Take Screenshot on HP Windows 10 Computer7 minutes read
 How to Use the 'Print Screen' Function on a Keyboard4 minutes read
 How to Take a Laptop Screen, Take a Screenshot of the Computer Screen5 minutes read
 How to Enable // Disable the Aero Snap Feature in Windows 104 minutes read
Reader Comments 0
Sign in with email or Google to join the discussion.