How to Prevent a Computer from Waking Up from External Devices
If you've experienced your computer suddenly turning itself on after you've put it to sleep or you've just shut it down, you may need to investigate what's causing it to wake up. The common causes that wake up your computer are hardware...
Table of Contents
Part 1 of 4:
Determining the Possible Causes for the Wake Up
-
 Access the Command Prompt. Click on the Start menu and look for the Command Prompt application. This is usually found under the Accessories folder. Click on it to launch it, and a window with a DOS-like environment will be opened.
 -
 Check the last wake trigger. On the Command Prompt, type in 'powercfg –lastwake' and then press the Enter key. The Wake History details will be displayed.
- If the Wake History Count is more than 0, that means your computer was woken up by something.
-
 Note the wake source. If the Wake History Count is not 0, the Wake Source details will also be displayed. The Wake Source will state what caused your computer to wake up.
- For example, if a device attached to a USB port was the source, USB Root Hub will be displayed.
Part 2 of 4:
Preventing Devices from Waking Up the Computer
-
 Access the Command Prompt.
 -
 Check devices. To see the list of hardware devices that can wake up your computer, type in 'powercfg -devicequery wake_armed' on the Command Prompt and then press the Enter key. The list of hardware devices will be displayed.
- Some possible devices that can wake your computer include, but is not limited to, your keyboard and your mouse.
-
 Note the devices. Take note of the list of hardware devices that can wake up your computer. You will need to configure them properly in the Device Manager.
 -
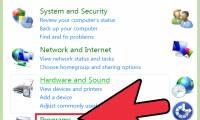
 Open the Control Panel. Click on the Start menu and click on 'Control Panel.' The Control Panel applets will be displayed.
 -
 Open the Device Manager. Browse through the items under the Control Panel and look for 'Device Manager.' Click on it. The Device Manager will be opened and the list of hardware devices for your computer will be displayed.
 -
 Look for the devices. Navigate through the Device Manager until you find the possible devices that may cause your computer to wake up. Click on the triangle icon beside each device to expand the category.
 -
 Open the Device Properties. Right-click on the device you want. Select 'Properties' from the menu to bring out the device's properties.
 -
 Disable Wake Up property. From the Device Properties window, select the Power Management tab. Untick 'Allow this device to wake up the computer' option.
- Click 'OK' to save your changes and exit. The selected device will no longer wake up the computer.
-
 Disable all other devices' wake up properties. Repeat Steps 6 to 8 to disable all possible devices that can wake up your computer. If left enabled, sudden or accidental movements that affect these devices can wake up your computer.
Part 3 of 4:
Preventing Tasks from Waking Up the Computer
-
 Open Command Prompt.
 -
 Check wake timers from tasks. To see the list of scheduled tasks that have set wake timers, type in 'powercfg –wake timers' on the Command Prompt and then press the Enter key. The list of scheduled tasks will be displayed.
- Wake timers wake up your computer at the defined time for it to run the scheduled tasks. This can be useful if you want to run certain tasks on schedule, even without you monitoring them.
-
 Note the tasks. Take note of the list of scheduled tasks that can wake up your computer.
 -
 Uninstall programs or adjust schedules. From the list of scheduled tasks, check which ones you really need. Uninstall or remove the ones you don't need, and adjust the schedules for the ones you do.
- Set a schedule that's good for you and your computer. Adjusting the scheduled tasks can be done from the Windows task scheduler or directly from each of the programs.
Part 4 of 4:
Disabling Wake Timers
-
 Open Control Panel. Click on the Start menu and click on 'Control Panel.' The Control Panel applets will be displayed.
 -
 Open 'Power Options.' Browse through the items under the Control Panel and look for 'Power Options.' Click on it. The Power Options will be opened.
 -
 Change the plan settings. Your computer's power plans will be displayed. Click on the 'Change plan settings' link beside the power plan you'd like to modify.
 -
 Change advanced power settings. Look for the 'Change advanced power settings' link and click on it. The Advanced settings for the Power Options will be displayed.
 -
 Disable wake timers. Navigate through the list of settings until you find 'Sleep.' Click on it to expand its properties.
- Under Sleep, click on 'Allow wake timers' to expand it further. Set both properties under it to Disable.
- No wake timers will now be able to wake up your computer.
Was this article helpful?
Your feedback helps us improve.
Related Articles
 How to enable / prevent device from waking Windows 10 computer3 minutes read
 Why shouldn't you make your bed right after waking up?3 minutes read
 How to Fix a Windows Computer that Hangs or Freezes5 minutes read
 How to Upgrade USB1 minutes read
 Microsoft made small changes in how Windows operating systems interact with external storage devices5 minutes read
 8 other uses of external hard drives/NAS besides file storage6 minutes read
Reader Comments 0
Sign in with email or Google to join the discussion.