How to Colour Your Computer
Computers come in a variety of sizes and shapes, as well as color. But suppose the computer you wanted didn't come in the color you wanted, or you couldn't find the right color case for your custom computer? Well, here's how you can...
Table of Contents
Part 1 of 3:
Taking Your Computer Apart
-
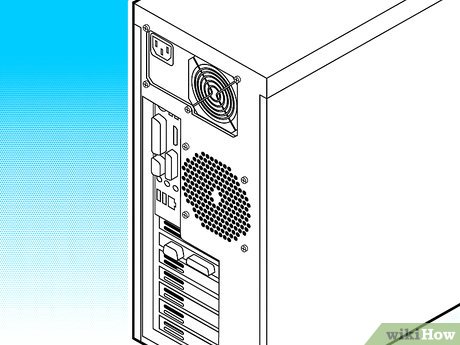 First, disconnect all cables in the back of your computer. Make sure there are no adapters, wireless antennae, or flash drives in the back of it.
 -
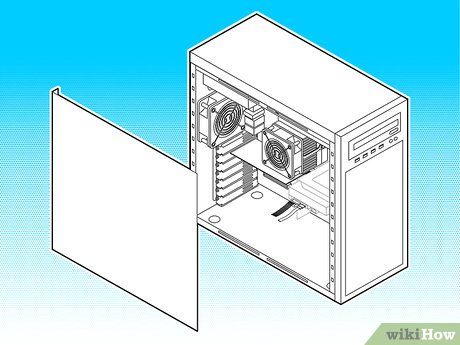 Open up the computer case and CAREFULLY remove all of the hardware. Start by unplugging all of the colorful cables from everything they are connected to. Make note of where they were connected, take a picture if you need to to aide you in rebuilding the computer.
 -
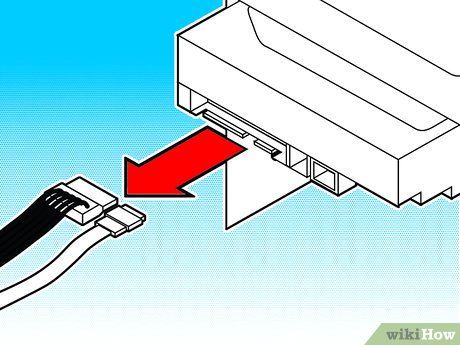 Now remove the thin, ribbon-like cables from all of the drives (rectangular things) and motherboard (The large board in the middle).
 -
 Get a screwdriver and start removing all of the screws inside, except for the ones on the big card in the middle. Make sure you mark each screw on a paper to show you where it goes!
 -
 Pull out the square things, called disk drives. Push them from the inside outward towards the front of the computer. Start with the familiar drives (CD, DVD, Floppy). Now move down to the hard disk(s) (The ones not sticking out of the front to put something in) and pull them out.
 -
 Assuming that you have removed ALL screws (except for the ones attaching the motherboard, or big one), start removing the small green cards. Store them in a safe place, and be careful with them!
 -
 Remove the fans. Pull them out (it should be easy without screws, unscrew them now if you haven't!) gently and unplug them from the colorful cables.
 -
 Now it's time to remove the motherboard. The screws that you didn't remove should now be removed, and the board will be easy to take out. Be sure not to drop anything that's on it like the CMOS battery! Be very careful with the motherboard, since it is the real computer out of all that other crap you took out!
 -
 Finally, remove that power supply, the one with the colorful cables coming out. Unscrew it and take it out.
Part 2 of 3:
Painting the Case
-
 Take your computer case and place it on newspaper outside. Make sure there is NO hardware inside, and that it is completely taken apart.
 -
 Cover up the parts you don't want to paint with painter's tape and paper that paint won't bleed through. BE ABSOLUTELY SURE that you cover up the interior of the case so you don't paint it! Also, for safety, make sure there are no drive bays inside (metal things that hold the drives in). If you haven't removed those, remove them now.
 -
 Paint the main case first (DON'T PAINT THE BACK!). Then paint the sides that came off, then the top that came off. No need to paint the bottom, and you probably shouldn't paint that either.
 -
 Wait a few hours, preferably 24, before moving on to the next step. Allow them to dry in the sun.
Part 3 of 3:
Rebuilding the computer
-
 First, put back the drive bays. Those are the metal things that hold the case together.
 -
 Put back the power supply.
 -
 Put back the motherboard, and screw it back in.
 -
 Put back the sound and graphics card, modem/Ethernet/wireless card, microphone card, etc. back exactly where they were. These are the little green cards you removed.
 -
 Put back the memory (if you removed it).
 -
 Put back the drives.
 -
 Plug in the power cables to everything EXACTLY the way they were. Look at the picture you took earlier if you took one.
 -
 Plug the drives in to the motherboard using the ribbon cables. Make sure to put them back in the right orientation!
 -
 Plug your computer in to the wall, and power it on to see if it boots. If it beeps over and over again, or doesn't power on, unplug it and check your work. Try flipping the IDE cables over on both sides (the cables that connect the CD, DVD, and Hard Drive to the motherboard), or the floppy cable.
 -
 Once it sounds like it does on boot up, hook it up to the monitor, keyboard, mouse, and whatever else you have! Congrats, you painted your computer case!
4 ★ | 1 Vote
- 6 iPhone Apps That Make Widgets Actually Useful
- Learn to use lesson computer 15 - Keep the computer clean
- Learn to use lesson 9 computer - Set up a computer
- Learn to use lesson computer 16 - Protect your computer
- Self-assembling computers, build desktop computers (P1): Choose hardware
- How to set up a USB-only computer, increase safety
- Test on computer network with answer P9
- Things to know about a computer engineer
- 8 Ways to Clean Up Computer Junk to Speed Up Computer 2024
- 2 How to change the name displayed on the computer
MORE LIKE THIS
- 5 Best and Thorough Uninstall Software 2024
- Instructions on how to remove laptop battery very easily without damaging the battery!
- Instructions for removing background online, no need to install Photoshop
- How to uninstall application software from a Windows computer
- 10 bathroom habits are devastating for your health
- Add more power to your vacuum: Clean it the right way
- How to Replace Suspension Springs
- How to Ungoogle Yourself
- How to Avoid Costly Computer Service Calls
- How to Fix Java
-
 15 common computer errors and how to fix them.
-
Computer Running Slow and How to Fix it
-
7 ways to reset your Windows 7/10/11 computer to its factory settings.
-
What is a VGA error? Identifying the signs and effective ways to fix it.
-
Causes and the simplest, most effective ways to fix driver errors.
-
What is the Control Panel? How to customize its functions and access it.
 15 common computer errors and how to fix them.
 Computer Running Slow and How to Fix it
 7 ways to reset your Windows 7/10/11 computer to its factory settings.
 What is a VGA error? Identifying the signs and effective ways to fix it.
 Causes and the simplest, most effective ways to fix driver errors.
 What is the Control Panel? How to customize its functions and access it.