6 Tips for Using External Hard Drives on Mac
Apple charges a premium for built-in storage, so investing in an affordable external hard drive can help solve your storage woes without breaking the bank..
Apple charges a premium for built-in storage, so investing in an affordable external hard drive can help solve your storage woes without breaking the bank. Here are some tips to make sure you get the most out of the external hard drives on your Mac.
6. Choose the correct file system format
Your Mac is compatible with a number of file systems, including FAT32, exFAT, APFS, and HFS+. Choosing the right format for your external hard drive depends on how you plan to use it. APFS is suitable for drives designed for use on Macs and is compatible with Time Machine. On the other hand, ExFAT and FAT32 are better options for compatibility with Windows and Linux.
Note : The main benefits of APFS over Hierarchical File System Plus (HFS+), also known as Mac OS Extended, are increased reliability and data integrity, built-in encryption, snapshots, deduplication, sparse files, shared spaces, and fast folder sizes. HFS+ is best suited for mechanical hard drives or drives used with older versions of macOS.
5. Create a dedicated Time Machine volume
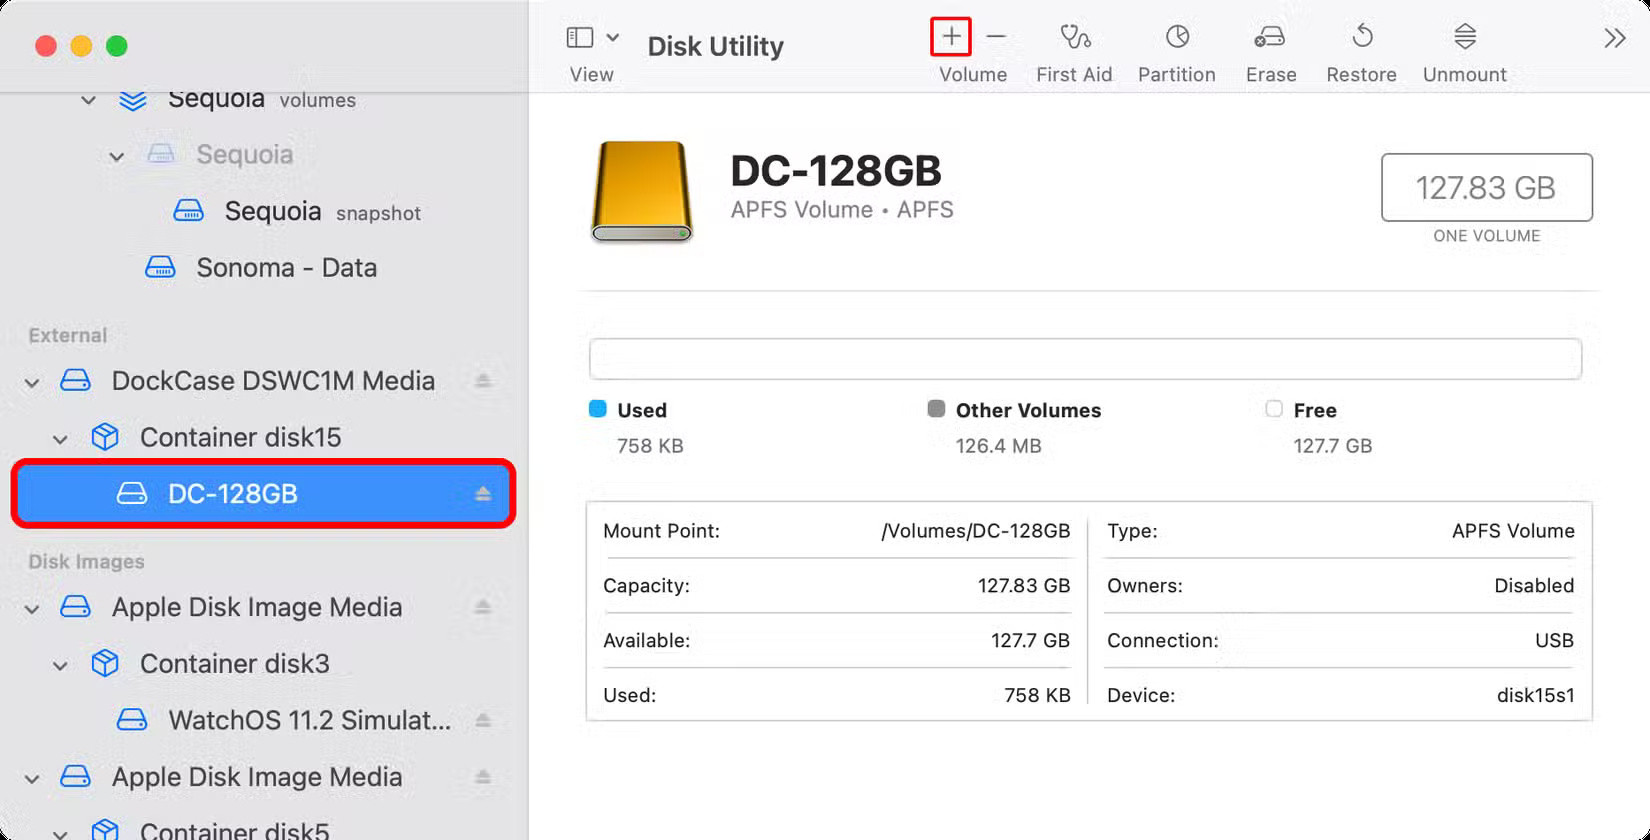
To store both your files and Time Machine backups on a single drive, you must create a dedicated APFS volume for Time Machine. First, erase the drive in Disk Utility using the APFS file system as explained in the previous section. Second, add a Time Machine-only APFS volume by selecting the newly created APFS volume in the Disk Utility sidebar and clicking the + (plus) icon in the toolbar.
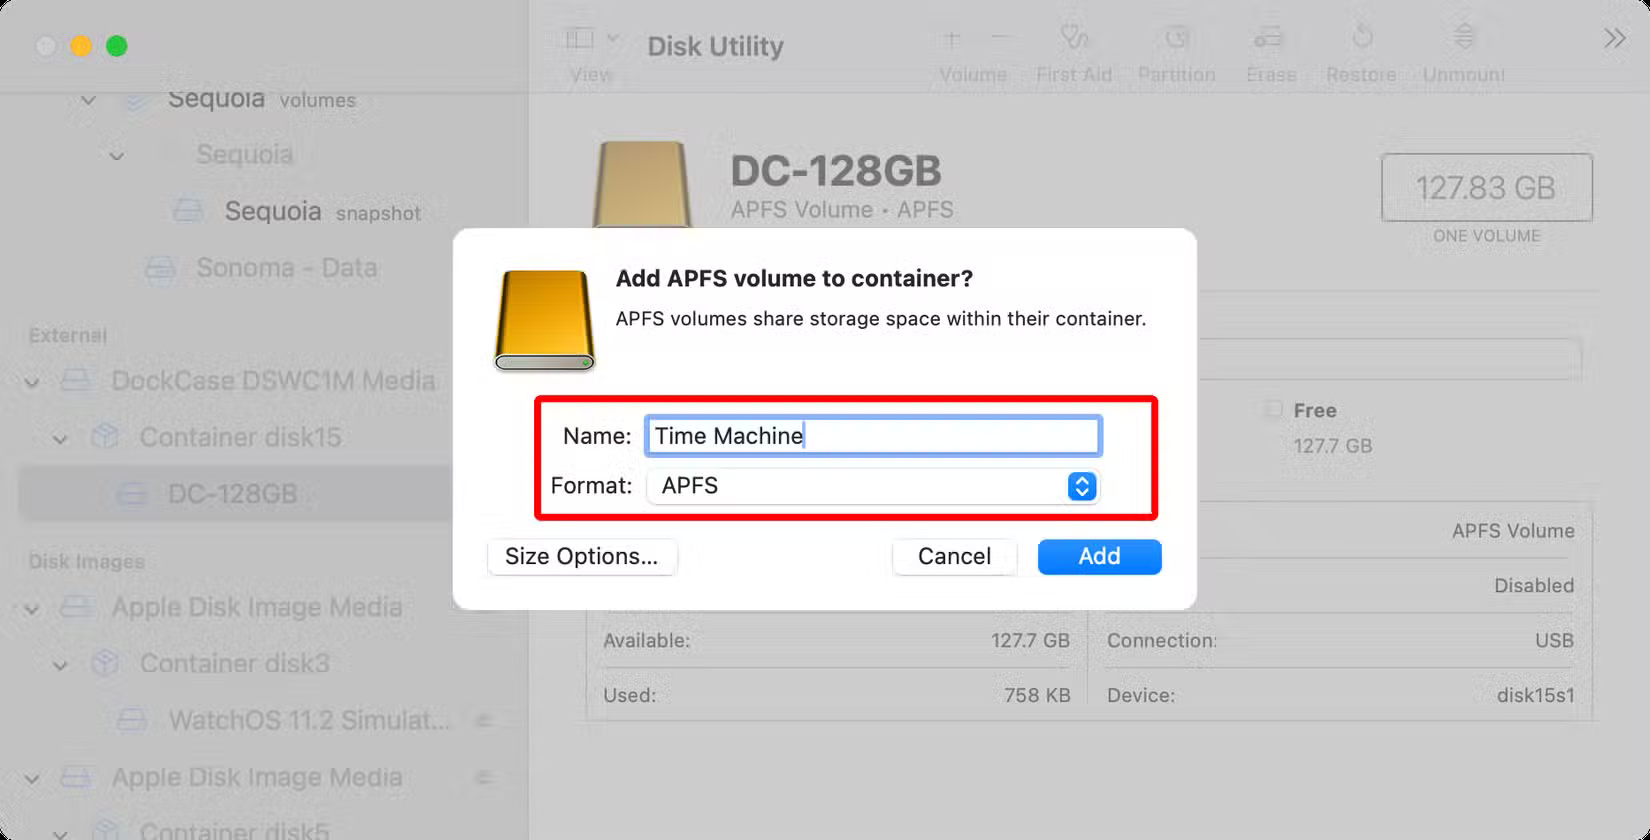
Name the drive 'Time Machine' or similar and select 'APFS' in the Format menu.
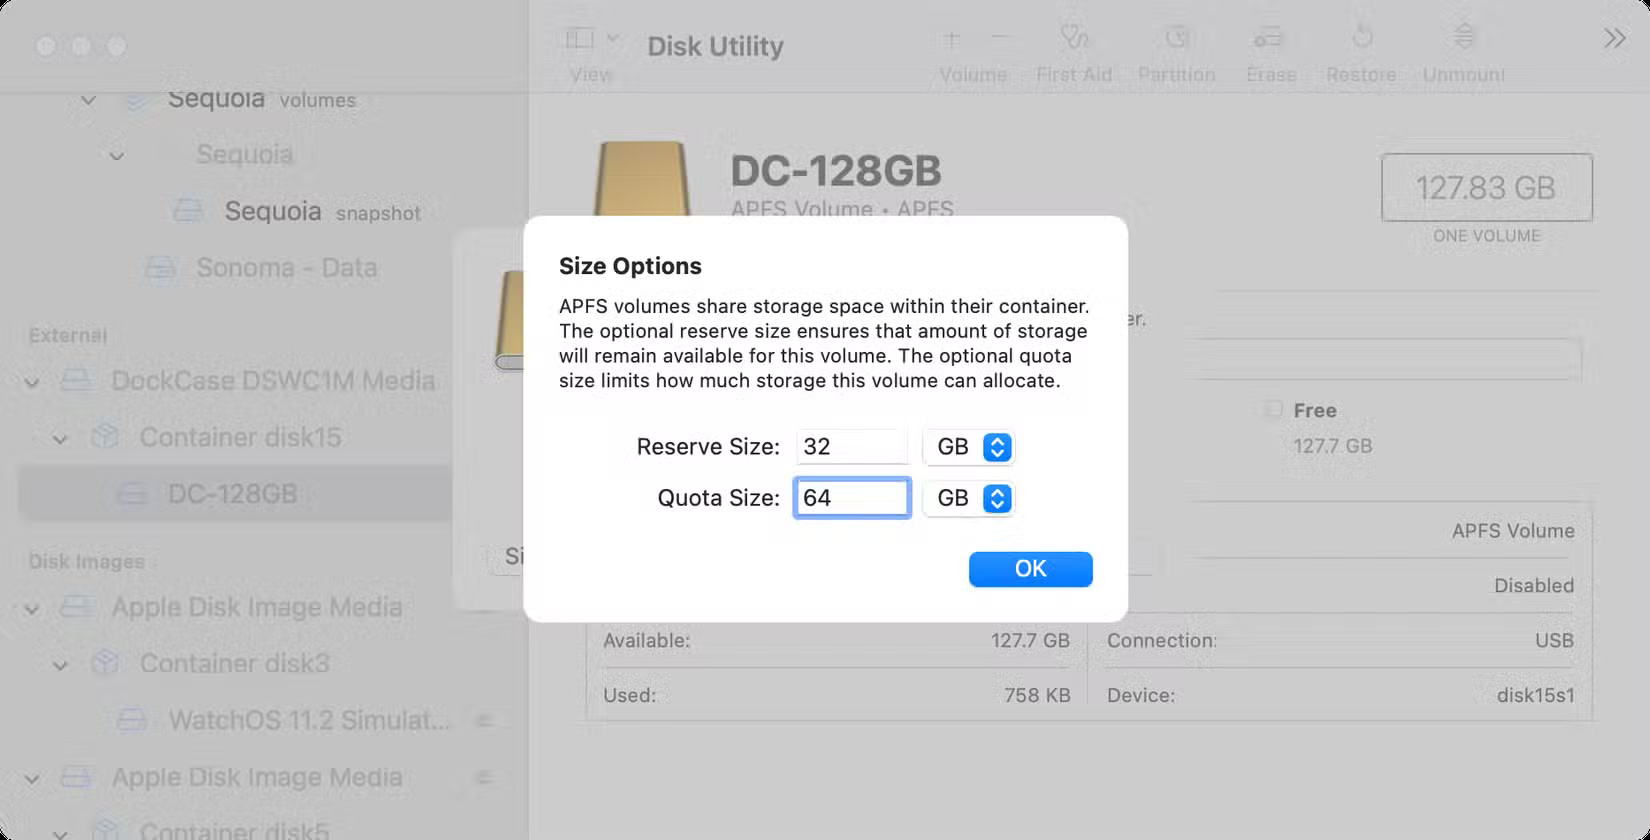
Click the Size Options button to allocate a minimum and maximum size for the volume. When ready, click OK , then select Add to create a new volume based on these parameters.
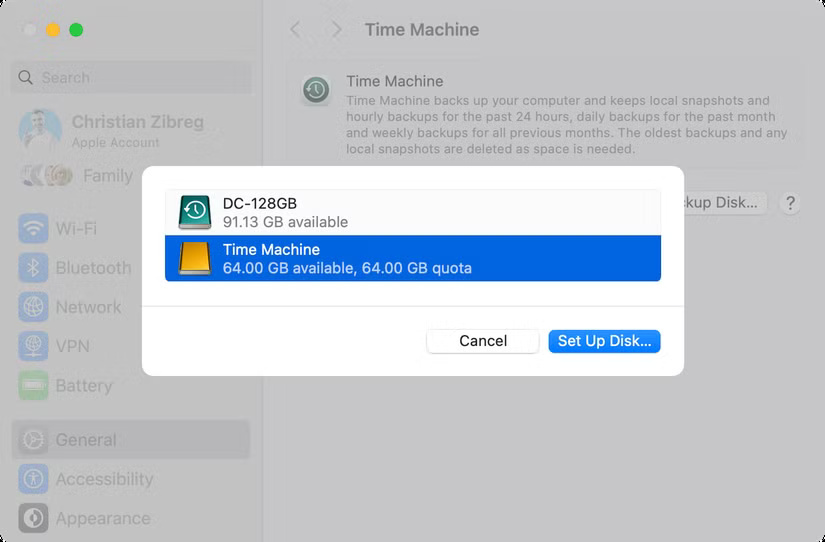
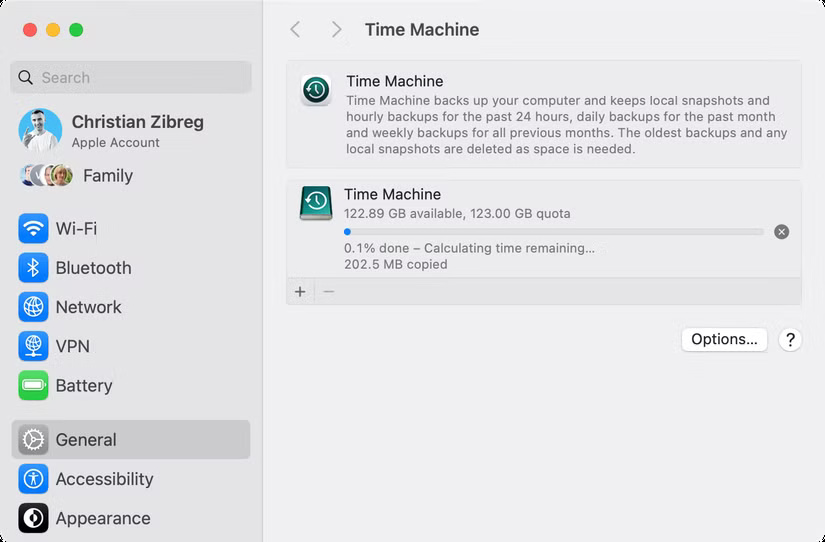
To set your APS volume as a Time Machine destination, go to System Settings > General > Time Machine . Click the + icon or the Add Backup Disk button , select your backup drive, click Set Up Disk , and follow the instructions.
Time Machine will now back up your Mac to a dedicated partition on the drive, which may take a little while at first. You can use a Time Machine backup to restore your Mac from scratch, restore previous versions of files without an attached backup drive, and more.
4. Create folders to organize files
Folders are the easiest way to organize files around projects. macOS provides built-in user folders like Documents, Movies, Music, Pictures, and Downloads that you can access from the Finder sidebar. You can also create your own folders to store a collection of files.
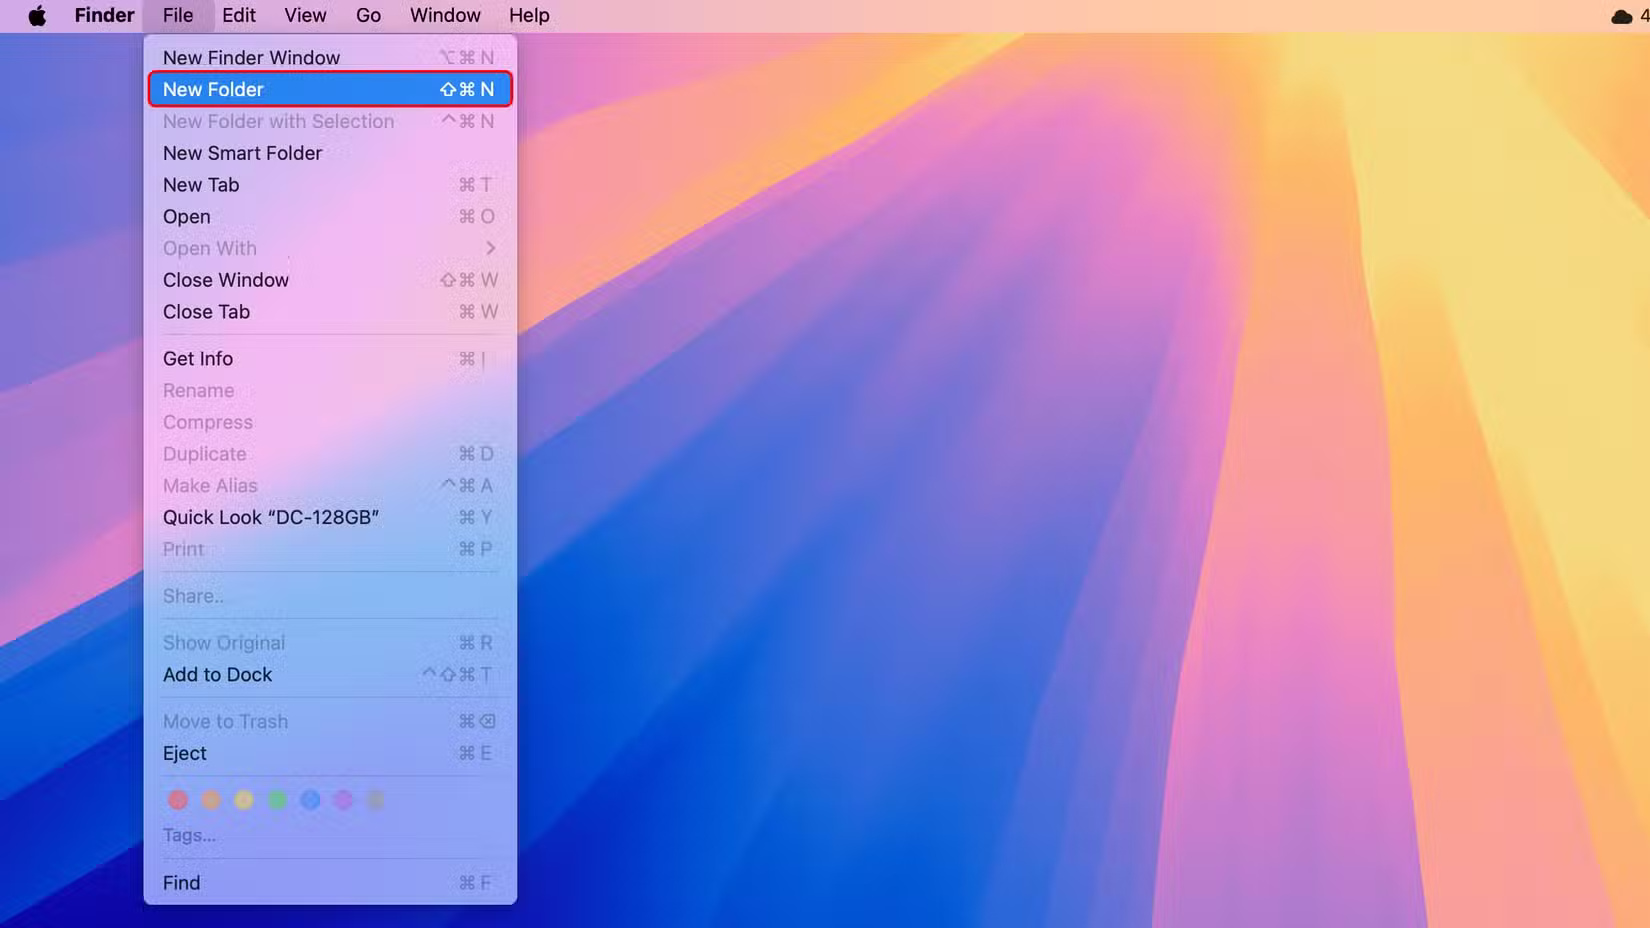
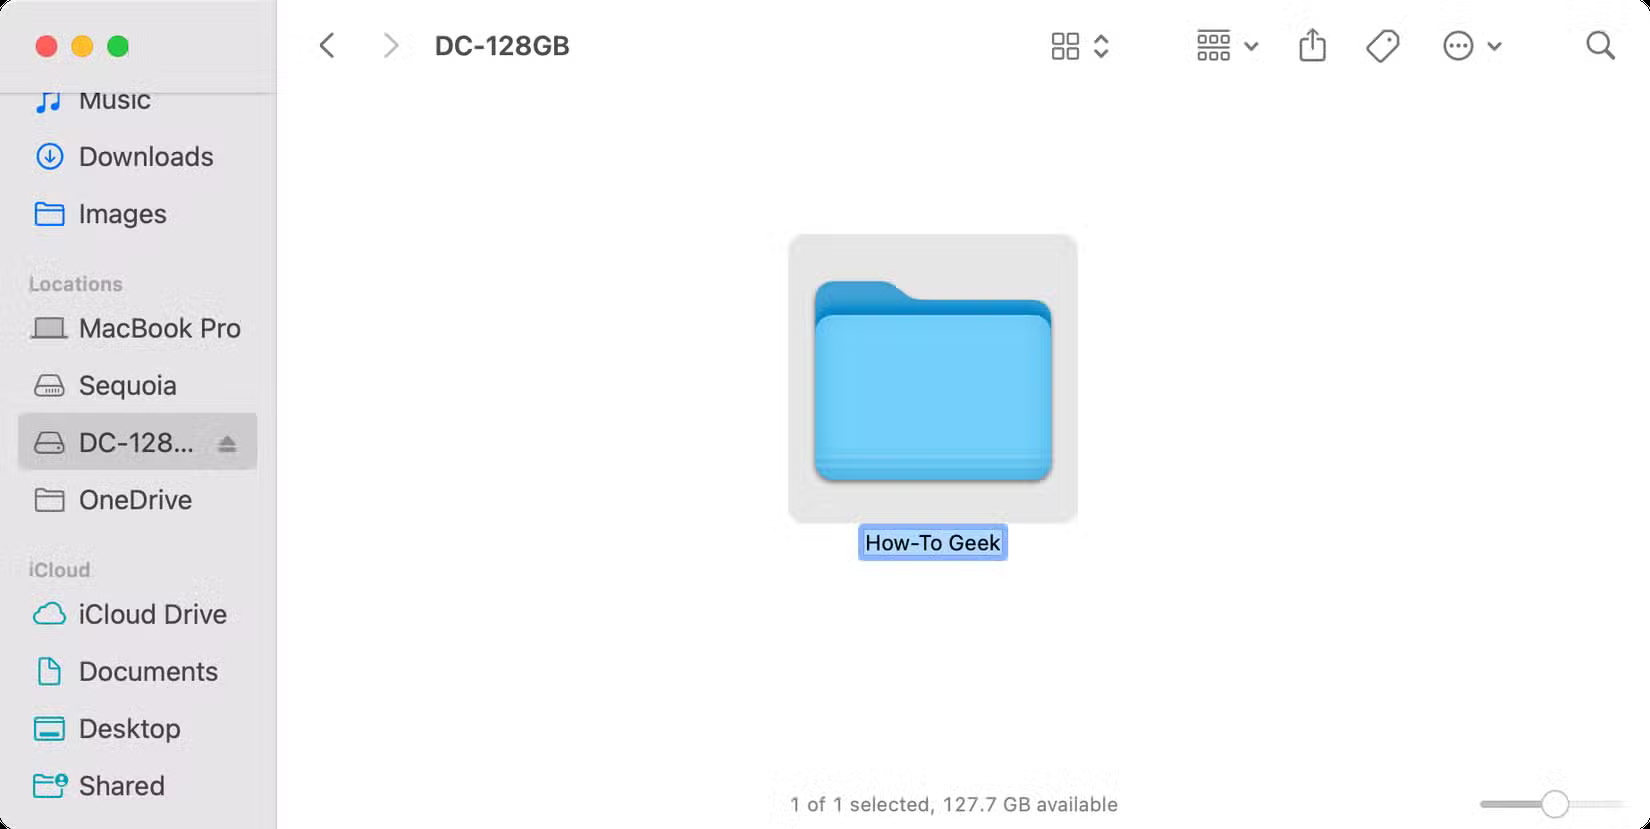
Navigate to the desired location on your external hard drive, then click File > New Folder on the menu bar or press Shift + Command + N on your keyboard, name the folder, and press Return .
To move content into your folder, select files and drag them into the folder.
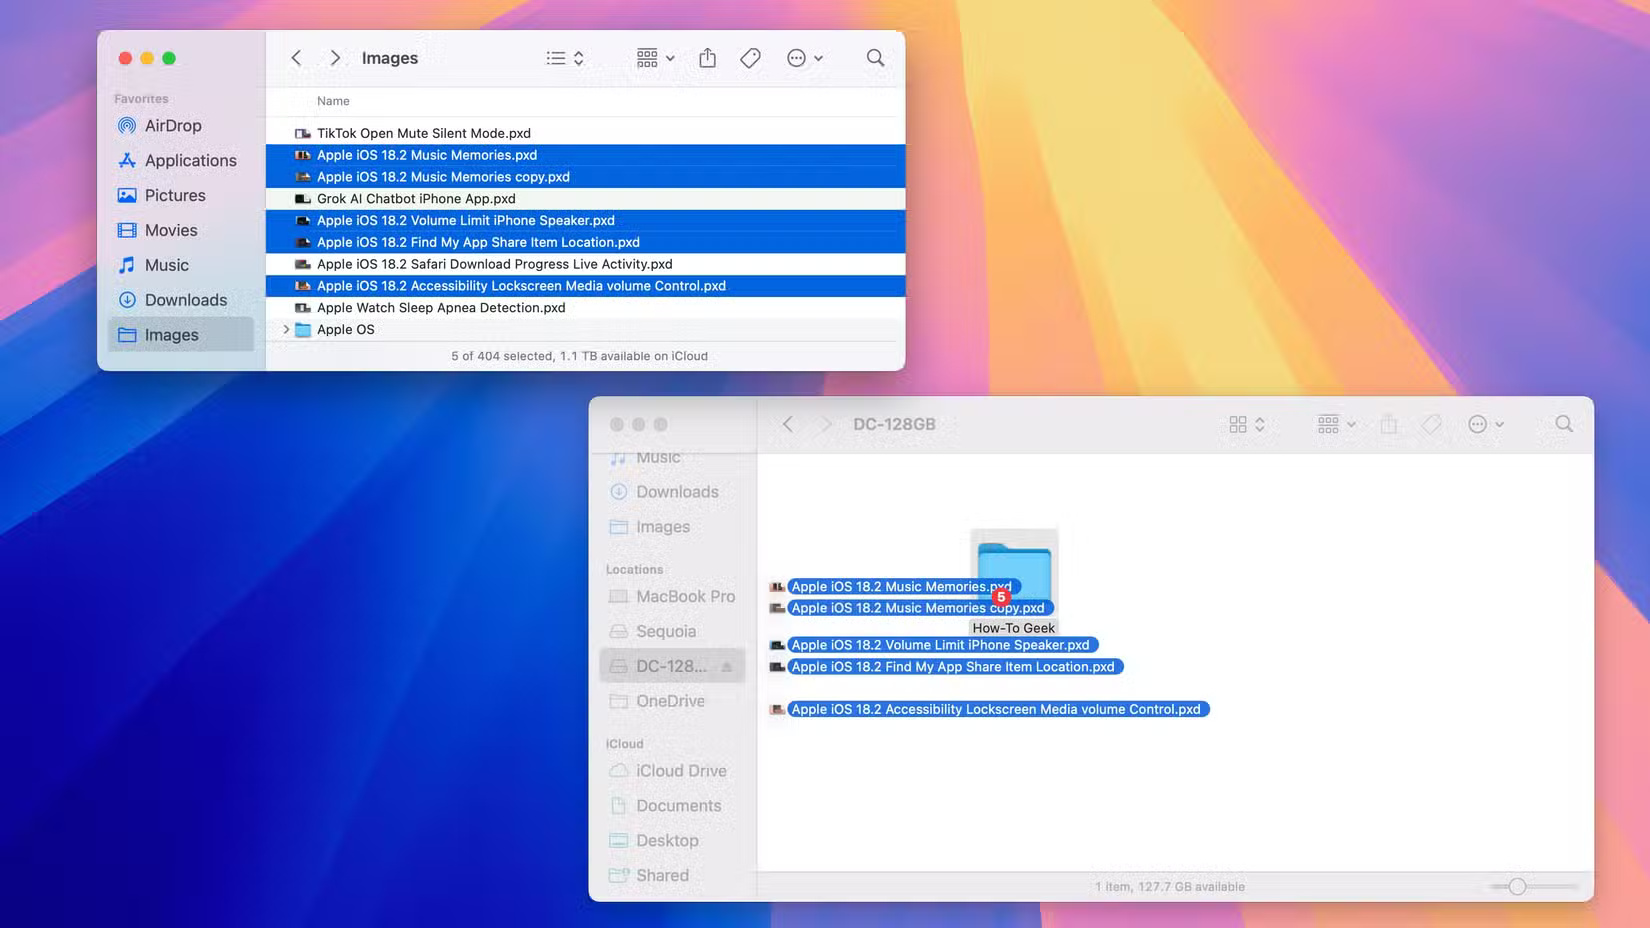
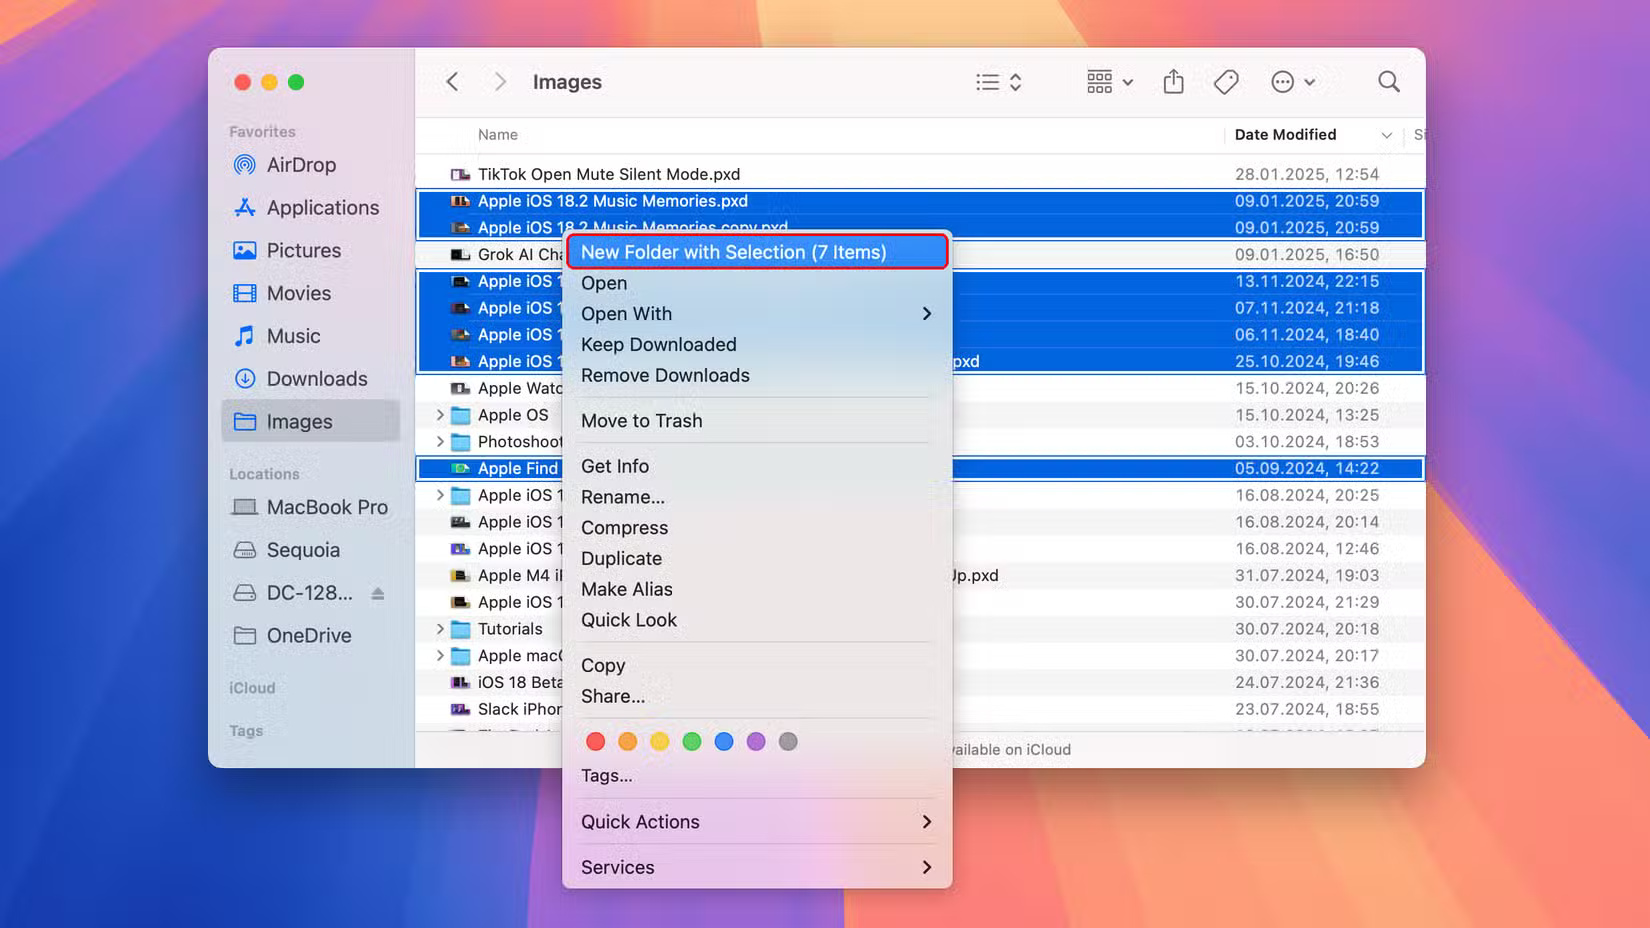
To create a new folder from a series of files, select them in Finder, right-click (control+click) the selection, and choose New Folder with Selection from the menu.
3. Is drive encryption required?
Encrypting your drive ensures that your files are safe if they are stolen or lost. No one can mount the drive on another computer without the encryption password. You can encrypt a drive in Disk Utility, which will erase the drive, or from the Finder if you already have files on it.
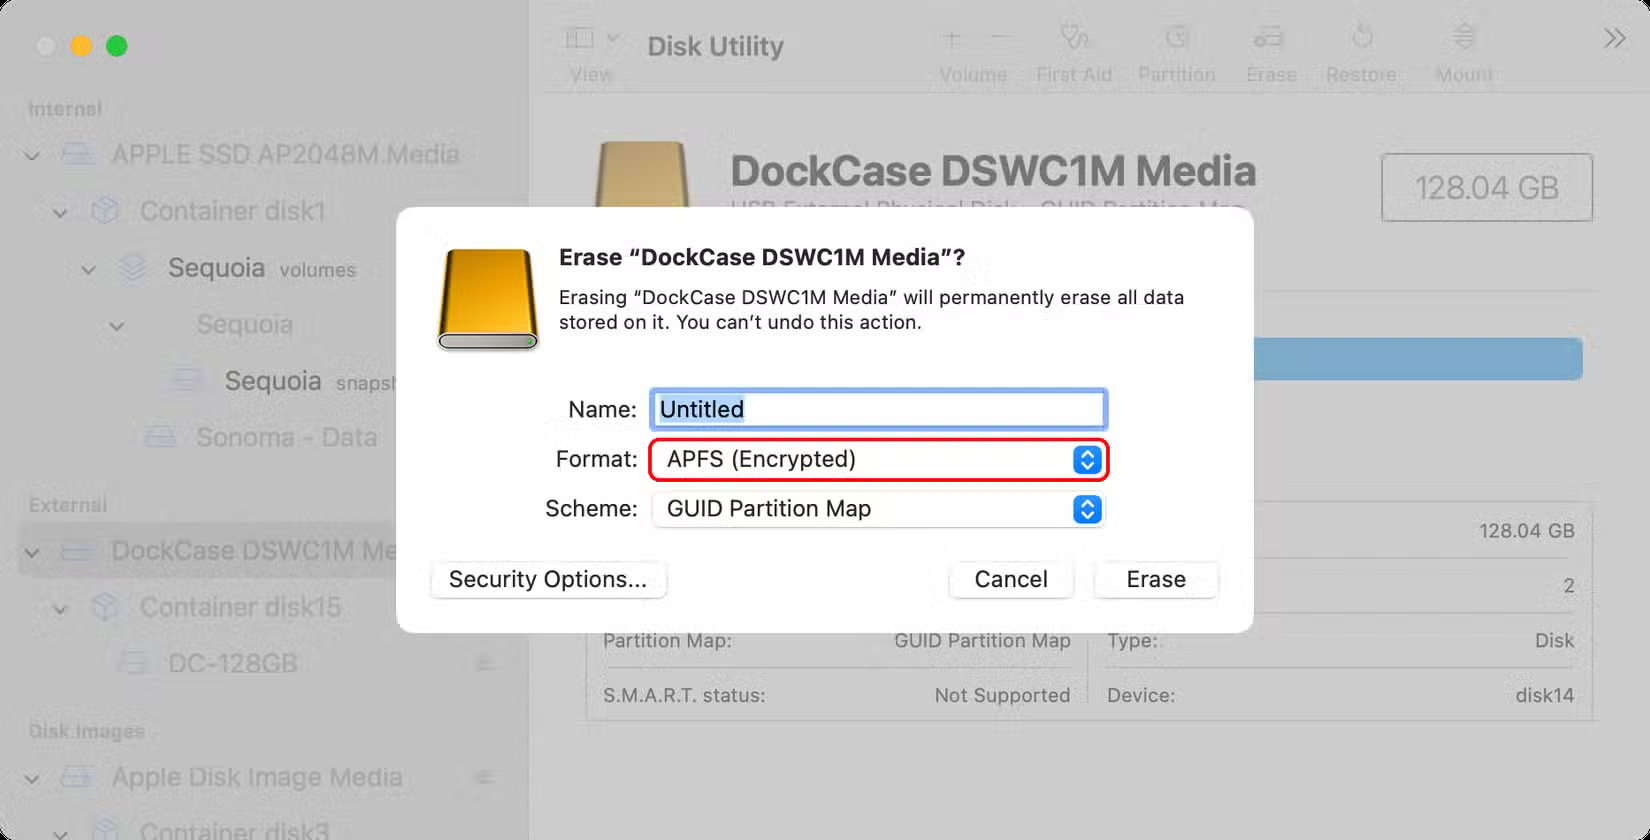
Select the drive in the Disk Utility sidebar and click Erase on the toolbar, select GUID Partition Map in the Scheme menu, and make sure APFS (Encrypted) is selected in the Format menu. Enter and verify the encryption password and click Choose , then Erase > Done . This will erase, format, and encrypt the drive in one go.
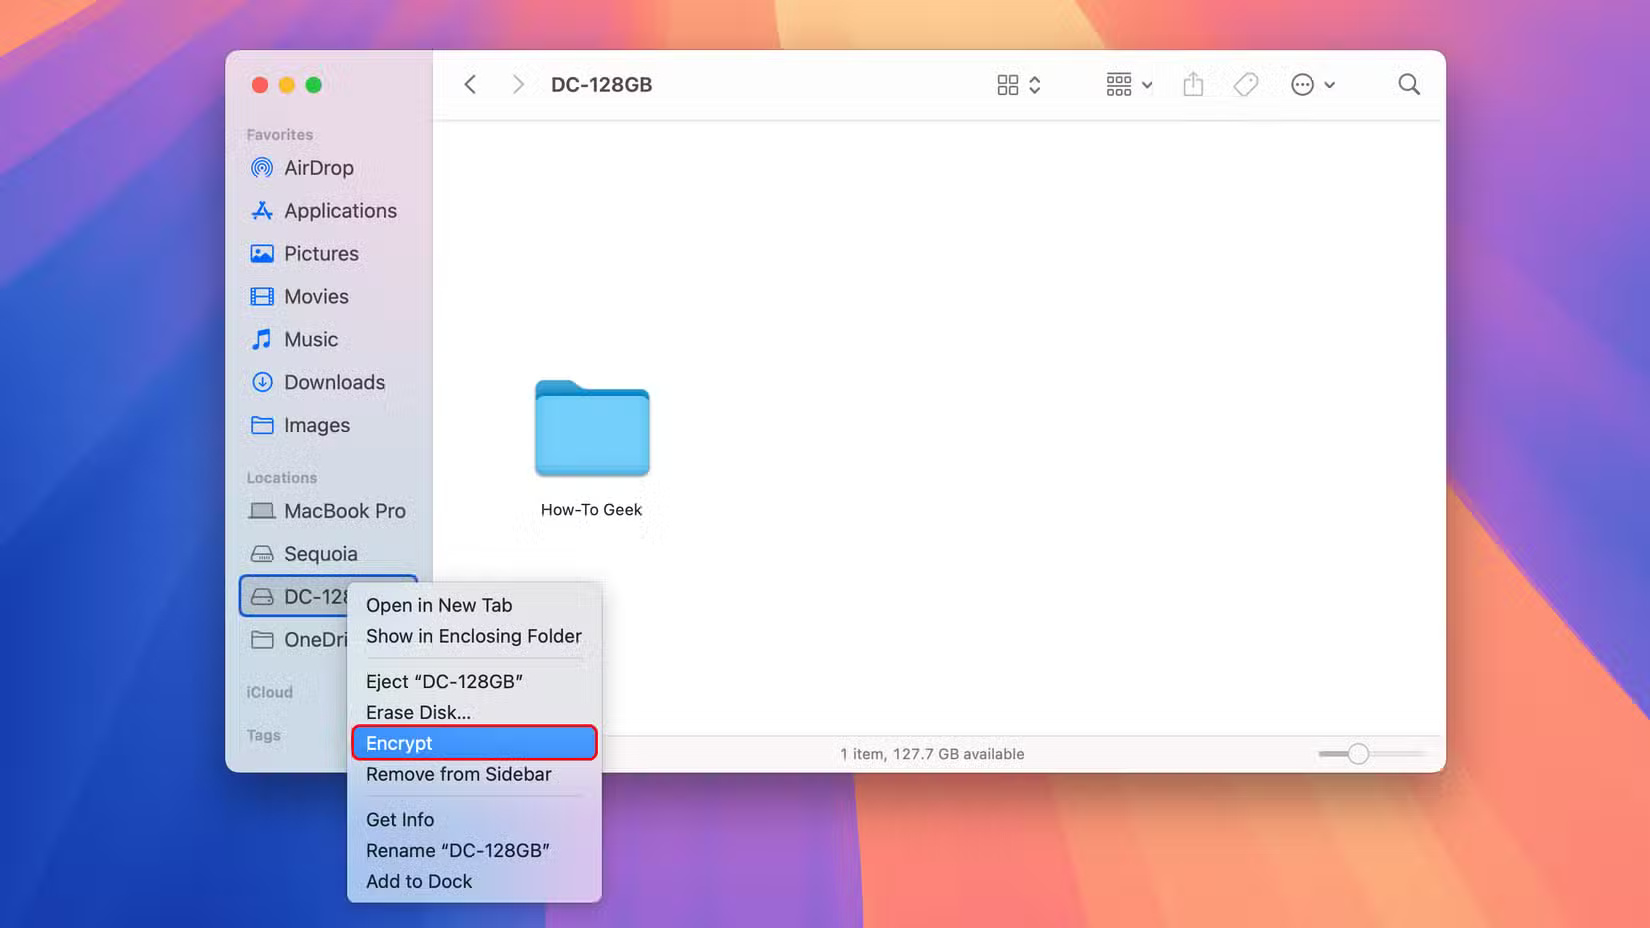
To enable encryption without erasing the drive, right-click (control+click) the drive in the Finder sidebar, select the Encrypt command from the menu, set a password, and click Encrypt Disk.
Note : Write down the encryption password and keep it in a safe place because you will not be able to access the data on the drive without the password.
2. Remove the safety drive
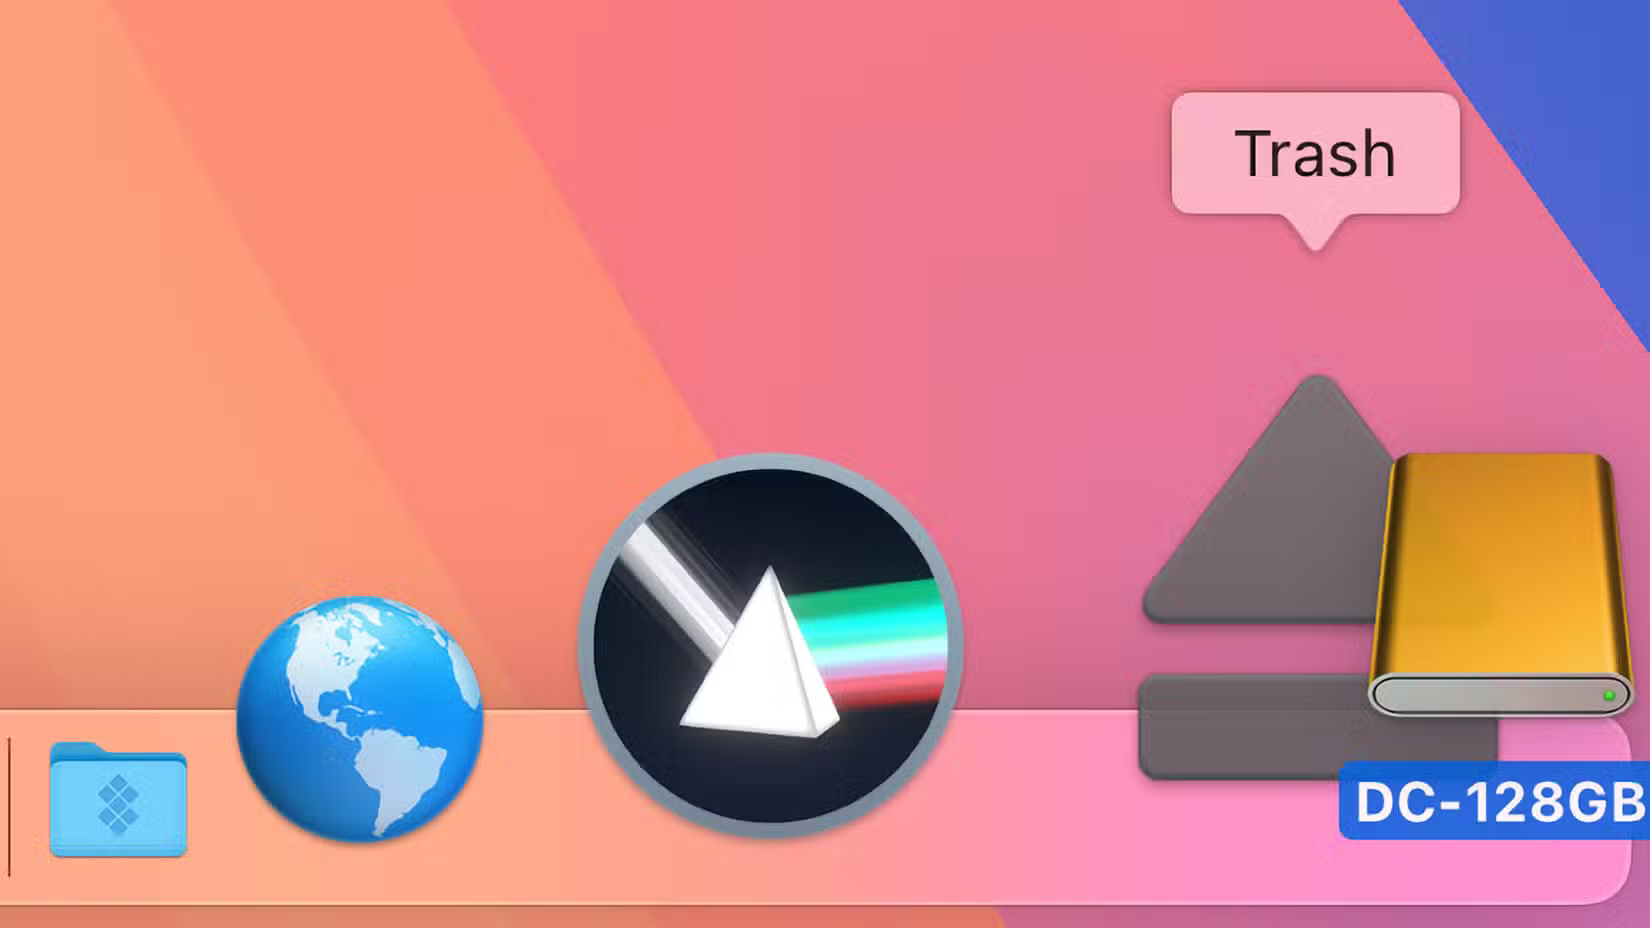
Always eject a removable drive before unplugging it to avoid losing data. You can eject a drive in macOS in a number of ways, including selecting the drive on your desktop and clicking Eject from the Finder's File menu, pressing Command + E , or dragging the drive icon to the Trash.
You can also Command-click the drive to access this option, click the drive's Eject icon in the Finder sidebar, or select the drive in Disk Utility and click File > Eject .
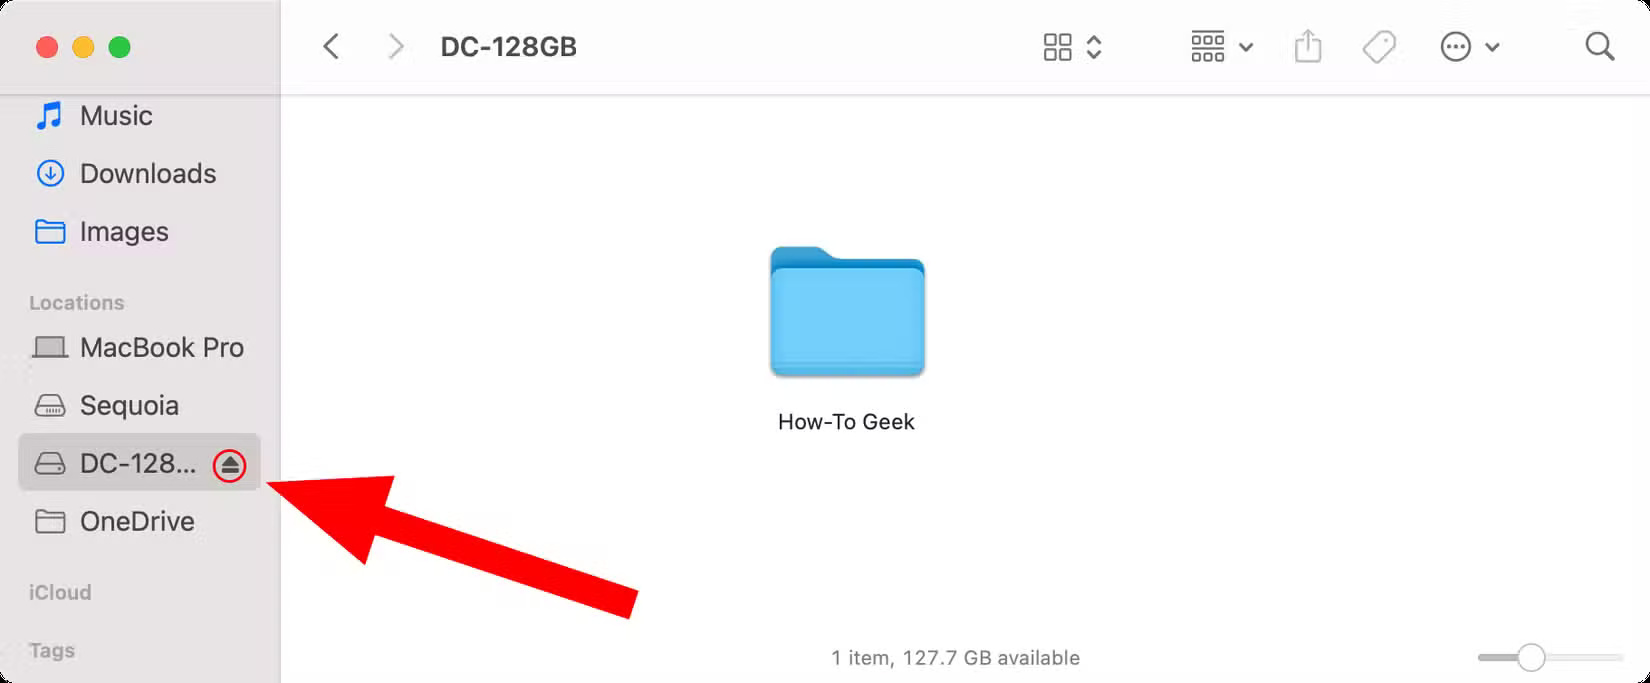
Tip : If the external hard drive doesn't show up on the desktop, click the Finder menu and select Settings , then select the General tab and check the External Disks box .
If the drive doesn't eject, make sure to save and close any open documents on the drive, force quit any apps, sign out of any macOS accounts that require the drive, and reboot if necessary. If that doesn't work, open Terminal from the Applications/Utilities folder , paste this command, and press Enter :
diskutil list externalMake a note of your drive name, such as "Disk1", then type this command into Terminal and press Return .
diskutil eject disk1If this doesn't work and data loss occurs, use First Aid in Disk Utility to repair the drive.
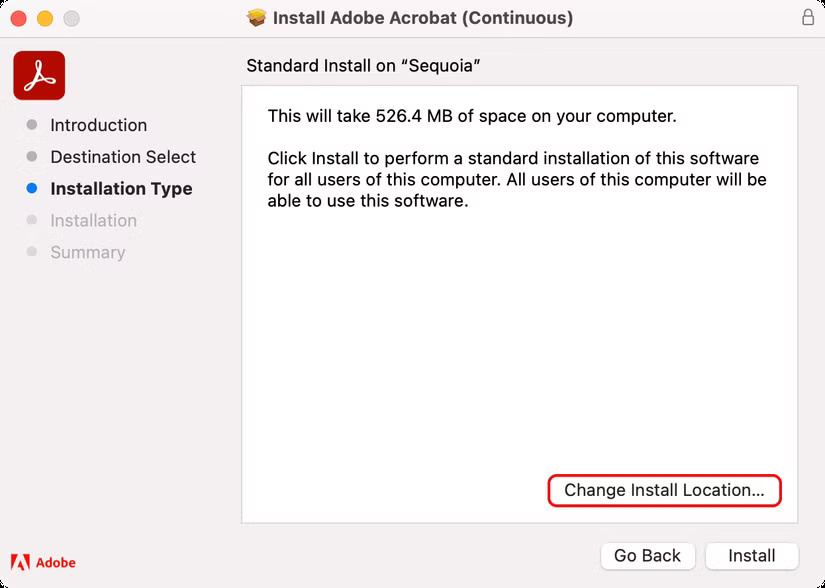
1. Install the application on an external hard drive
Apps downloaded from the Mac App Store install their binaries and associated files in a subfolder under Applications, with some of the contents stored in the Library folder. For apps downloaded from other sources, such as the developer's website, the standard macOS installer lets you specify a custom path, such as a folder on your external hard drive.
To install apps from the Mac App Store on an APFS-formatted external hard drive, open the App Store by clicking the app's icon in the Dock, then click App Store > Settings , check the Download and install large apps to a separate disk box , and select your drive from the menu.

Any app or game downloaded from the Mac App Store that is larger than one gigabyte will be downloaded and installed to the external hard drive, saving valuable space on your boot drive.
Tip : You should install the application on the boot drive to avoid splitting the binary files between the external hard drive and the Library folder, which must be on the boot drive.
Keep in mind that you have to open such apps directly from your external drive, as they won't show up in Launchpad. You can also move existing space-hungry apps like iMovie to your external drive and run them from there; just drag them to your external drive, delete the duplicates from your Applications folder, and empty the Trash to free up space on your startup drive.
Whether you're using a mechanical drive or a traditional hard drive, these tips will help you get the most out of your external hard drive. While hard drives are more affordable than flash drives, you should opt for an SSD if your budget allows to avoid latency and reliability issues.