Table of Contents
This practical guide walks through how to play Wi-Fi (hotspot) on Windows 10 computers, explains the main requirements, and highlights common issues that may appear along the way.
How to play Wi-Fi with a Windows 10 computer
Use Settings
The long-released Settings app for Windows 10 is where you'll set up Mobile Hotspot on your PC. Then up to 8 devices can connect to your hotspot.
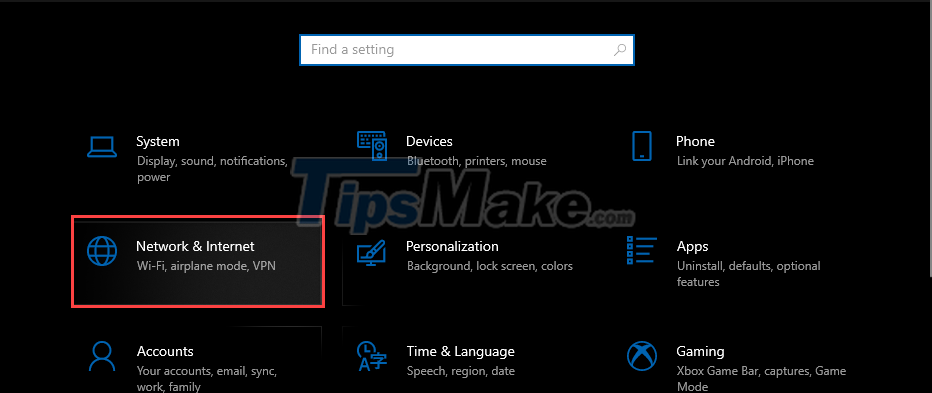
Step 1: Press Windows + I to open Settings, then navigate to Network & Internet.
Step 2: Select the Mobile Hotspot tab from the menu on the left.

Step 3: To set the hotspot name and password, click Edit.

Step 4: Change the network name and password to your liking and then click Save.

Step 5: Finally, turn on the switch below the line Share my Internet connection with other devices.
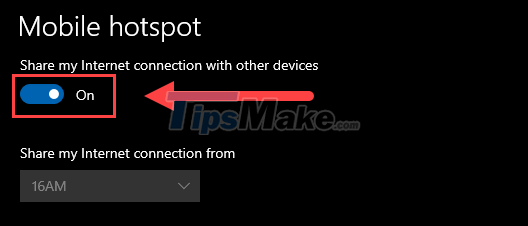
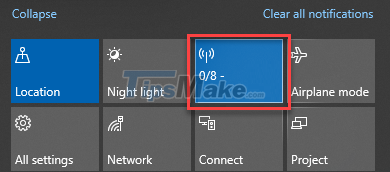
Everyone can now connect to the network through your computer with a set name and password. To enable/disable hotspot faster, you can expand the notification panel in the lower right corner and tap on Mobile Hotspot.
Using Command Prompt
The mobile hotspot can also be managed, turned on and off using the Command Prompt in Windows 10. However, it works separately from the hotspot via Settings.
Now you can use this method to enable a second hotspot in Windows 10 and run 2 at the same time.
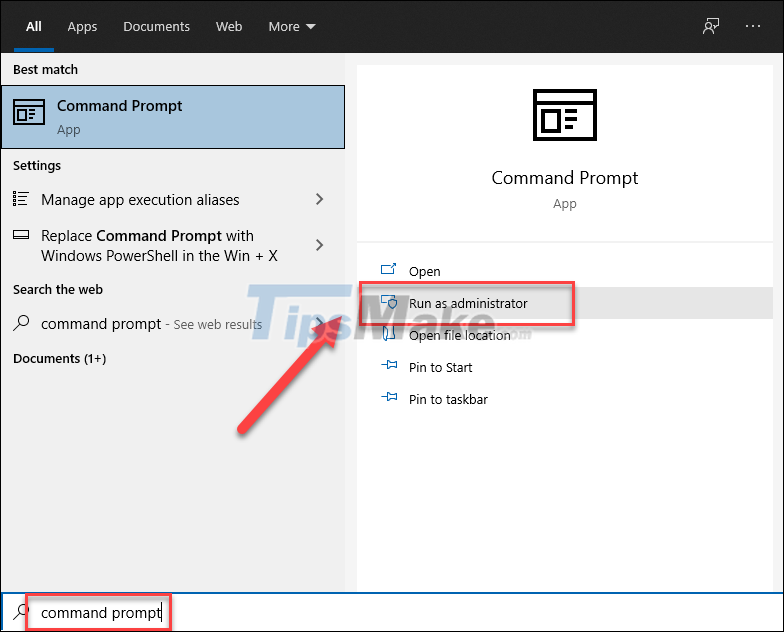
Step 1: Find Command Prompt using the search bar and run the application as administrator (Run as administrator).
Step 2: Enter the following command to configure the hotspot.
netsh wlan set hostednetwork mode=allow ssid=tendiemphat key=matkhau
In there, you replace tendiemphat and matkhau with the character you want.

Step 3: Now enter the following code to activate the hotspot.
netsh wlan start hostednetwork

Now other devices can connect to your hotspot. When you want to disable it, enter the following command:
netsh wlan stop hostednetwork
Remember that these two methods will create 2 different hotspots, with a maximum of 8 devices connecting each.
Using Connectify Hotspot software
Connectify Hotspot is a software that allows you to manage wi-fi hotspots on Windows 10 computers.
Step 1: Visit Connectify's homepage and click Download to download the software.
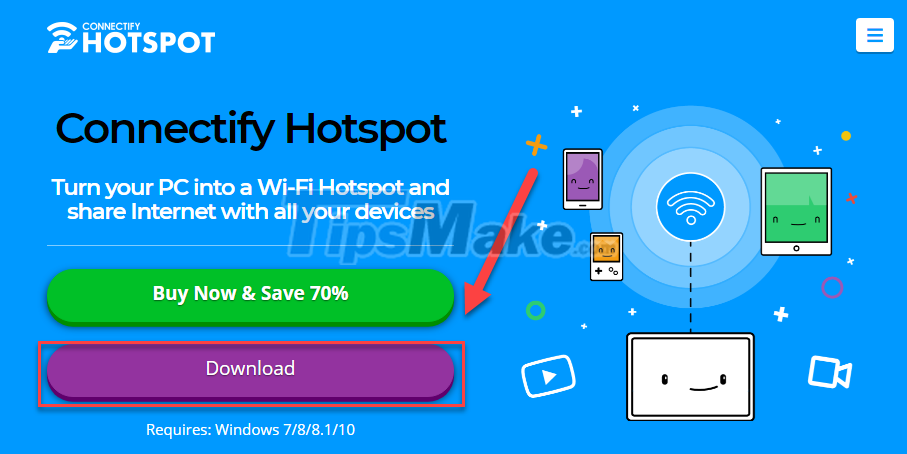
Step 2: You proceed to install the software, click Agree.
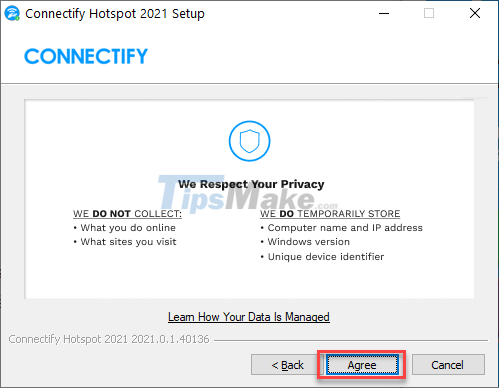
Click Try It Out to use the free version of the software.

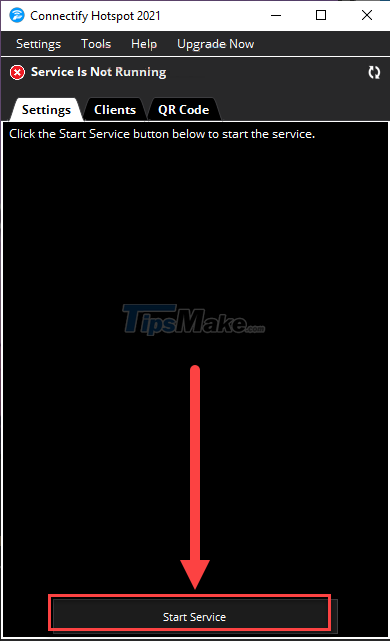
Step 3: Go to the main interface of Connectify Hotspot, click Start Service in the Settings tab to start the setup.
Step 4: Enter the Hotspot Name and password as you want, note that the network name must start with Connectify- (since you are using the free version).
When ready, click Start Hotspot.
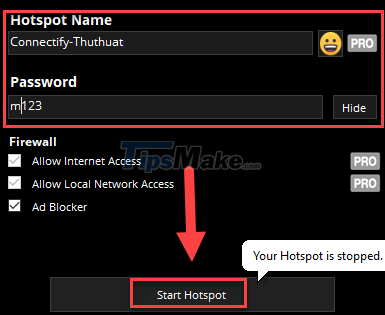
And that's how you broadcast Wi-fi with your Windows 10 computer through the Connectify Hotspot software.
Above are 3 ways to play Wi-Fi with Windows 10 computers, which method did you follow? Good luck.
Key Takeaways
Use the information above as a practical reference for how to play Wi-Fi (hotspot) on Windows 10 computers. Review each step carefully, confirm any requirements, and choose the option that best fits your situation.
FAQ
What does this guide explain about Play Wi-Fi (Hotspot) on Windows 10 Computers?
It explains the main concepts, practical considerations, and useful steps related to play Wi-Fi (hotspot) on Windows 10 computers without requiring advanced knowledge.
Who can benefit from learning about Play Wi-Fi (Hotspot) on Windows 10 Computers?
This information is useful for readers who want a clear overview, practical guidance, and reliable steps related to play Wi-Fi (hotspot) on Windows 10 computers.
What should I check before applying this information?
Review the requirements, confirm that your device, software, or situation matches the instructions, and back up important data before making major changes.
Related Articles
 What Is Wi-Fi Hotspot: What Is Hostspot Wi-Fi and Are They Safe?8 minutes read
 How to Play Wi-Fi Win 7 - Create a Hotspot on Windows 7 Laptop Simple and4 minutes read
 How to Play Wi-Fi from Laptop on Windows 7, Windows 8 Easily5 minutes read
 Access Point Wi-Fi: How to Using Your Phone as a Wi-Fi Hotspot3 minutes read
 Play Wi-Fi on Super Simple Computers with Mypubicwifi4 minutes read
 Configure Your Laptop to Be a Wi-Fi Hotspot3 minutes read
Reader Comments 0
Sign in with email or Google to join the discussion.