How to put apps to sleep in Windows 10
Putting unnecessary applications to sleep in Windows 10 will help save system resources and increase computer performance..
Windows 10 comes with a feature that allows apps to run in the background even when they haven't started. While quite useful, this feature can sometimes consume a significant amount of system resources, including CPU, RAM, Internet bandwidth, and battery. So you need to put apps that don't need to go to sleep so they don't run in the background.

1. Put apps to sleep from Settings
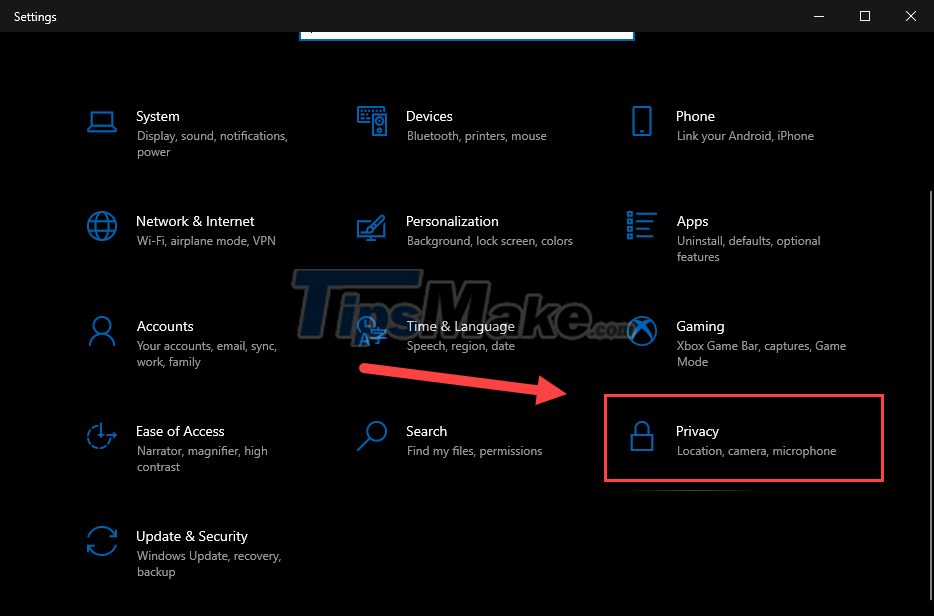
Step 1: Open Windows Settings by pressing Windows + I. In the main screen, select Privacy.
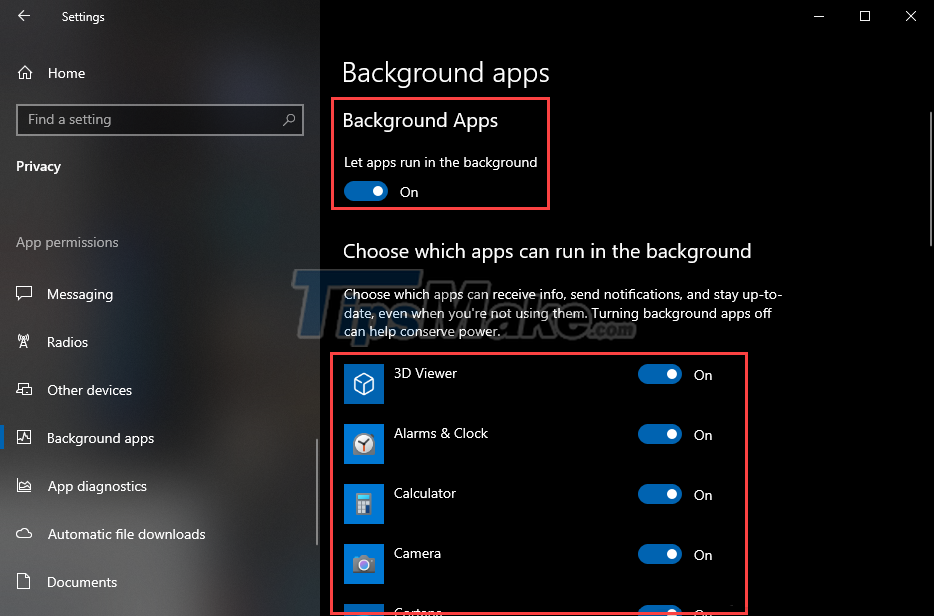
Step 2: In the left column, scroll down until you find Backgrounds apps.

Step 3: You will find 2 options here.
- Enable/disable 'Let apps run in the background'. Select this option if you want to disable background apps completely. All apps will go to sleep mode.
- Choose which apps can run in the background (Choose which apps can run in the background). If you don't want an app to run in the background, turn the switch to Off to turn it off. At that time, only applications in the On state are allowed to operate in the background.
2. Shut down programs from Task Manager and System Configuration
In the above method, you can easily see that it does not support the installation of all software, but only applications downloaded from the Microsoft Store. If you want to prevent traditional Windows programs and process files from running in the background, then you need to follow the steps below.
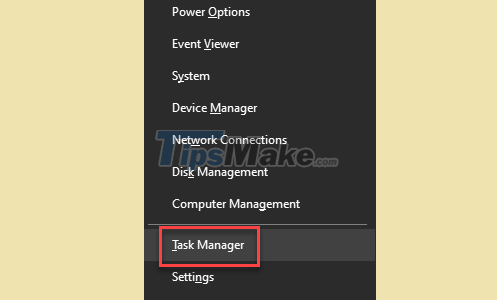
Step 1: Press Windows + X, when the menu appears, select Task Manager.
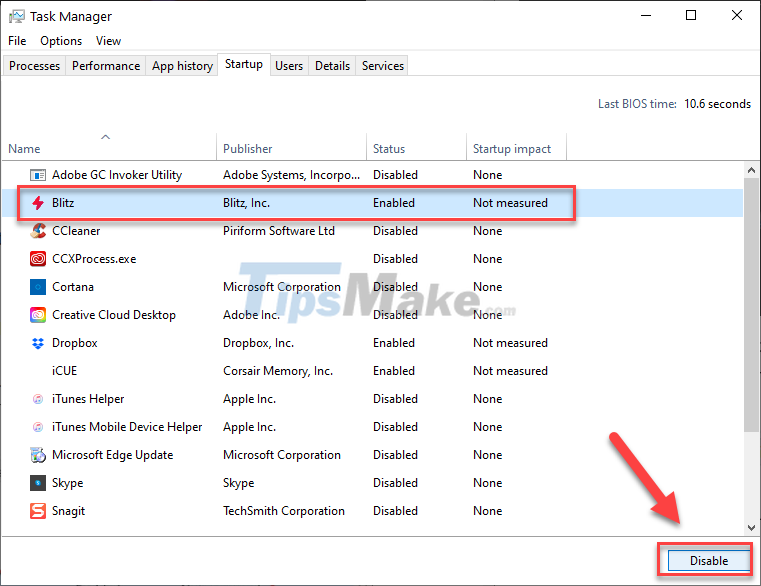
Step 2: Switch to the Startup tab.

Step 3: Select the software you do not want it to automatically start and Disable it.
Or, if you want to disable all autostart programs, do the following:
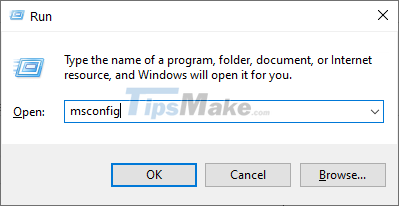
Press Windows + R to open the Run dialog, then you type msconfig and press Enter.
The System Configuration screen appears, in the General tab, select Selective startup and uncheck Load startup items.
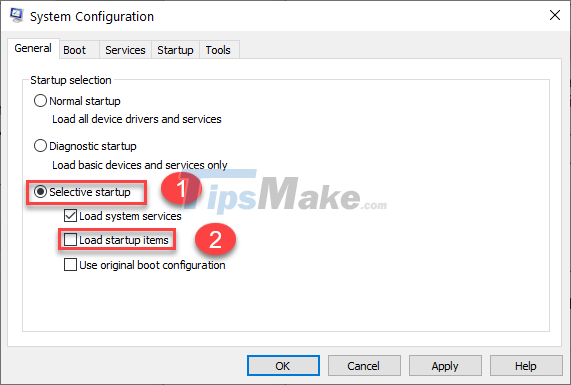
This will make your system boot faster. Applications and programs will not use any system resources until you start them. While this may slightly increase the startup time of each application, it will also increase system performance.
3. Prevent apps from running in the background using Registry
This is the most thorough method of preventing apps from running in the background as you will be impacting the system registry.
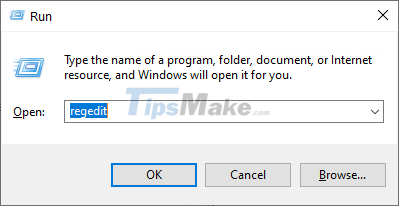
Step 1: Press Windows + R to open the Run dialog box, then type regedit and press Enter.
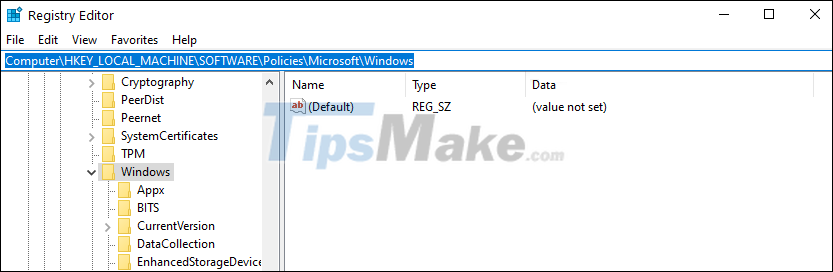
Step 2: When the Registry Editor appears, go to the following folder.
Step 3: Right-click on Windows >> New << Key.
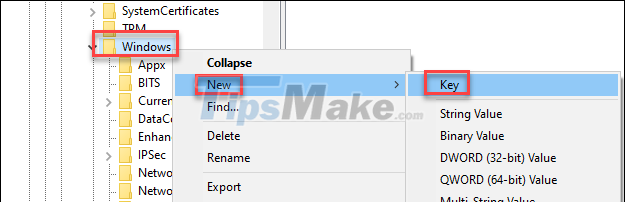
Step 4: Name the new Key AppPrivacy.

Step 5: Continue to right-click on AppPrivacy >> New >> DWORD (32-bit) Value.
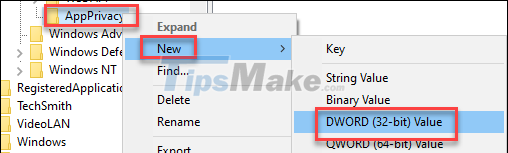
Step 6: Name the new DWORD LetAppRunInBackground.

Step 7: After creating it, open it and set the Value data to 2, then click OK.

In the future, if you change your mind and want to allow apps to run in the background, you can simply return to this location and set the Value data to 0.
And above are 3 easy ways for you to put apps to sleep. Good luck!