Steps to disable PowerShell in Windows 10
If you do not often use PowerShell, disable and disable PowerShell to ensure the safety of your computer.
Table of Contents
PowerShell is a powerful command-line tool for users to install and manage Windows 10. However, this tool can also be used for malicious purposes if it falls into the hands of strangers. So, if you don't often use PowerShell, disable it to ensure the safety of your computer.
Method 1: Turn off PowerShell using Group Policy
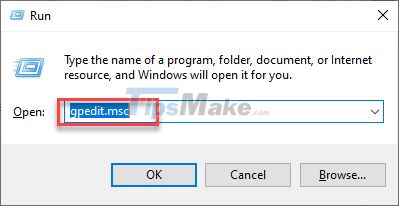
Step 1: Press the Windows + R combination to open the Run dialog box, then enter gpedit.msc and Enter.
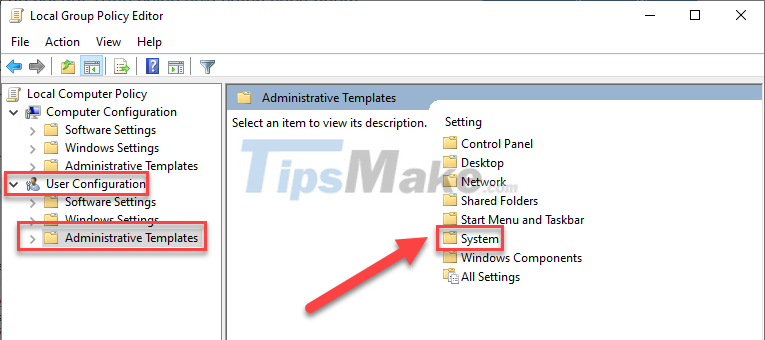
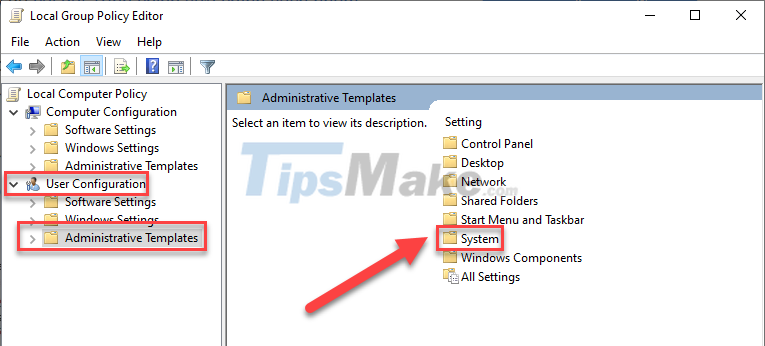
Step 2: In the Group Policy window that appears, go to User Configuration >> Administrative Templates >> System.
Step 3: Now, look in the right pane for Don't run specified Windows applications and click on it.
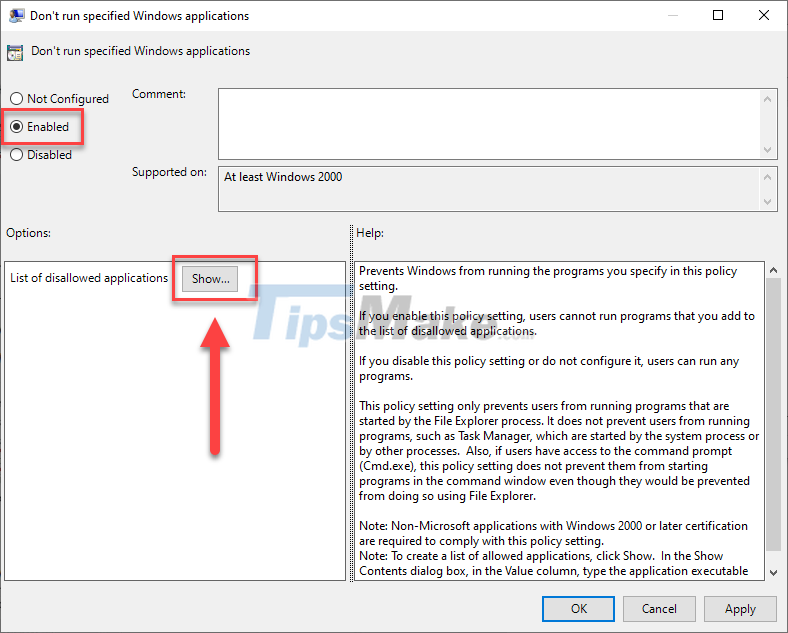
Step 4: In the pop-up window, check the Enabled box. Then, click the small Show… button in the lower frame.
Step 5: A new window appears, enter powershell.exe under the value column. You can also type powershell_ise.exe and pwsh.exe to disable ISE (server application for PowerShell). Click OK when finished.

Step 6: Go back, click Apply then OK to apply the changes.

Now you will no longer be able to open PowerShell. If at any time you want to re-enable PowerShell, just go back to the Don't run specified Windows applications window and select Disabled.
Method 2: Turn off PowerShell in Windows 10 with Local Security Policy Editor
Local Security Policy Editor in Windows 10 allows users to manage security protocols.
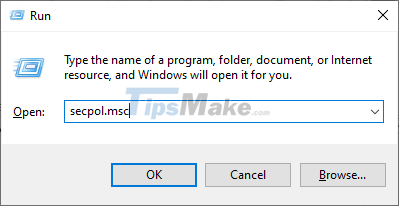
Step 1: Press Windows + R to open the Run dialog box, then type secpol.msc and Enter.
Step 2: In the Local Security Policy window, right-click Software Restriction Policy and select New Software Restriction Policies.

Step 3: Right-click Additional Rules >> Select New Hash Rule…

Step 4: Click Browse.

Step 5: In the Browse… window, enter the following path in the address bar.
%SystemRoot%system32WindowsPowerShellv1.0

Step 6: Select powershell.exe in the list and click Open.

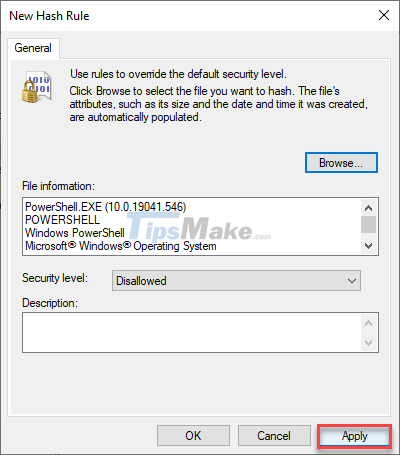
Step 7: When back to the New Hash Rule window, click Apply to apply.
Now, restart your computer for the changes to take effect.
If you ever want to re-enable Windows PowerShell, just reopen the Local Security Policy Editor and click Additional Rules. Now, right click on the commands you created and select Delete.

Windows PowerShell is a powerful tool that not everyone should use. If you do not have much knowledge about this tool, turn it off by the two ways above.
Was this article helpful?
Your feedback helps us improve.
Related Articles
 How to completely disable PowerShell 2.0 in Windows 103 minutes read
 How to install PowerShell 7.0 in Windows 10/8/72 minutes read
 12 Most Useful PowerShell Commands for Windows7 minutes read
 About PowerShell15 minutes read
 What is Windows PowerShell? How to use Windows PowerShell4 minutes read
 Instructions on how to use PowerShell in Windows Server 20124 minutes read
Reader Comments 0
Sign in with email or Google to join the discussion.