Table of Contents
This updated guide explains how to Play a CD on a Desktop Computer through clear steps, practical examples, and important checks that help prevent common errors.
Part 1 of 4:
Playing a CD in Windows
-
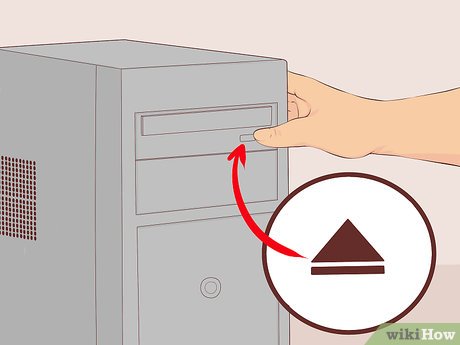 Press the Eject button on your disc drive. This is typically located on the front plate of the disc drive, on the bottom-right.
 -
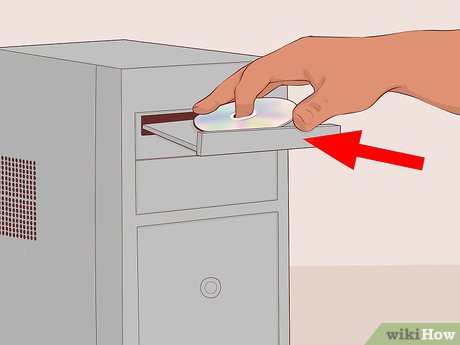 Place the disc in the tray label-side up.
 -
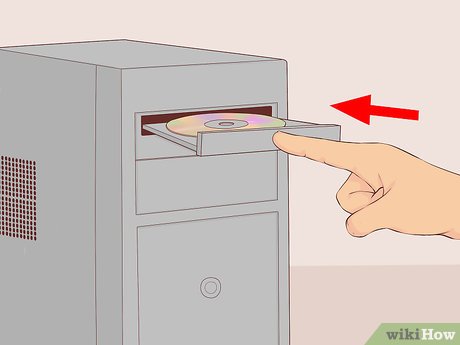 Close the tray by pushing it or pressing Eject again. The tray's motor will typically handle the closing, unless it's a spring-loaded notebook drive.
 -
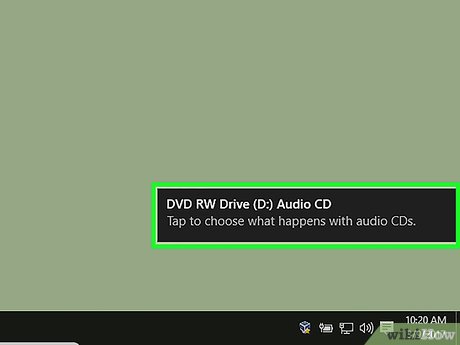 Click Select to choose what happens with audio CDs. If you don't see this notification appear on your screen, you've already chosen an action to take when an audio CD is inserted.
- If you may need to change the program that opens automatically when a CD is inserted, you can do so from the Control Panel.
-
 Click Play audio CD. You'll see the program that will play the CD displayed beneath. If you have multiple programs installed that can play audio CDs, you'll see them listed. Windows Media Player is the program that comes installed on all versions of Windows.
 -
 Start Windows Media Player if AutoPlay doesn't appear. If nothing happens when you insert your disc, you can start Windows Media Player yourself.
- Press ⊞ Win and type "Windows media player."
- Click Windows Media Player in the list.
-
 Double-click your audio CD in the left menu. The CD will begin playing, and you'll see all of the tracks appear in the center of the window.
 -
 Click and drag the volume slider in Windows Media Player. This will adjust the volume of the CD as it plays. Note that this volume slider is separate from your system volume. Make sure your system volume is set high enough to hear before adjusting the Windows Media Player volume.
Part 2 of 4:
Adjusting Windows AutoPlay Settings
-
 Open the Control Panel. The process for this is a little different for Windows 10 and 8 versus Windows 7 and earlier:
- Windows 10 and 8 - Right-click the Start button and select "Control Panel."
- Windows 7 and earlier - Click the Start button and select "Control Panel" from the Start menu.
-
 Click the AutoPlay option. If you don't see this option, click the "View by" menu in the upper-right corner and select either "Large icons" or "Small icons."
 -
 Scroll down to the CDs section.
 -
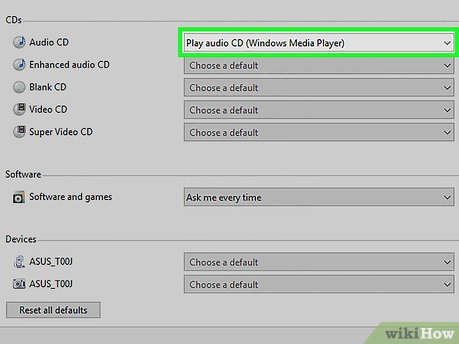 Click the Audio CD drop-down menu.
 -
 Click the action you may need to take when an audio CD is inserted.
 -
 Click the Enhanced audio CD drop-down menu.
 -
 Click the action you may need to take for enhanced audio CDs.
 -
 Click the Save button. The actions you set will be the new default actions for when an audio CD is inserted into the computer.
Part 3 of 4:
Playing a CD on a Mac
-
 Insert the disc into your Mac's disc drive. Make sure that the disc is label-up as you insert it.
- Most Mac laptop computers have a slot for discs, while some Mac desktops have a slide-out tray.
-
 Click the iTunes button in your Dock if it doesn't open automatically.
 -
 Click the CD button. You'll see this along the top row of buttons in iTunes.
 -
 Click the Play button. The CD will begin playing.
 -
 Click and drag the Volume slider to adjust the volume. You'll see the volume slider at the top of the window next to the playback controls.
- The iTunes volume slider is independent from the system volume slider. If your system volume is turned all the way down, adjusting the iTunes volume won't do anything.
-
 Eject the disc when you're done. There are several ways to eject the disc on a Mac:
- Press the Eject button on your keyboard.
- Press ⌘ Command+E.
- Click your desktop, then click File → Eject.
- Drag the CD icon on your desktop into the Trash. This will only work if icons for discs are visible on the desktop.
-
 Update iTunes if the CD automatically ejects. Some users of older versions of iTunes report audio CDs automatically ejecting, even though other discs work. This problem is usually solved by updating to the latest version of iTunes.[1]XResearch source
Part 4 of 4:
Adjusting Your Mac's CD Defaults
-
 Click the Apple menu.
 -
 Click System Preferences. If you don't see all of the System Preferences options, click the Show All button at the top of the window.
 -
 Click CDs & DVDs. You'll see this in the second section of the System Preferences menu.
 -
 Click the When you insert a music CD menu.
 -
 Click the action you may need to take. If you want the CD to start playing immediately in iTunes, select "Open iTunes."
 -
 Open iTunes. If you set iTunes to open when an audio CD is inserted, you can now set a more specific action for iTunes to take.
 -
 Click the iTunes menu.
 -
 Click Preferences.
 -
 Click the When you insert a CD menu.
 -
 Click the action you may need to take when a CD is inserted. You can choose to start playing the music, import the songs to your library, or display the contents of the CD.
 -
 Click OK. Audio CDs will now automatically play in iTunes when they are inserted.
FAQ
What is the easiest way to Play a CD on a Desktop Computer?
Start with the requirements in this guide, then follow each step in order. Check the result after every major change so problems are easier to identify.
Can beginners follow these instructions?
Yes. The process is organized into practical steps, and you can repeat any step before moving forward.
What should I check if the method does not work?
Confirm your software or device version, permissions, settings, file format, and internet connection when the task depends on online services.
Related Articles
 Experience Google Play Music Desktop Player on Your Computer7 minutes read
 Ways to Connect to Wi-Fi for Desktop Pcs4 minutes read
 Should You Buy a Gaming Laptop or Build Your Own Desktop PC?8 minutes read
 How to Hear Audio from the Remote PC When Using Remote6 minutes read
 How to Play Wi-Fi (Hotspot) on Windows 10 Computers5 minutes read
 Additional Wi-Fi: How to Connect Wi-Fi to Desktop, PC7 minutes read
Reader Comments 0
Sign in with email or Google to join the discussion.