Table of Contents
This updated guide examines Click: How to Make a Ringtone on Itunes and organizes the essential facts, background, and practical takeaways in clear American English.
Part 1of 2:
Creating a Ringtone from a Song
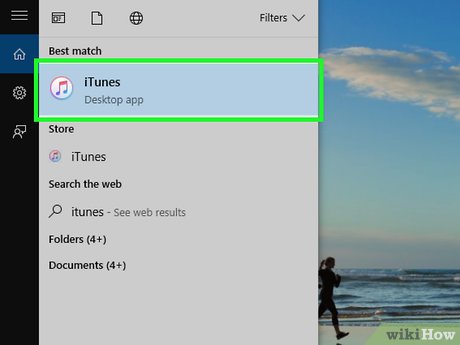 Open iTunes. If you're using a Mac, click music note icon on the Dock, which is usually at the bottom of the screen. If you're using Windows, you'll usually find iTunes in the Start menu (sometimes in a folder called All Apps ).
- If you'd rather download a ringtone from the iTunes Store, see this wikiHow.
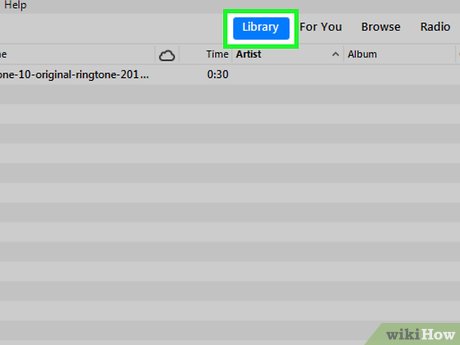 ClickLibrary. It's near the top-center part of iTunes. This displays the contents of your library.
- To use a part of a song as a ringtone, it must already be in your library, whether you've purchased it from iTunes or imported it from elsewhere.
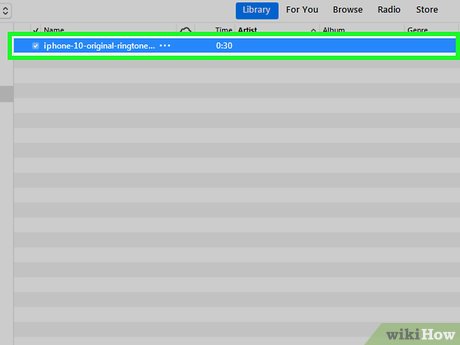 Select a song. When selecting a song, choose one that has a solid 20 second (or less) segment of sound you want to hear when your phone rings.[1]XResearch source
 Write down the start and stop times of the segment you want to use. Play the song and write down the exact time within the song you want the ringtone to begin, then write down the time in the song where it should end.
- Example: If the part of the song you want to use begins exactly 50 seconds into the song, write down '0:50' as the start time. If you want the ringtone to stop at at 1 minute and 10 seconds into the song, write down '1:10' as the stop time.
- If the segment you choose is shorter than 20 seconds, the tone will repeat until the call is answered, canceled, or routed to voicemail.
 Right click on your selected song. A menu will appear.
 ClickSong InfoorGet Info. This opens a window that contains details about the file.[2]XResearch source
 Click theOptionstab. It's near the top of the window.
 Enter the start and stop times. Check the boxes next to 'start' and 'stop,' and then type the start and stop times you wrote down.
 ClickOK. It's at the bottom of the window.
- Now that you've set times, listen to the track to make sure it sounds the way you'd like it to sound as your ringtone. Make any changes to these times as needed before you move forward.
 Click the song once to highlight it. The song is now ready to be converted.
 Click theFilemenu. It's at the very top of the screen (on a Mac) or at the top of iTunes (on a PC).
 ClickConvert. It's near the bottom of the menu. Another menu will expand.
 ClickCreate AAC Version. This creates a ringtone file from the start and stop points of the selected song. You should see the new version of the song right beneath the original file.
- If you don't see both versions of the song, it might be because you're viewing a playlist. Try searching for the song's title or artist in the search bar at the top of iTunes.
 Remove the start and stop times from the original file. You'll want to reset the start and stop times of the original file you can listen to the whole song in the future. Here's how:
- Right-click the original song and select Song Info .
- Remove the check marks from 'start' and 'stop.'
- Click OK .
Part 2of 2:
Adding the Ringtone to your iPhone
 Right-click the ringtone file in iTunes. This is the shortened version of the song you created. A menu will expand.
 ClickShow in Windows Explorer(PC) orShow in Finder(Mac). This opens a window containing your new ringtone file, which should be called something like SongName.m4a.
- If you're using Windows and don't see the '.m4a' at the end of the file name, click the View menu at the top of the Explorer window, then check the box next to 'File name extensions' (on the 'Show/hide' panel).
 Change the.m4a part of the file to.m4r. Here's how:
- Right-click the file and select Rename .
- Delete.m4afrom the end of the filename and replace it with.m4r.
- Press↵Enteror⏎Return.
- Click Yes (PC) or Use.m4r (Mac) to confirm.
 Drag the renamed file to your desktop. Just click and drag the file from the Explorer or Finder window to the desktop, and then release the mouse button to complete the move.
 Return to iTunes and right-click the shortened ringtone. It's the same one you right-clicked earlier. A menu will expand.
 ClickDelete from Library. If prompted to confirm, follow the on-screen instructions to do so.
 Connect your iPhone to the computer. Use the cable that came with your iPhone or one that's compatible. After a few moments, you should see an iPhone button appear near the top-left corner of iTunes.[3]XResearch source
 Click the iPhone button. This selects your iPhone, and expands a section called 'On My Device' near the bottom of the left panel.[4]XResearch source
 ClickTones. It's in the left panel under 'On My Device.' A list of your custom ringtones will appear in the right panel.
 Drag the ringtone file from your desktop to 'Tones. ' You can drop it right onto the right panel of iTunes. Once the file is added, its name will appear in the list of Tones.[5]XResearch source
 ClickSync. It's the gray button at the bottom of iTunes.
 ClickDone. It's to the right of 'Sync.' You can now remove your iPhone from the computer.
 Open your iPhone's Settings
 . You'll usually find this app on the home screen.
 Scroll down and tapSounds. It's the option with a pink icon that has a speaker on it.
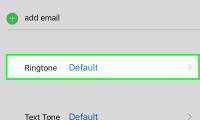
 TapRingtone. It's under the 'SOUNDS AND VIBRATION PATTERNS' header. A list of ringtones on your iPhone will appear, including the one you just added (the newest should be at the top of the list, under the 'RINGTONES' header.
 Tap the ringtone to select it. This sets your new ringtone file as your iPhone's default ringtone.
FAQ
What is Click: How to Make a Ringtone on Itunes about?
It provides a structured overview of click, explains the main context, and highlights practical takeaways for readers.
Why does this topic matter?
Understanding the main concepts helps readers evaluate the issue, avoid common mistakes, and make better-informed decisions.
How should readers use this information?
Use the guidance as a practical starting point, confirm details that may have changed, and follow current product, safety, or security recommendations.
Related Articles
 How to Fix the Error Does Not Appear Item Tones Ringtone on iTunes6 minutes read
 How to Set a Ringtone for iPhone with ITunes3 minutes read
 How to Fix m4r File Error Creating iPhone Ringtone with iTunes5 minutes read
 Fixing the Issue of Not Seeing the Tones Ringtone Option in iTunes When Creating iPhone5 minutes read
 How to Set a Song as an iPhone Ringtone Without Any Supporting3 minutes read
 How to Set a Song as an iPhone Ringtone: Practical Guide10 minutes read
Reader Comments 0
Sign in with email or Google to join the discussion.