How to Install Ubuntu Server
This wikiHow teaches you how to install Ubuntu Server on a Windows computer. Ubuntu Server is a free, Linux-based server operating system that you can use to host your web services. Open the Ubuntu Server download page. Go to....
Part 1 of 3:
Creating an Installation Drive
-
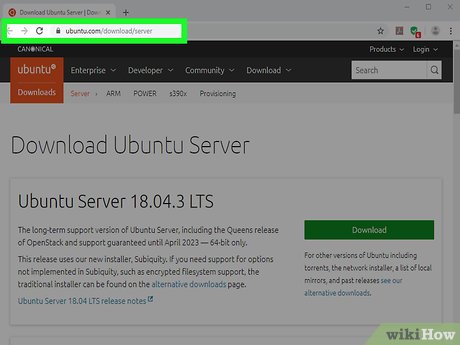 Open the Ubuntu Server download page. Go to https://www.ubuntu.com/download/server in your computer's web browser.
 -
 Click Download. It's a green button on the right side of the page. Your Ubuntu Server disk image (ISO) will begin downloading onto your computer.
 -
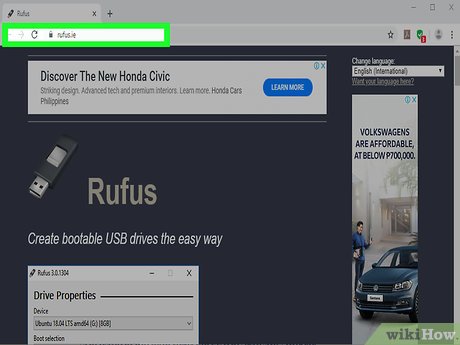 Open the Rufus website. Go to https://rufus.akeo.ie/ in your computer's web browser.
 -
 Download Rufus. Scroll down to the "Download" heading, then click Rufus 3.1 below the heading to prompt the launch file to begin downloading.
 -
 Plug a flash drive into your computer. Insert a flash drive that has at least 4 GB of storage capacity on it into one of your computer's rectangular USB ports.
- Keep in mind that the flash drive will be completely erased during the installation drive creation process. You may want to copy any existing files on the flash drive onto your computer before proceeding.
-
 Run Rufus. Double-click the downloaded Rufus file, then click Yes when prompted.
 -
 Click SELECT. It's on the right side of the Rufus window. This will open a File Explorer window.
 -
 Open the downloaded ISO file. Go to the location of the Ubuntu Server file, then double-click it to open it in Rufus.
 -
 Click START. It's at the bottom of the Rufus window. Your ISO file will begin burning onto your flash drive.
- You may have to click through a few prompts (e.g., click OK to begin the process) before your flash drive will begin burning.
-
 Wait for the burning to finish. This may take several minutes. Once your flash drive finishes burning, you can proceed to the next part.
- Don't remove your flash drive once the burning completes. You'll need to keep your flash drive inserted throughout the installation process.
Part 2 of 3:
Changing Your Computer's Boot Order
-
 Find your computer's BIOS key. Each computer has a specific key that, when pressed repeatedly while the computer is starting up, opens the BIOS menu. This key varies from computer to computer, but you can usually find your computer's specific key by looking up your computer's model and manufacturer followed by "BIOS key".
- You may also be able to find the BIOS key in your computer's manual.
- The BIOS key is usually one of the function keys (e.g., F12), the Del key, or the Esc key.
-
 Turn off your computer. Click Start, click the Power
 icon, and click Shut Down.
- You can only change your computer's boot order from the BIOS, which is a menu that can only be opened during a narrow window of time while your computer starts.
-
 Turn on your computer. You'll need to proceed to the next step as soon as you press your computer's Power switch.
 -
 Begin pressing the BIOS key. As soon as your computer begins to turn back on, begin pressing rapidly the key your computer uses to open the BIOS. You can stop pressing the key once the BIOS page opens.
- If your computer completes the restart cycle, you'll need to turn it off and try again.
-
 Find the "Boot Order" section. Using the left and right arrow keys, scroll through the BIOS tabs until you find a list of boot items.
- You may have to select Boot Order (or similar) and press ↵ Enter to open the menu.
- Every computer has a unique BIOS, so check your computer's manual or online documentation if you can't find the "Boot Order" menu.
-
 Select your flash drive's name. Press the "Down" arrow key until you've selected the USB flash drive's name.
- The flash drive might be named "Removable Disk" or something similar.
-
 Move the flash drive to the top of the list. In most cases, you'll press the + key until the flash drive's name is at the top.
- If pressing the + key doesn't work, consult the key legend at the bottom (or side) of the BIOS screen for the correct key.
-
 Save and exit. Press the "Save and Exit" key that's listed in the key legend. Doing so will save your changes to the BIOS and then exit the BIOS screen.
- You may have to confirm your choice by pressing another key before you can proceed.
- If your computer finishes restarting into Windows, you'll need to restart your computer one more time before continuing.
Part 3 of 3:
Installing Ubuntu Server
-
 Select a setup language. Use the arrow keys to scroll up or down to the language you want to use, then press ↵ Enter.
 -
 Select a keyboard layout if necessary. If you use a different keyboard layout than the one that is selected in the middle of the screen, scroll down to the current layout and press ↵ Enter, then scroll down to the layout you want to use and press ↵ Enter.
 -
 Proceed to the next page. Scroll down to select Done at the bottom of the page, then press ↵ Enter.
 -
 Select Install Ubuntu and press ↵ Enter. It's at the top of the screen.
 -
 Skip the network configuration page. Scroll down to select Done, then press ↵ Enter.
 -
 Enter any proxy details if necessary. If you use a proxy for your network, select the text field and press ↵ Enter, then enter your proxy details.
- Skip this step if you don't use a proxy.
-
 Open the next page. Scroll down to select Done, then press ↵ Enter.
 -
 Confirm the mirror settings. Scroll down to select Done, then press ↵ Enter.
 -
 Select the disk on which you want to install Ubuntu Server. Select Use An Entire Disk and press ↵ Enter, then select your disk and press ↵ Enter.
- Keep in mind that this will overwrite your entire disk with Ubuntu Server, so your hard drive will be erased.
-
 Confirm your disk settings. Scroll down to select Done and press ↵ Enter.
 -
 Select Continue and press ↵ Enter. Doing so will take you to the server setup screen.
 -
 Enter your server information. Fill out the following fields:
- Your name — Enter your name here.
- Your server's name — Add a nickname for your server.
- Pick a username — Enter the username you'd like to use.
- Choose a password — Create a strong password for your server.
- Confirm your password — Repeat your password.
-
 Confirm your server settings. Scroll down to the bottom of the page to select Done, then press ↵ Enter.
 -
 Add snaps if necessary. If you want to add snaps, which are additional in-server services, to your installation, select the snap you want to add and press space.
 -
 Confirm your snaps. Scroll down to select Done and press ↵ Enter. At this point, Ubuntu Server will begin installing.
 -
 Restart your computer when prompted. Select Reboot Now at the bottom of the screen and press ↵ Enter.