Table of Contents
This updated guide examines How to Install Skype Using Terminal on Ubuntu and organizes the essential facts, background, and practical takeaways in clear American English.
Method 1of 2:
Installing from the Canonical Partners Repository
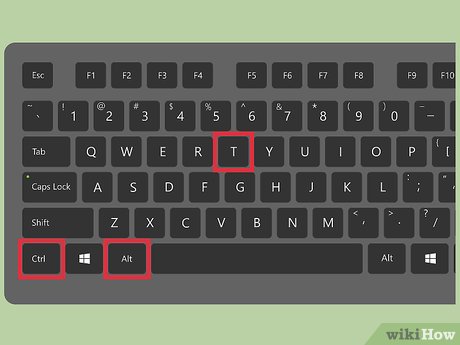 PressCtrl+Alt+Tto open a terminal window. It used to be that Skype had to be installed by manually downloading the binary from Skype's website, but now you can install it from the Canonical Partners repository. Start by opening a terminal window.
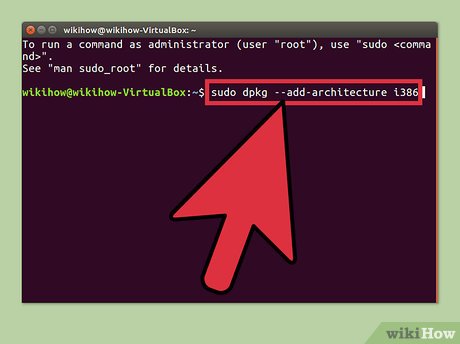 Enable Multiarch for 64-bit Ubuntu. If you're using the 64-bit version of Ubuntu, you'll need to enable Multiarch so the program will install. At the command prompt:[1]
- Type:sudo dpkg --add-architecture i386
- Press↵Enter.
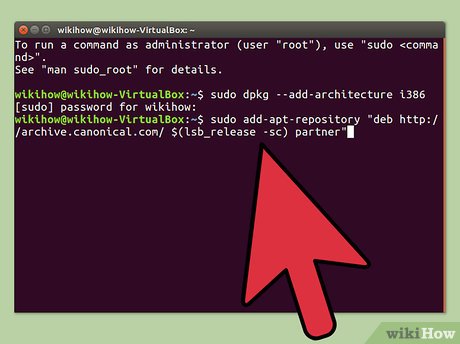 Add the Canonical Partners repository to Ubuntu. This repository, which is where Skype (and a lot of other closed-source software) is found, is disabled by default.[2]To enable it from the command line:[3]
- Type:sudo add-apt-repository "deb http://archive.canonical.com/ $(lsb_release -sc) partner"
- Press↵Enter.
 Install Skype from the Canonical Partners Repository. Ubuntu recommends that Skype only be installed through this repository (rather than downloading the package from Skype's website).[4]Here's how:
- Type:sudo apt-get update && sudo apt-get install skype
- Press↵Enterto begin the installation. When the installation is complete, you'll return to the command line.
 Typeskypeat the prompt and press↵Enter. This will launch Skype. Follow the prompts to create your account so you can get started with video chat.
Method 2of 2:
Installing Skype Manually
 PressCtrl+Alt+Tto open a terminal window. While it's no longer mandatory that Skype be installed by manually downloading the package from Skype's website, it's still an option.[5]Try installing Skype from the Canonical Partners repository first. If you run into any issues, use this method as a backup.
 Download Skype with wget. The path to the package is different depending on whether you're using 32-bit or 64-bit Ubuntu:
- If you're using 32-bit Ubuntu, type:wget http://www.skype.com/go/getskype-linux-beta-ubuntu-32and press↵Enter.
- 64-bit Ubuntu, type:wget http://www.skype.com/go/getskype-linux-beta-ubuntu-32and press↵Enter.
 Install Multiarch for 64-bit Ubuntu. If you're using the 64-bit version of Ubuntu, you'll need Multiarch to install Skype. Here's how to do it from the command line:[6]
- Type:sudo dpkg --add-architecture i386and press↵Enter.
- When you return to the command prompt, type:sudo apt-get updateand press↵Enter.
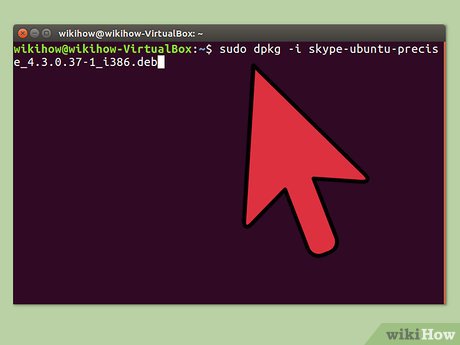 Install Skype from the downloaded package. You'll do this with the 'dkpg' command. Make sure the version number aligns with the one you downloaded earlier.[7]
- Type:sudo dpkg -i skype-ubuntu-precise_4.3.0.37-1_i386.deband press↵Enter.
- As Linux tries to unpack Skype, you'll see a slew of errors on the screen about dependency issues. This is normal.
 Install the required dependencies. To correct the errors and start the Skype install:
- Type:sudo apt-get -f installand press↵Enter.
- Wait a few moments as the package installs. When the installation is complete, you'll return to the command prompt.
 Run your new installation of Skype. To start Skype, typeskypeand press↵Enter. Follow the prompts to sign in or create a new account with Skype.
FAQ
What is How to Install Skype Using Terminal on Ubuntu about?
It provides a structured overview of skype, explains the main context, and highlights practical takeaways for readers.
Why does this topic matter?
Understanding the main concepts helps readers evaluate the issue, avoid common mistakes, and make better-informed decisions.
How should readers use this information?
Use the guidance as a practical starting point, confirm details that may have changed, and follow current product, safety, or security recommendations.
Related Articles
 How to Install Hyper Terminal in Ubuntu 20.045 minutes read
 How to Install Skype in Ubuntu11 minutes read
 How to Install Skye on Ubuntu: Install Skype on Linux4 minutes read
 How to Install and Uninstall Applications from Terminal in Ubuntu3 minutes read
 Terminal: How to Install Ubuntu Tweak 0.5.1 in Ubuntu2 minutes read
 How to Customize Terminal in Ubuntu8 minutes read
Reader Comments 0
Sign in with email or Google to join the discussion.