How to install NTP server and client on Ubuntu 24.04
NTP, or Network Time Protocol, is a protocol used to synchronize all system clocks in a network to use the same time.
Table of Contents
NTP, or Network Time Protocol, is a protocol used to synchronize all system clocks on a network to use the same time. When using the term NTP, the article refers to the protocol itself and the client and server programs running on the computers connected to the network. NTP belongs to the traditional TCP/IP protocol suite and can easily be classified as one of its oldest components.
When you initially set up your clock to synchronize with NTP, it takes 6 exchanges over 5 to 10 minutes before the clock is set. Once the network clock is synchronized, the client updates its clock with the server every 10 minutes. This is typically done through a single message exchange (transaction). These transactions use system port 123.
This article will describe a step-by-step process on how to:
- Install and configure NTP server on Ubuntu machine.
- Configure NTP client to synchronize time with server.
The article ran the mentioned commands and procedures on Ubuntu 22.04 LTS and Ubuntu 24.04 systems.
Install and configure NTP server on host computer
Follow these steps to install NTP server on Ubuntu server:
Note : The article is using the Ubuntu command line, Terminal, to install and configure NTP. You can open the Terminal application via searching for the application launcher or the shortcut Ctrl + Alt + T .
Step 1: Update the package repository index
To install the latest software versions from the Internet repository, your local repository index must match them. Run the following command as sudo to update your local repository index:
$ sudo apt update

Step 2: Install NTP Server using apt-get
Please run the following command as sudo to install the NTP server daemon from the APT repository:
$ sudo apt install ntpPlease note that only authorized users can add, remove, and configure software on Ubuntu.
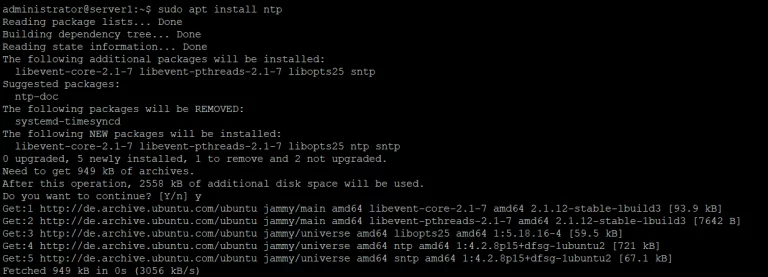
The system may ask you for your sudo password and give you the Y/n option to continue the installation. Type Y and press Enter ; the NTP server will then be installed on your system. However, this process may take some time, depending on your Internet speed.
Step 3: Verify settings (optional)
You can verify your NTP settings and also check the version number by running the following command in Terminal:
$ sntp --version

Step 4: Switch to the NTP server pool closest to your location
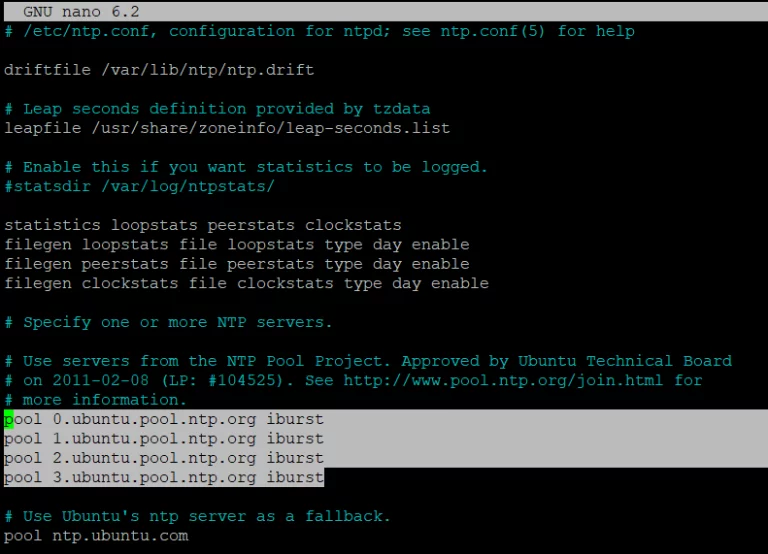
When you install an NTP server, it is usually configured to get the appropriate time. However, you can switch to the server pool closest to your location. This involves making some changes to the /etc/ntp.conf file.
Open the file in nano editor as sudo by running the following command:
$ sudo nano /etc/ntp.conf

In this file, you will be able to see the pool list. The task here is to replace this pool list with the pool of the time server closest to your location. The pol.ntp.org project provides reliable NTP service from a cluster of time servers. To select the pool list according to your location, visit the following page:
https://support.ntp.org/bin/view/Servers/NTPPoolServers

This page asks us to add the following lines to the ntp.conf file:
server 0.us.pool.ntp.org server 1.us.pool.ntp.org server 2.us.pool.ntp.org server 3.us.pool.ntp.orgThis is the file interface after adding the above lines:
Exit the file by pressing Ctrl + X and enter y to save changes.
Step 5: Restart NTP server
For the above changes to take effect, you need to restart the NTP server. Run the following command as sudo to do so:
$ sudo service ntp restartStep 6: Verify that the NTP server is running
Now, check the status of NTP service using the following command:
$ sudo service ntp status
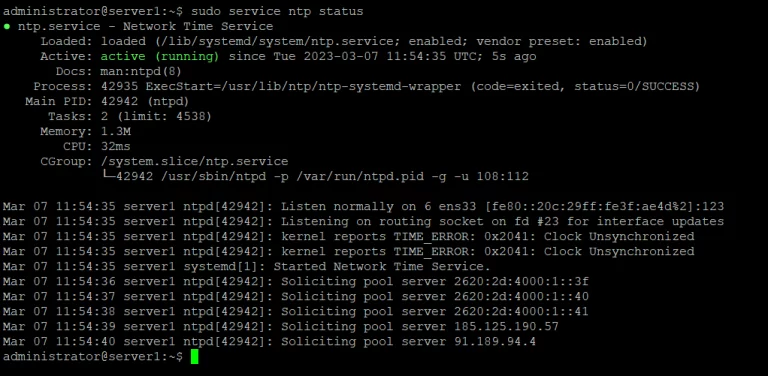
The Active status verifies that the NTP server is active.
Step 7: Configure the firewall so that the client can access the NTP server
Finally, it's time to configure the system's UFW firewall so that incoming connections can access the NTP server at UDP port number 123.
Run the following command as sudo to open port 123 for incoming traffic:
$ sudo ufw allow from any to any port 123 proto udp
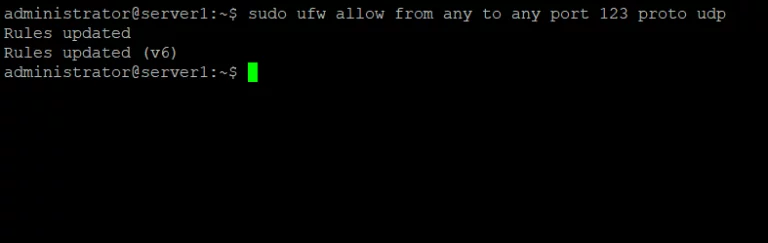
Your Ubuntu server is now configured as an NTP server.
Configure NTP client to synchronize time with NTP server
Now, let's configure the Ubuntu client to synchronize time with the NTP server.
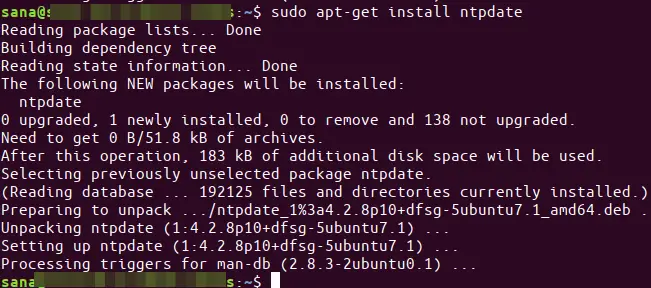
Step 1: Install ntpdate
The ntpdate command will allow you to manually test your connection configuration with the NTP server. Open the Terminal application on the client and enter the following command as sudo:
$ sudo apt-get install ntpdate
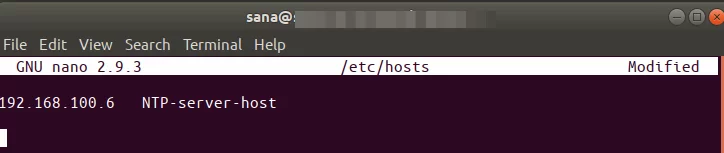
Step 2: Specify the IP and hostname of the NTP server in the hosts file
In order for your NTP server to resolve to the hostname in the client, you need to configure your /etc/hosts file.
Open the hosts file as sudo in the nano editor by entering the following command:
$ sudo nano /etc/hostsNow, add the IP of the NTP server and specify the hostname as follows in this file:
Exit the file by pressing Ctrl + X and then save by typing y .
Step 3: Check if the client's time is synchronized with the NTP server
The following ntpdate command will allow you to manually check if the time is synchronized between the client and server systems:
$ sudo ntpdate NTP-server-hostThe ideal output would be to display the time difference between the two systems.
Step 4: Disable the systemd timesyncd service on the client
Since we want the client to synchronize time with the NTP server, let's disable the timesyncd service on the client.
Enter the following command to execute:

Step 5: Install NTP on client
Run the following command as sudo to install NTP on the client:
$ sudo apt-get install ntpStep 6: Configure the /etc/ntp.conf file to add the NTP server as a new time server
Now, we want our client to use our own NTP host server as the default time server. To do this, we need to edit the /etc/ntp.conf file on the client.
Run the following command as sudo to open the file in the Nano editor:
$ sudo nano /etc/ntp.confThen add the following line to the file, where NTP-server-host is the hostname you specified for your NTP server:
server NTP-server-host prefer iburstThis is what the file looks like after specifying the time server:

Press Ctrl + X to close the file and type y to save changes.
Step 7: Restart NTP server
For the above changes to take effect, you need to restart the NTP service. Run the following command as sudo to do so:
$ sudo service ntp restartStep 8: View the time sync queue
Now your client and server are configured to synchronize time. You can view the time synchronization queue by running the following command:
$ ntpq -psYou should be able to see NTP-server-host as the time synchronization host/source in the queue.
So that's all you need to know about installing and configuring NTP to synchronize the time on your networked Ubuntu machines. The process may seem a bit complicated, but if you follow all the steps carefully, your machines will be synchronized in no time.
Was this article helpful?
Your feedback helps us improve.
Related Articles
 How to install Putty SSH Client on Ubuntu 20.04 LTS4 minutes read
 How to install FTP Server on Ubuntu5 minutes read
 How to Install Ubuntu Server8 minutes read
 How to install desktop/GUI environment in Ubuntu Server4 minutes read
 Install the client (Client) for ISA2 minutes read
 What is the difference between Ubuntu Desktop and Ubuntu Server?4 minutes read
Reader Comments 0
Sign in with email or Google to join the discussion.