How to use the advanced options of Raspberry Pi Imager
The official Raspberry Pi Imager tool makes it extremely easy to burn the operating system to a microSD card for use with the Raspberry Pi. In addition, Imager has a few advanced options hidden underneath that can sometimes be quite useful..
Raspberry Pi is a single board computer with diverse applications. While the Raspberry Pi is easy to set up and use, many people still find the process a bit daunting.
The official Raspberry Pi Imager tool makes it extremely easy to burn the operating system to a microSD card for use with the Raspberry Pi. In addition, Imager has a few advanced options hidden underneath that can sometimes be quite useful.
How to access advanced options in Raspberry Pi Imager
Starting with v1.6, Raspberry Pi Imager includes advanced options. Unlike the other Imager options, which are presented first in the application, these options are not easily accessible; because they are hidden at first. There are two ways to access them:
- With a shortcut. On a Linux or Windows computer, you can do this by opening the Imager application and pressing the keyboard shortcut Ctrl + Shift + X . If you're on a Mac, use Command + Shift + X .
- Additionally, if you select Choose OS from the Imager main menu and then select an operating system, a gear icon will appear at the bottom right; Click here to open advanced options.

What advanced options does Imager provide?
When you open the Advanced options window , you'll see a bunch of settings to use. Here's a quick overview of these options and how to use them.
1. Set Hostname

Hostname is an identifier for your Raspberry Pi. It determines how your device appears on the network. Tick the Set hostname checkbox , tap the text field and give your Pi a unique name instead of the default raspberrypi .
2. Enable SSH
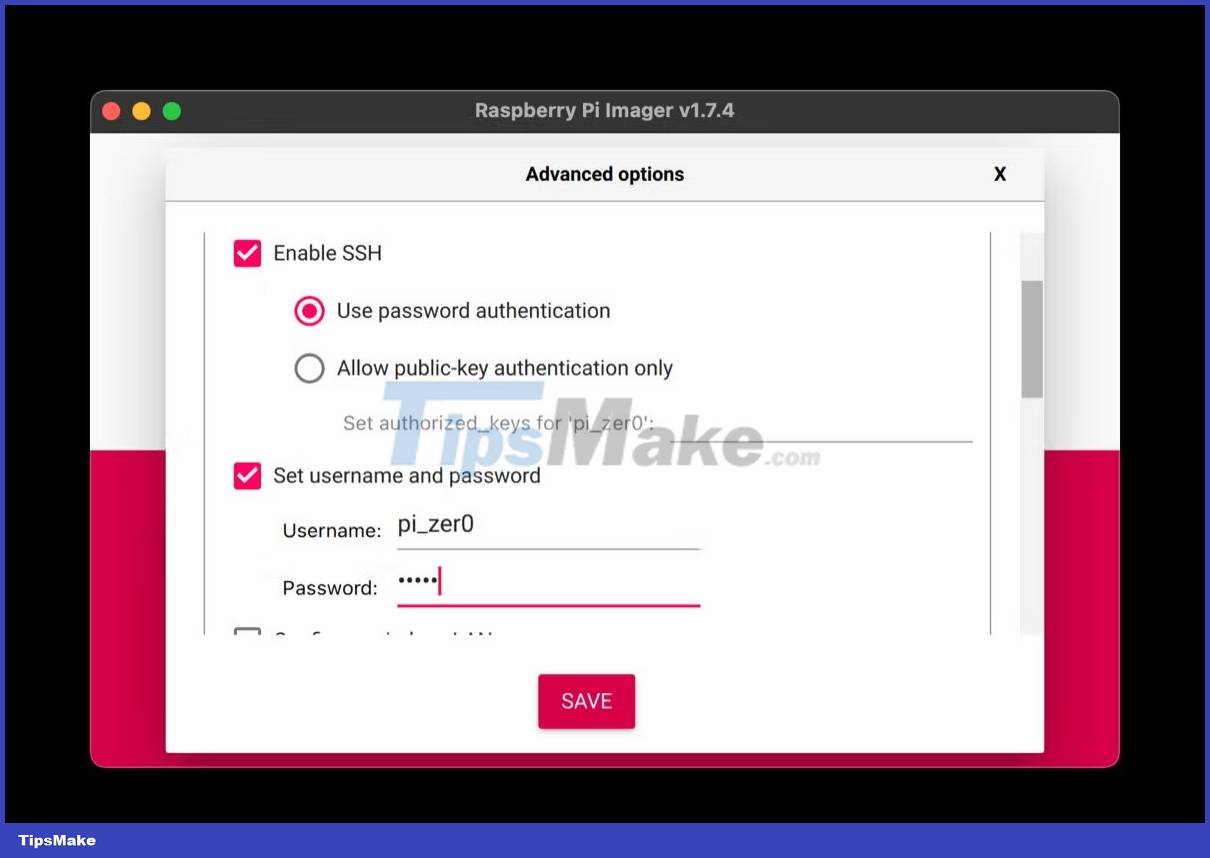
SSH or Secure Shell allows you to remotely access your Raspberry Pi through a terminal on another device over an unsecured network. It is especially useful when you need to work on Raspberry Pi in a headless installation.
Tick the Enable SSH checkbox and make sure Use password authentication is selected. Now enter your preferred username in the Username field and a strong password in the Password field .
Alternatively, you can use public key authentication, in which case you need to select Allow public-key authentication only and enter the authorized keys for your computer. To generate an authorized key, enter the command ssh-keygen in Terminal; Press Enter to skip the file renaming, add an optional passphrase, then copy the contents of the public key file - id_rsa.pub by default - into the field in the Imager.
3. Configure Wireless LAN

Raspberry Pi requires an Internet connection to install programs, browse the Internet, and perform some other operations. While you can configure it later, Imager allows you to do it first so that your Pi automatically connects to the network when it first boots up.
To do this, enable the option by ticking the Configure wireless LAN checkbox . Then enter the SSID (network name) and password of the WiFi connection. Finally, use the Wireless LAN country drop-down menu and select your region.
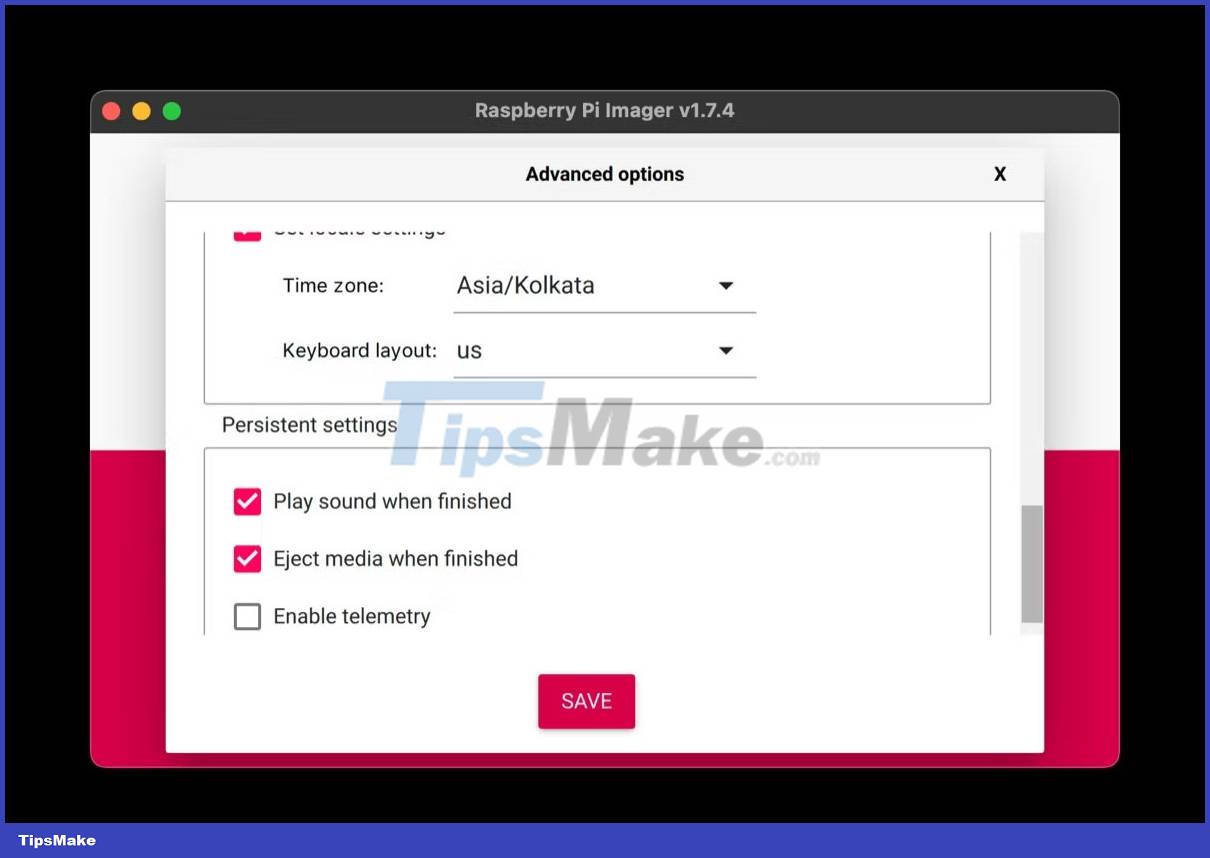
4. Set Locale Settings
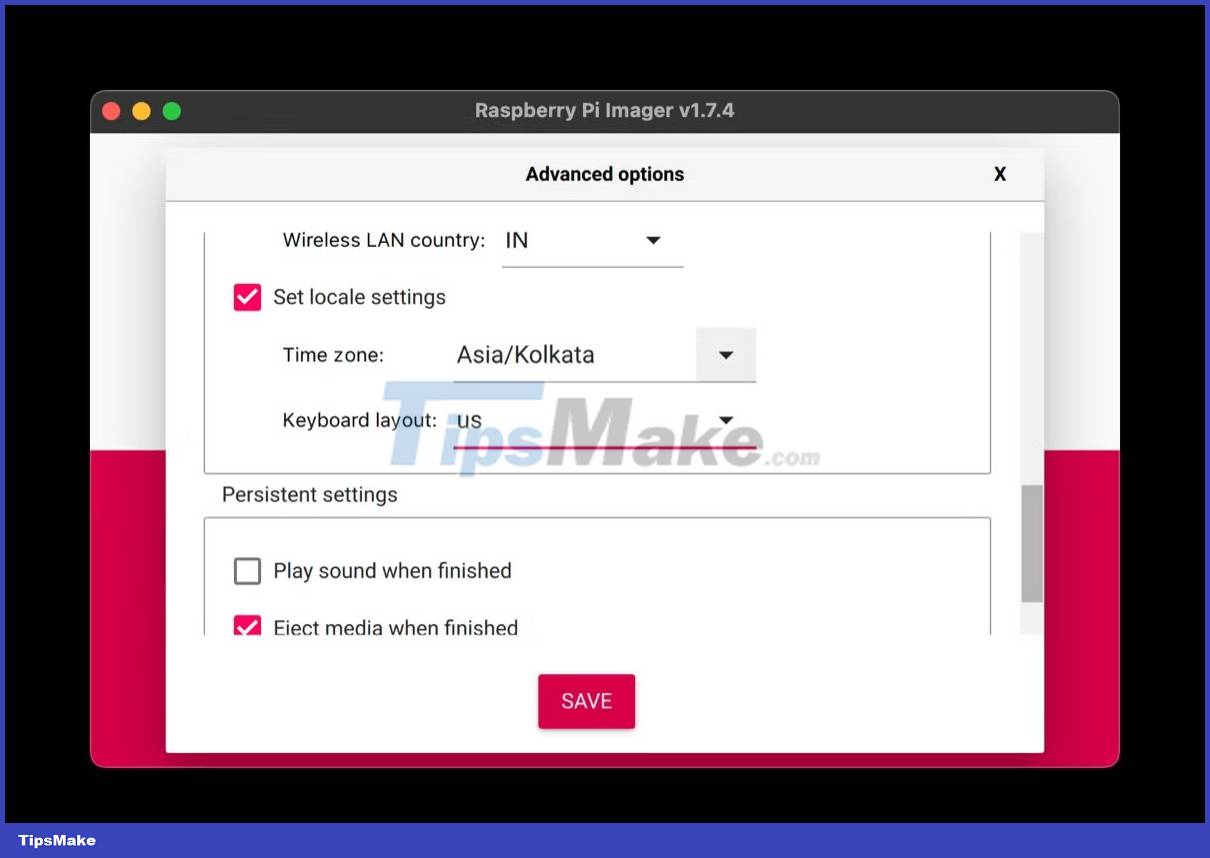
Language settings are parameters that define various country-specific options. In Imager you can use them to set the time zone and keyboard layout.
Start by ticking the Set locale settings checkbox . Then use the Time zone and Keyboard layout drop-down buttons to set them up based on your zone.
Save settings
Finally, after you have configured the advanced options in Imager, you need to save them. To do this, scroll to the top of the page, click the Image customization options drop-down box , and then select:
- for this session only : If you only want to apply the changes to the current session or…
- to always use : If you want to use the same configuration settings for every subsequent writing process
When done with the advanced options, scroll to the bottom and press the SAVE button .

Other settings
Besides the configuration options, the Raspberry Pi Imager advanced options window offers you a few settings. It calls them "persistent installs" and includes options:
- Play sound when finished : It plays a notification sound to alert you when Imager is done writing the operating system to your microSD card.
- Eject media when finished : As the name suggests, this option automatically ejects the microSD card as soon as the operating system is written to the card.
- Enable telemetry : By default, every time you use the Imager tool, it sends some of your data - called telemetry, for diagnostic and feedback purposes - to the Raspberry Pi website to generate a statistics page. . If you feel this violates your privacy, you can uncheck the Enable telemetry option to prevent Imager from collecting your data later.