Table of Contents
This guide explains how to add a Missing Draw Tab to the Ribbon in Microsoft Office, with clear steps, practical tips, and important checks before you begin.
Add the Draw tab to the Ribbon of Microsoft Office
Don't worry, the task is very simple, so it won't take long to complete.
The first step to do here is to open the Microsoft Office app of your choice - for example, Word, Excel, or PowerPoint.
Remember that the Draw tab is available in every toolkit software, so activate a piece of software where you're ready to draw.
Missing the Microsoft Word Draw tab?
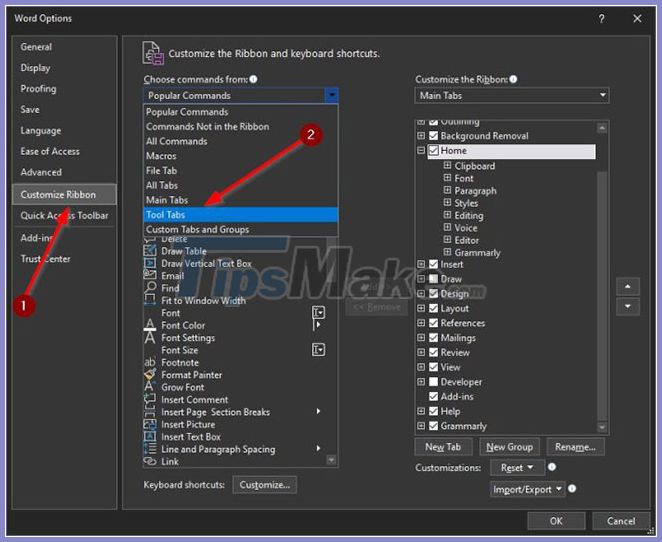
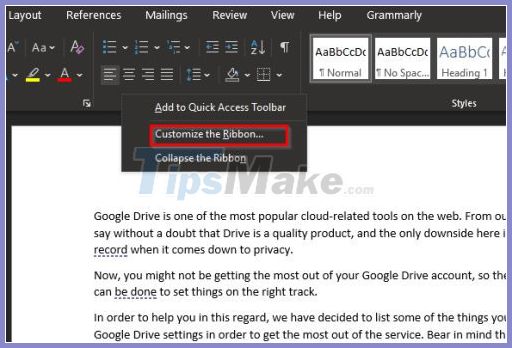
After opening your document, customize the Ribbon for more Draw tabs.
To do this, right-click on an empty part of the Ribbon and from there choose Customize the Ribbon to open a new window.
Alternatively, you can open the Options section by clicking File> Options> Customize the Ribbon , and that's it!
Add Draw to the Main tab on the Ribbon
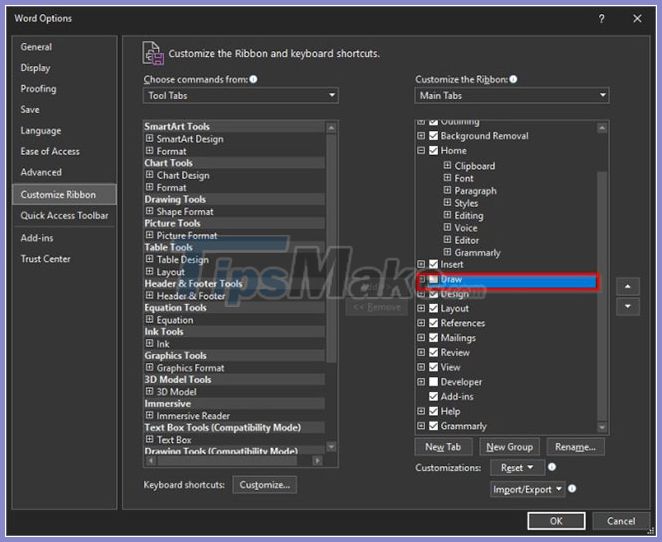
The next thing to do here is to add Draw to the Main tab on the Ribbon, and this will be done quickly.
After opening Customize the Ribbon , click on the drop-down menu under Choose commands from. We recommend that you choose the one called Tool Tab , then navigate down to Ink Tools.
Select Draw , then click the Add button in the middle to push it to the Main Tab. In some cases the Draw tool will be in the Main Tab and all you have to do is tick the box to activate it.
FAQ
What should I know about Add a Missing Draw Tab to the Ribbon in Microsoft Office?
Focus on the key features, requirements, limitations, and practical use cases explained in this guide.
How do I get the best results with Add a Missing Draw Tab to the Ribbon in Microsoft Office?
Follow the recommended steps, use current software or information, confirm compatibility, and review settings before major changes.
Are there any risks or limitations?
Potential limitations depend on compatibility, data quality, cost, privacy, support, and how the product or method is used.
Related Articles
 5 Tips 'VIP' on Office 20105 minutes read
 Backup and Restore Office 2010 Ribbon Toolbar: Tutorial3 minutes read
 How to Use Office 2003 Menus and Toolbars in Microsoft Office5 minutes read
 Hide the Ribbon Toolbar in Word 2013: Ribbon Word 20133 minutes read
 The Default Settings Should Change on Microsoft Office8 minutes read
 Microsoft Officially Stopped Supporting Office 20073 minutes read
Reader Comments 0
Sign in with email or Google to join the discussion.