How to Group and Outline Excel Data
Part 1 of 2:
Outlining Automatically
-
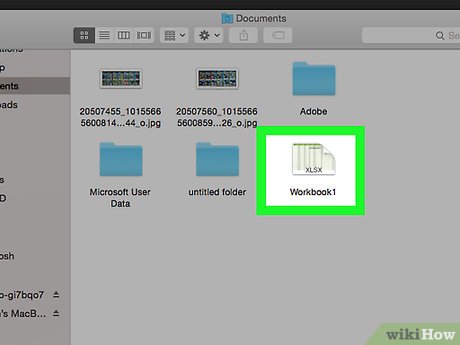
 Open your Excel document. Double-click the Excel document to open it.
 -
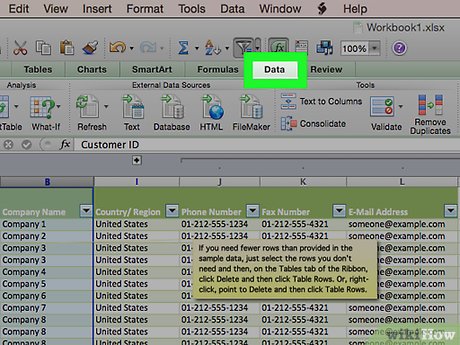
 Click the Data tab. It's in the left side of the green ribbon that's at the top of the Excel window. Doing so will open a toolbar below the ribbon.
 -
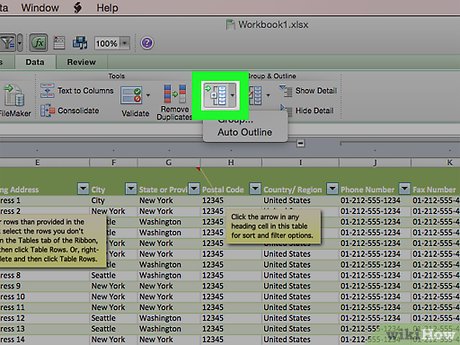
 Click the bottom of the Group button. You'll find this option on the far-right side of the Data ribbon. A drop-down menu will appear.
 - Click Auto Outline. It's in the Group drop-down menu.
- If you receive a pop-up box that says "Cannot create an outline", your data doesn't have an outline-compatible formula in it. You'll need to manually outline the data.
-
 Minimize your data. Click the [-] button at the top or on the left side of the Excel spreadsheet to hide the grouped data. In most cases, doing this will only display the final line of the data.
 -
 Clear your outline if needed. Click Ungroup to the right of the Group option, then click Clear Outline... in the drop-down menu. This will ungroup and unhide any data that was minimized or grouped previously.
Part 2 of 2:
Outlining Manually
-
 Select your data. Click and drag your cursor from the top-left cell of the data you want to group to the bottom-right cell of the data.
 -
 Click Data if this tab isn't open. It's in the left side of the green ribbon at the top of Excel.
 -
 Click Group. It's on the right side of the Data toolbar.
 -
 Click Group…. This option is in the Group drop-down menu.
 -
 Select a group option. Click Rows to minimize your data vertically, or click Columns to minimize horizontally.
 -
 Click OK. It's at the bottom of the pop-up window.
 -
 Minimize your data. Click the [-] button at the top or on the left side of the Excel spreadsheet to hide the grouped data. In most cases, doing this will only display the final line of the data.
 -
 Clear your outline if needed. Click Ungroup to the right of the Group option, then click Clear Outline... in the drop-down menu. This will ungroup and unhide any data that was minimized or grouped previously.
Share by
Marvin Fry
Update 09 March 2020


