How to Design a Form
Designing a form is a common task in many types of office applications. At times, you may need to update an older format that is no longer useful. In other cases, the goal is to start fresh and create something brand new. In both....
Method 1 of 2:
Designing a Form
-
 Determine the types of information that must be entered in the fields of the form. This will depend on the intended use of the document. Identify how many different pieces of information must be captured, and relate that to the number of fields required to provide adequate space for that data.
 -
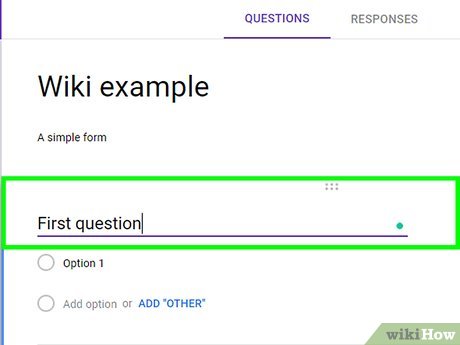 Arrange the information types in a logical sequence. The idea is to create a flow from 1 field to the next that will make sense to those who will use the document. A very simple form that is intended to capture basic contact information may follow a sequence of date, first name, last name, address, city, state or province, zip or postal code, telephone and fax numbers and a field for an email address.
 -
 Apply the arrangement to the creation of a form template. Software applications typically make it easy to create fields that can be moved by using a computer mouse to drag the field into position on a blank document. Create and place fields that correspond to the data that must be entered on the form in the same sequence you chose earlier.
 -
 Customize each field on your form template. Most software programs used to make forms allow you to adjust the length and width of each field, as well as restrict the type of characters that are allowed in each field. This makes it possible to ensure that dates and telephone numbers are entered in a uniform manner.
 -
 Add drop down menus when appropriate. If the form is to be used in an online environment or part of a template in a database, adding drop down menus will often require creating a table and associating it with the appropriate field. Specific instructions on how to accomplish this can be found in the support materials that came with the software.
 -
 Test-drive your form. Before releasing the form for general use, take the time to enter some data and make sure the result is what you expected. Should the data not get entered properly, or 1 or more fields do not function as anticipated, return to the form template and make adjustments.
Method 2 of 2:
Creating a Form in Microsoft Word
-
 Open Word. Word has a blue icon with a white "W". You can open Word in the Windows Start menu on PC, or the Applications folder on Mac. Click on the icon to open Word.
 -
 Click a black document. It's the icon that resembles a sheet of paper at the top of the list of templates. This opens a blank document.
- Alternatively, you can type Forms in the templates search box. Click a template that matches the form you want to create and click Create.
-
 Create the static parts of your form. The static parts of the form is the text that cannot be edited by the person filling out the form. This includes any instructions, introductions, as well as labels that inform the user what information to provide. Labels can include "Name", "Date", "Email" and any other information you want to collect. Leave space for the answer elements of the form.
 -
 Click File. It's in the menu bar at the top of the screen.
 -
 Click Options. It's in the drop-down menu below "File".
 -
 Click Customize Ribbon. It's in the Options menu. This displays the "Customize Ribbon" menu, which allows you to customize the tabs menu at the top of the screen.
 -
 Select Main Tabs. It's in the drop-down menu at the top of the "Customize Ribbon" menu. This allows you to customize the main tabs menu.
 -
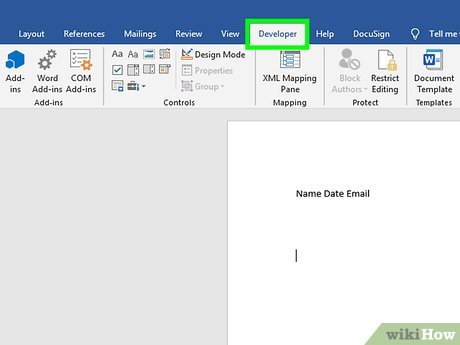
 Click the checkboxnext to "Developer" and click Ok. This adds the developer options to your main tabs menu. You can use the content control options in the Developer tab to add form elements that users can fill out.[1]
-
 Click where you want to add a form element. These are the areas where users fill out their own information.
 -
 Click the Development tab. This displays the development properties at the top of the screen.
 -
 Click one of the control icons. This adds a customizable element to the form that users can use to provide an answer to a question. There are a number of control icons in the "Controls" group that are useful for adding form elements. Useful form controls include the following:
- Click (Aa) or (Aa) to add a rich text or plain text box. Users can use the text box to type an answer to a question.
- Click one of the icons that resemble a menu to add a combo box or drop-down menu. Both a combo box and a drop-down menu allow users to select an option from a list. A combo box also allows them to provide their own answer.
- Click the icon that resembles a checkbox to add a checkbox. Checkboxes are useful for "Yes" or "No" questions.
- Click the icon that resembles a calendar to add a date picker. A date picker is useful for allowing users to select a date from a calendar.
-
 Click the form element that you just added. This selects the element.
 -
 Click Properties. It's in the Control group at the top of the page under the "Development" tab. This displays properties you can use to customize the element.
 -
 Adjust the properties as needed. The properties menu is going to be different for each element type. You can add text to help users, you can change the color, or add menu items to a drop-down menu. You can also protect the content control information from being edited or deleted in the Properties window.[2]
 -
 Click Ok. When you are finished adjusting the properties, click Ok to close out of the properties tab.
 -
 Click File. It's in the menu bar at the top of the screen.
 -
 Click Save. This saves your form.
- You can also save the form as a template by clicking Save As in the "File" menu and then selecting Word Template next to "Save as Type".