How to Give System Permissions for Apps on MacOS Catalina
Starting with macOS 10.14 Mojave, Apple has introduced a new security feature that ensures third-party applications work safely with your data. In short, you need to manually grant permission to your apps, so they can work with files on...
Table of Contents
Method 1 of 3:
Granting full disk permission
-
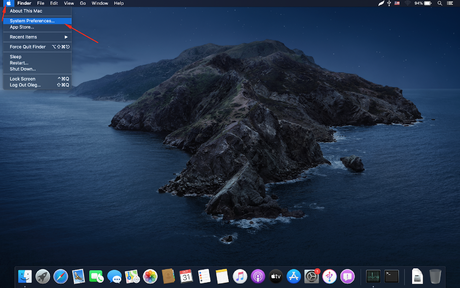 Go to System Preferences. Click on the Apple icon at the top-left corner of your desktop, then click System Preferences
 -
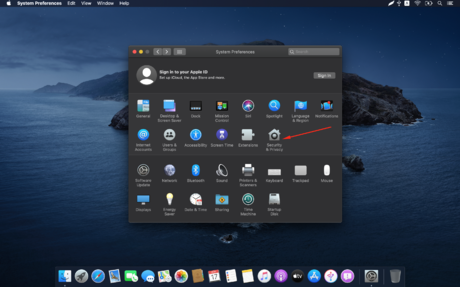 Open Security & Privacy section.
 - Switch to the Privacy tab. It's the last of four tabs in the row.
-
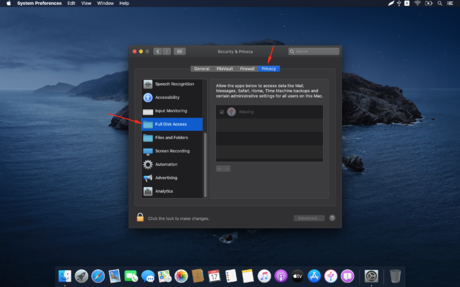 Select 'Full Disk Access' from the list.
 -
 Click on the 'Lock' icon to unlock changes. You'll need to enter your admin password at this point.
 -
 Click on the checkbox next to the app to give it full disk access. If the app in question is not on the list, you can add it with the + button under the app list, or just drag & drop it from the Applications folder.
 - Click on the Lock icon in order to save changes.
Method 2 of 3:
Granting selected permissions
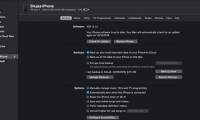
- Choose, what permissions are required by the app. You can selectively grant access to the following data:
- Apple Mail
- Photos
- Calendar
- Contacts
- Messages
- Safari bookmarks
- Documents folder
- Screen recording
- Desktop folder
- iCloud Drive
- Downloads folder
- External hard drives
-
 Go to System Preferences. Click on the Apple icon at the top-left corner of your desktop, then click System Preferences.
 -
 Open Security & Privacy section.
 - Switch to Privacy tab. It's the last of four tabs in the row.
- Click on the section you want to grant permission for.
- Click on the 'Lock' icon to unlock changes. You'll need to enter your admin password at this point.
-
 Click on the checkbox next to the app to give it selected permissions. If the app in question is not on the list, you can add it with + button under the app list, or just drag & drop it from the Applications folder.
 - Click on the Lock icon to save changes.
Method 3 of 3:
Grant access to files in specific locations
- Choose, which file locations you need to share. You can selectively grant access to folders in the following locations (apps may not ask for permissions in all locations):
- Removable volumes;
- Network volumes;
- Downloads folder;
- Documents folder;
- Desktop folder.
-
 Go to System Preferences. Click on the Apple icon at the top-left corner of your desktop, then click System Preferences.
 -
 Open Security & Privacy section.
 - Switch to the Privacy tab. It's the last of four tabs in the row.
- Click on Files and Folders in the list.
- Click on the 'Lock' icon to unlock changes (you'll need to enter your admin password at this point).
-
 Click on the checkbox next to the file location to grant permission. If the app in question is not on the list, you can add it with the + button under the app list, or just drag & drop it from the Applications folder.
 - Click on the Lock icon to save changes.
Was this article helpful?
Your feedback helps us improve.
Related Articles
 How to fix common macOS Catalina issues15 minutes read
 Everything you need to know about macOS Catalina6 minutes read
 How to perform a clean install of macOS 10.15 Catalina6 minutes read
 How to sync iOS device with macOS Catalina4 minutes read
 How to downgrade macOS Catalina to Mojave?9 minutes read
 macOS Catalina, the new operating system for Mac computers, has just been announced by Apple2 minutes read
Reader Comments 0
Sign in with email or Google to join the discussion.