Table of Contents
This updated guide explains how to Forward Mail in Gmail through clear steps, practical examples, and important checks that help prevent common errors.

Forward Any Mail
Step 1: On the interface of your gmail account, you select a message to forward.
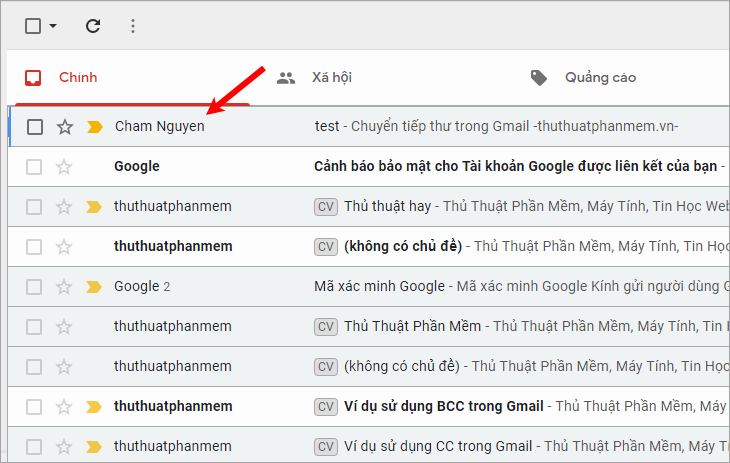
Step 2 : In the content of the message you need to forward, select Forward at the bottom of the message.

Or you choose the arrow icon next to the time sent -> Forward.

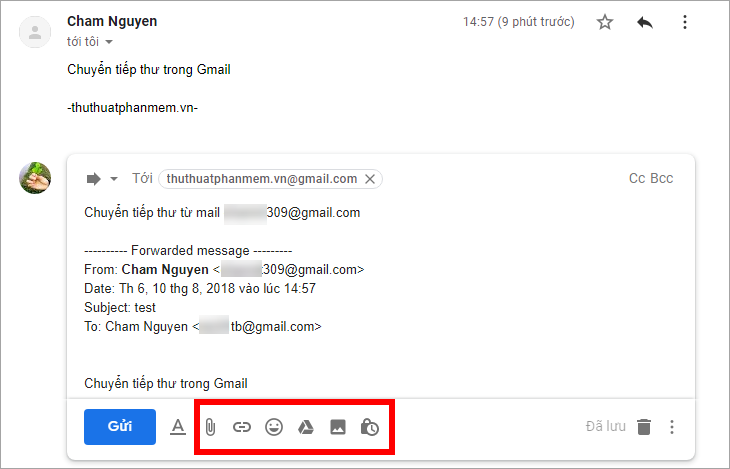
Step 3 : The message forwarding interface appears, this interface is similar to that you choose to compose a new message, but in the message delivery section, it will display the content of the message you choose to forward.

You only need to add the necessary content such as adding text, attaching files, images. similar to writing a new letter, then enter the sender to forward (you can choose Cc and Bcc to Enter the recipient's name).
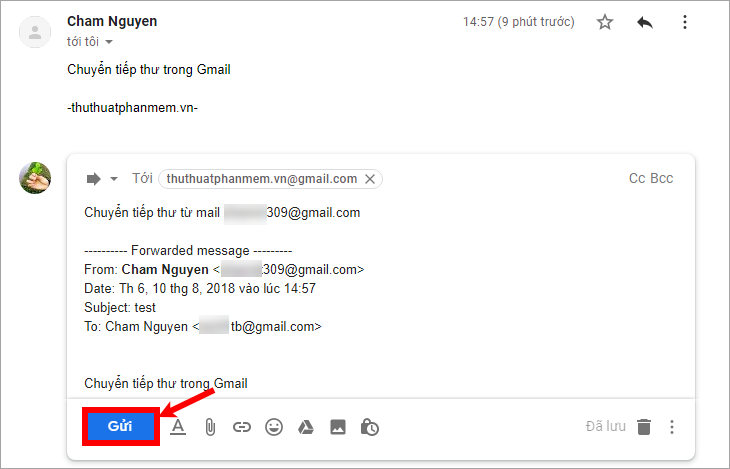
Step 4: Click Send to forward the message.
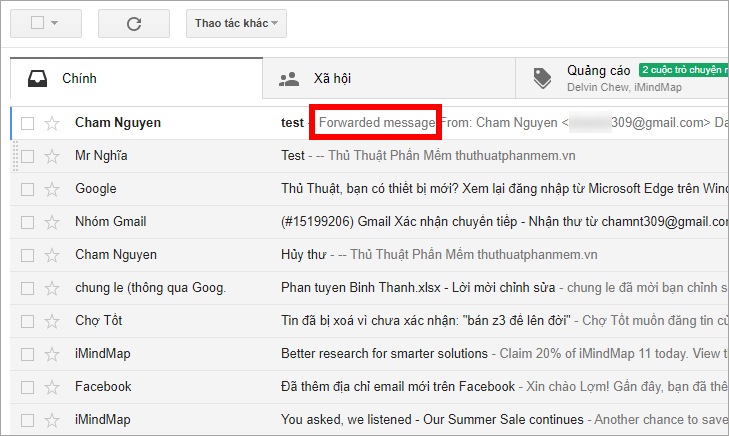
The recipient will receive a forwarded mail with a subject starting with the Forwarded message.
Automatically Forward Gmail Messages to Other Accounts
If you have two or more mails, instead of having to log in to two gmail accounts to check your inbox, you just need to set up automatically transferring mail from one gmail to another gmail account to just log in. 1 email and can still receive email from other accounts. To set up automatic forwarding you do the following:
Step 1 : On the email account you may need to forward to another account, select the gear icon -> Settings.
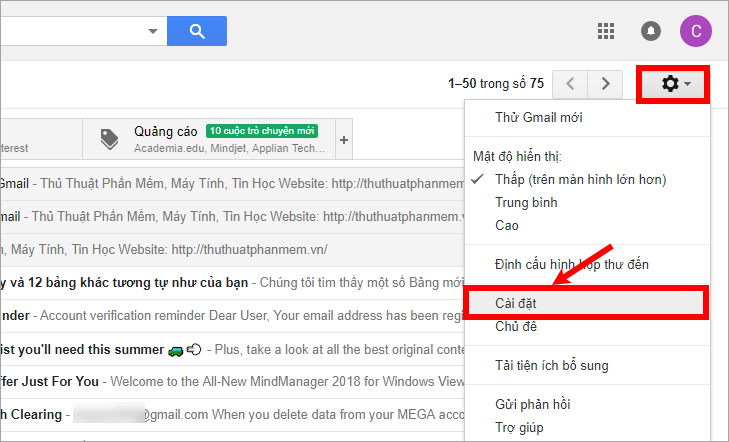
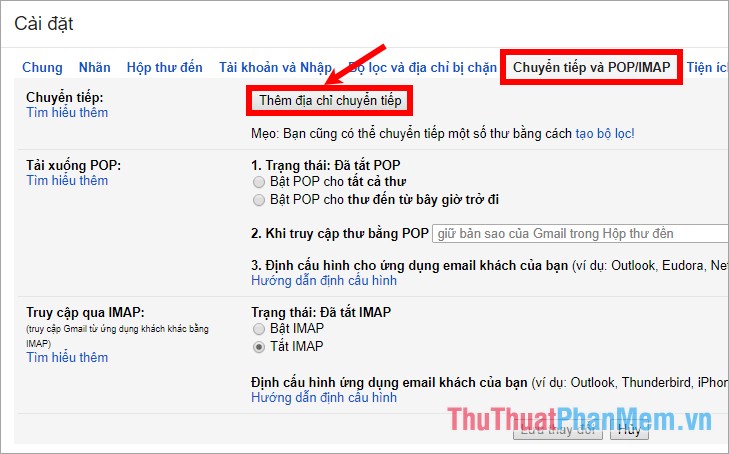
Step 2: In the Settings, select Forwarding and POP / iMAP tab , next select Add forwarding address in the Forwarding section .
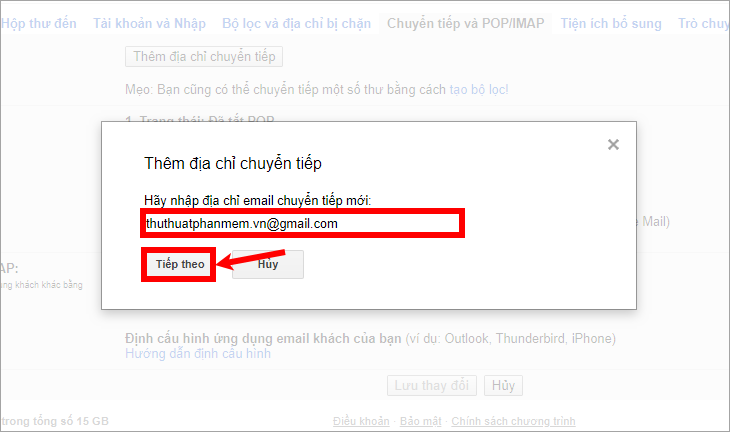
Step 3 : The dialog box Add forwarding address you enter forwarding email (this email will receive emails from the email you forward) and click Next .
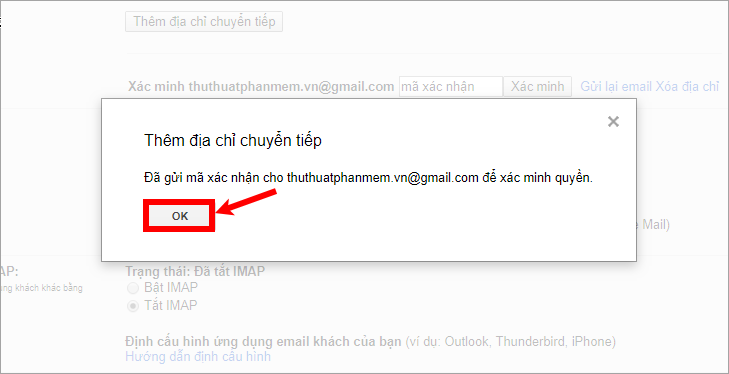
Step 4: A notice appears and select OK .
Step 5 : You log into the gmail you just entered to receive forwarding, open Gmail email Confirm forwarding , you can click the blue link to confirm forwarding.
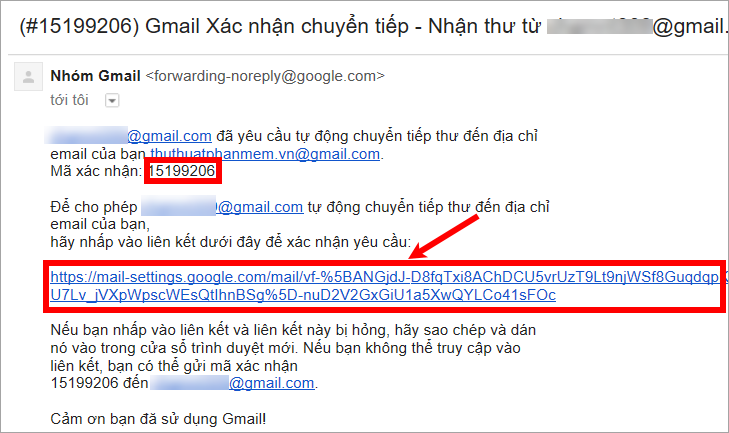
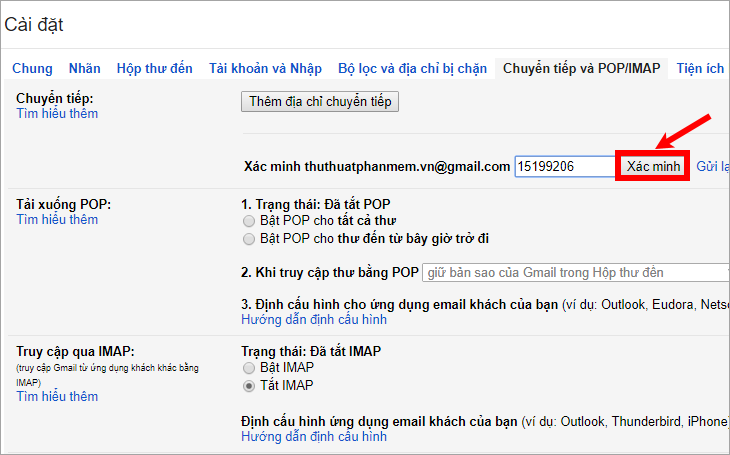
Or copy the verification code in the mail, then go back to gmail is setting up forwarding, enter the verification code in the white box next to the Word Verification and click Verify to confirm forwarding.
Step 6: A confirmation message appears, select the Forward a copy of incoming mail box . You can choose a number of options: keep a copy of Gmail in your Inbox, mark Gmail copy as read, store Gmail copy, delete Gmail copy. Then click Save Changes to save your settings.
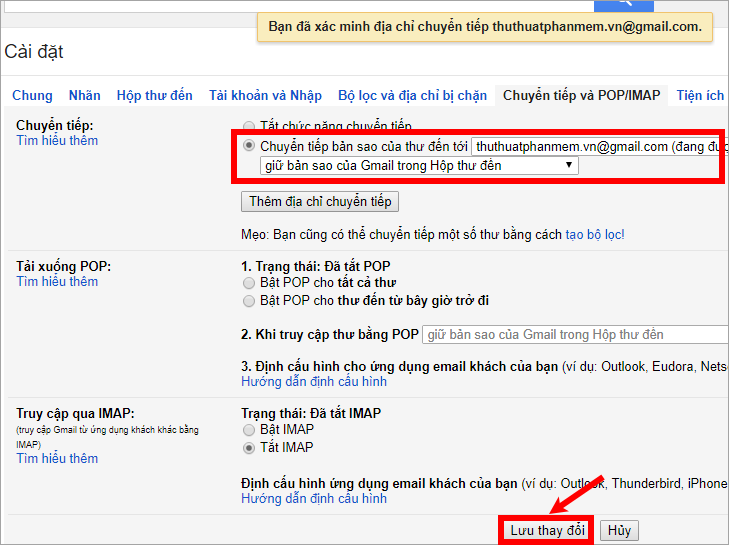
So you have set up automatic forwarding in Gmail, from now on when the incoming mail of the forwarded account will be transferred to mail TipsMake. vn@gmail. com.
Above the article has shared with you two ways to forward mail in Gmail, hope the article will help you. Good luck!
FAQ
What is the easiest way to Forward Mail in Gmail?
Start with the requirements in this guide, then follow each step in order. Check the result after every major change so problems are easier to identify.
Can beginners follow these instructions?
Yes. The process is organized into practical steps, and you can repeat any step before moving forward.
What should I check if the method does not work?
Confirm your software or device version, permissions, settings, file format, and internet connection when the task depends on online services.
Related Articles
 What Is Forward Mail? How Forward Forwarding Mail to Another3 minutes read
 How to Forward Mail from Yahoo to Gmail: Step-by-Step Guide2 minutes read
 Set up Auto-Sending, Forward Email to Another Account in Gmail?4 minutes read
 How to Forward Mail (Forwarded Mail) Has Received to Another2 minutes read
 How to Forward Emails from Yahoo to Gmail: Practical Guide7 minutes read
 How to Add Gmail to the Windows 10 Mail App7 minutes read
Reader Comments 0
Sign in with email or Google to join the discussion.