Instructions for creating incoming mail filters on Gmail
If you use Gmail as the main exchange method, especially for those who use to exchange jobs, the number of new emails is quite large. Therefore, we should have a tool to effectively manage all emails sent on Gmail.
Table of Contents
It's not too strange for a person to own one or two Gmail accounts. If anyone using Gmail is the main way to exchange jobs or subscribe to services and send information about Gmail, the number of daily messages you receive will be pretty much. If you are feeling confused about the amount of email messages, you should use the mail filtering feature available on Gmail. Users can set up mail filtering mode based on the title, sender, . and new email will automatically be sorted according to what we will set up. If you don't know how to set up or use Gmail mail filters, follow the tutorial below of Network Administrator.
Add a label
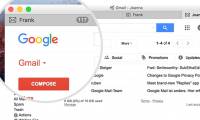
To get started, you need to add a label to your Gmail account. Look under the ' Compose ' button on the left side of the screen and scroll down until you find the ' More ' button.
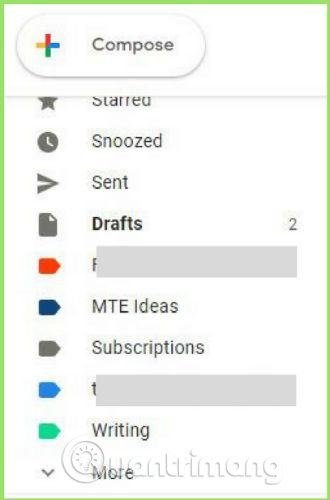
Click that button and continue scrolling if necessary to find ' Create New Label '.

Name the label to classify incoming mail by work, personal, etc. then click ' Create '. Make a new label if there are many other genre emails before applying the filter.

Add filter
After creating categories and labels for incoming emails, you can apply labels to specific emails by clicking on the drop-down arrow at the bottom of the search bar.
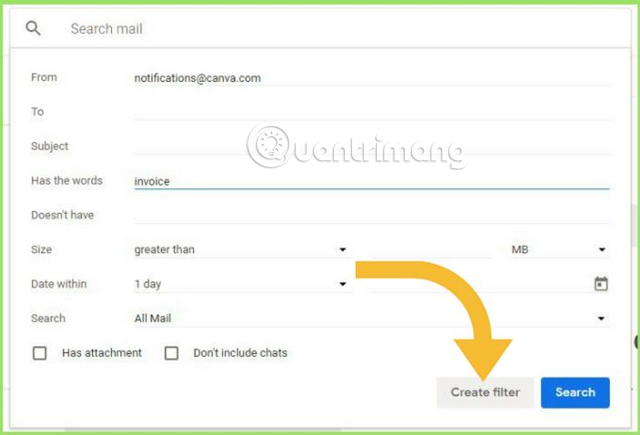
Enter the address or copy and paste in the " From " field. You can add another criterion for emails coming from this sender as email contains or does not contain a specific word, size, etc. For example, you can add conditions in the email that must be from the invoice, and emails from this sender will not be added without the invoice. When done, click Create filter to create the filter.
Then, you will see a dialog box appear to finish creating the filter, click next to ' Apply the Label ' and all the labels you create will pop up, then select one of them and click ' Create Filter ' .
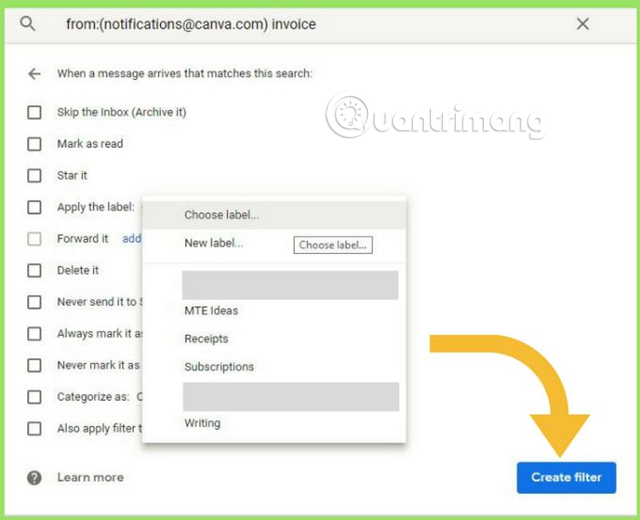
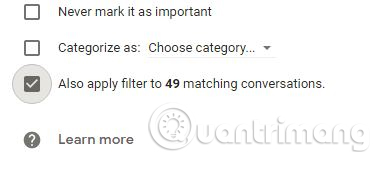
If you want the same filter to be applied to the received emails, click the checkbox to let Gmail know to add it to the appropriate conversation.
Add colors to labels
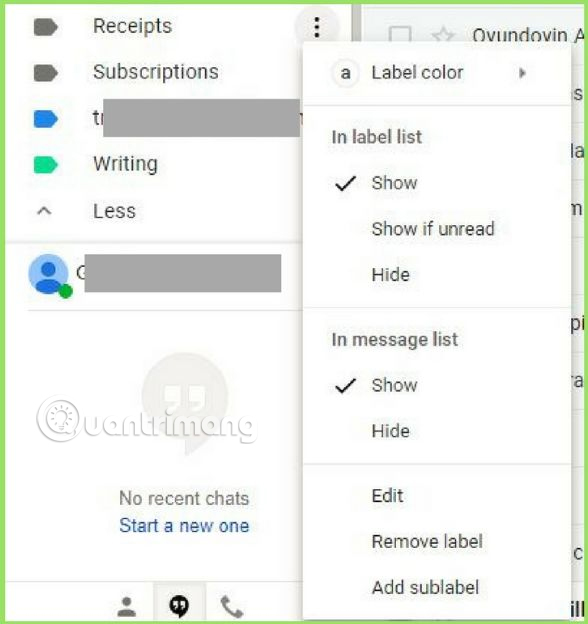
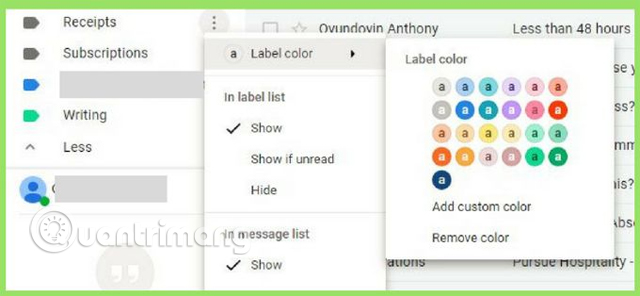
To color the Gmail code, click on the three dots next to the category and hover over the arrow next to ' Label color '.
Choose a color for your label.
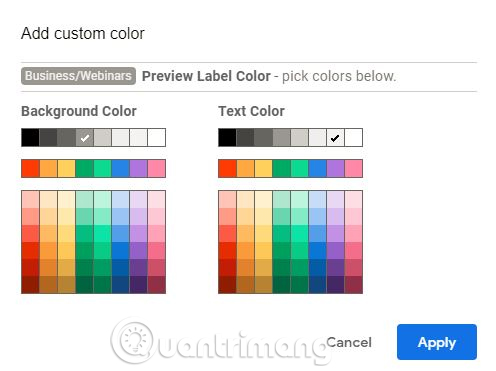
You can also use a limited number of other custom colors, but there is no way to add RGB or hex colors but you can mix different colors.
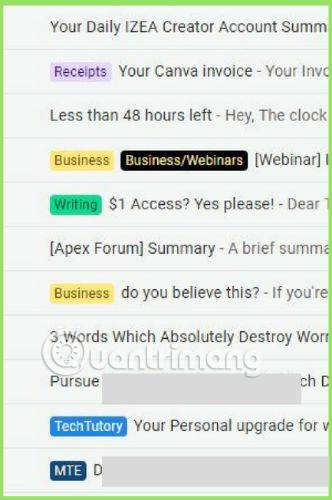
The figure below shows its shape in the inbox after adding color.

These categories can also be organized into folders by labeling them under another label. Therefore, this email will have two cards.

You can see the inbox shape as shown below after adding two cards for an email.
Gmail will now automatically apply those filters to all your incoming messages. However, it will take some time to edit. For example, if you buy something from a new provider, you will have to add the 'Receipts' filter to this sender's email address.
You should not label all emails, only for specific emails. Adding this color label also helps you find promotional emails to transfer them to its inbox instead of the inbox.
Refer to the following articles:
- Instructions to create Group, Email group in Gmail
- 2-layer security for Gmail how?
- Become a player using Gmail with the following 5 tips
I wish you all success!
Was this article helpful?
Your feedback helps us improve.
Related Articles
 How to create filters in Gmail to classify messages?6 minutes read
 How to Set Up Email Filters in Gmail, Yahoo Mail, and Outlook8 minutes read
 Add a whitelist for Gmail2 minutes read
 How to forward mail in Gmail4 minutes read
 Instructions on how to send mail with Gmail5 minutes read
 Great way to search for Gmail, search for super cool things5 minutes read
Reader Comments 0
Sign in with email or Google to join the discussion.