Configure Window Mail to connect to Gmail
Following the series of articles on how to configure Windows Mail to connect to different e-mail providers, today we will step by step guide how to configure Windows Mail to connect to Gmail accounts. As you know, Gmail is an email account that supports POP3 for free. However to use this feature you need to enable it at g
Following the series of articles on how to configure Windows Mail to connect to different e-mail providers, today we will step by step guide how to configure Windows Mail to connect to Gmail accounts. As you know, Gmail is an email account that supports POP3 for free. However to use this feature you need to enable it at the Gmail web interface.
How to enable POP3 in Gmail
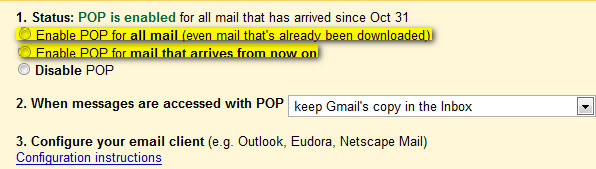
Before starting, check whether your POP3 Gmail account is enabled. To do so, log in to your Gmail account and select Settings -> Forwarding and POP / IMAP

Select one of the following two options to activate POP3 service: Enable POP for all mail , or Enable POP for mail that arrives from now on .
How to configure Windows Mail
Start Window Mail on Tools and press the Accounts button as shown below.

Then click the Add button.

Select the E-mail Account option and click Next .

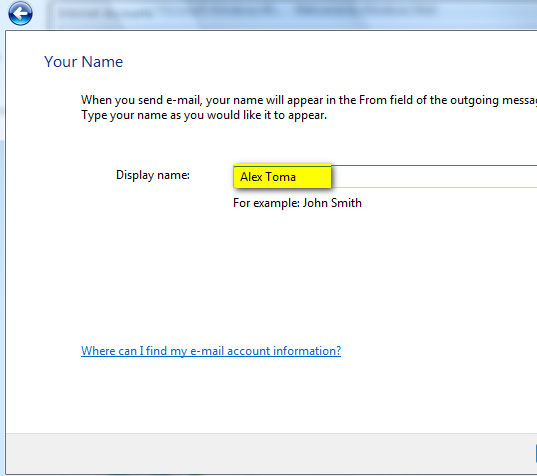
Select the name and enter the display name that will appear in the message you send and click Next to move to the next window.
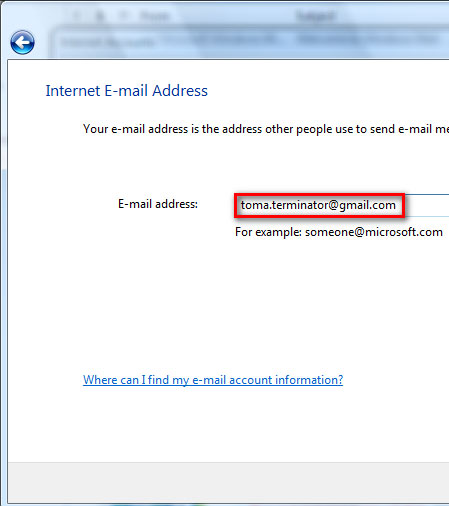
You are required to enter your e-mail address. Fill in and click Next .
In the next window you will have to set up the e-mail server. At the Incoming e-mail server select POP3 and at the Incoming & Outgoing server enter the name as shown below and check the Outgoing server requires authentication option . When done, click Next .

Enter your e-mail address and password at the Internet Mail Logon window. For ease of use, select the Remember password and click Next .

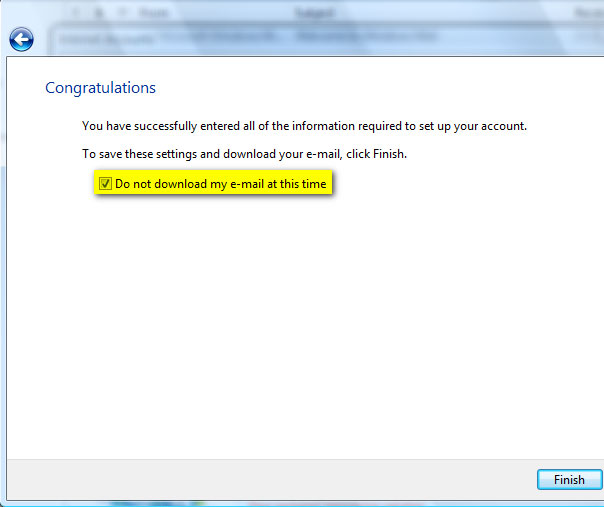
At this point your work is almost completed. Click Do not download my e-mail at this time and then click the Finish button.
Internet Accounts window is opened. Choose your Gmail account and then click Properties .
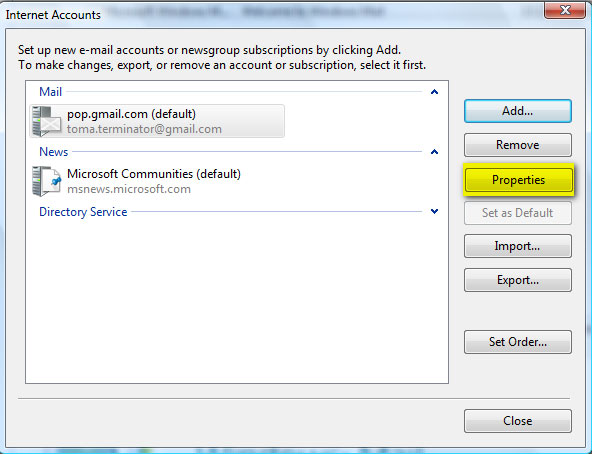
At Advance tab, enter port 465 for SMTP and port 995 for POP3 . Please click " This server requires a secure connection (SSL) " for both POP3 and SMTP.
If you want your mail to be stored on the Gmail server, don't forget to click Leave a copy of messages on server . If you do not select this option, when your mail is downloaded it is automatically deleted from Gmail. Once completed, click OK .

Windows Mail is now configured to connect to your Gmail account. Click the Send / Receive button to start sending and receiving mail.
Was this article helpful?
Your feedback helps us improve.
Related Articles
 Configure POP3 Gmail on Outlook, Windows Mail, Thunderbird8 minutes read
 How to add Gmail to the Windows 10 Mail app6 minutes read
 Gmail or Proton Mail is better?10 minutes read
 6 tips little known Gmail5 minutes read
 Proton Mail: Privacy-Focused Email App That's Almost the Perfect Gmail Alternative9 minutes read
 How to quickly open the compose window in Gmail1 minutes read
Reader Comments 0
Sign in with email or Google to join the discussion.