Table of Contents
This guide explains how to resolve the Error That iPhone Receives Wi-Fi but Cannot Access the, starting with the most likely causes and moving through practical troubleshooting steps.
1. Turn off the Wi-Fi modem and turn it on again
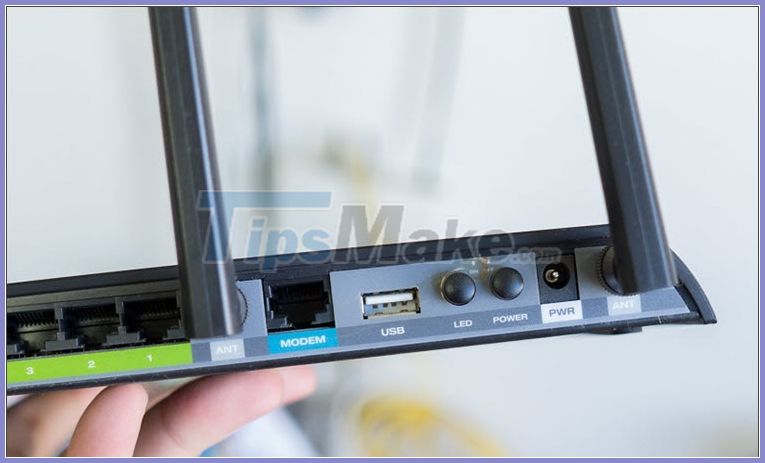
Sometimes your Wi-Fi modem gets "overloaded" due to long-term operation. You should turn off the modem for 5 minutes and then turn it on again to let the modem re-assign new IP addresses for the device.
2. Turn off Wi-Fi on iPhone and reopen it
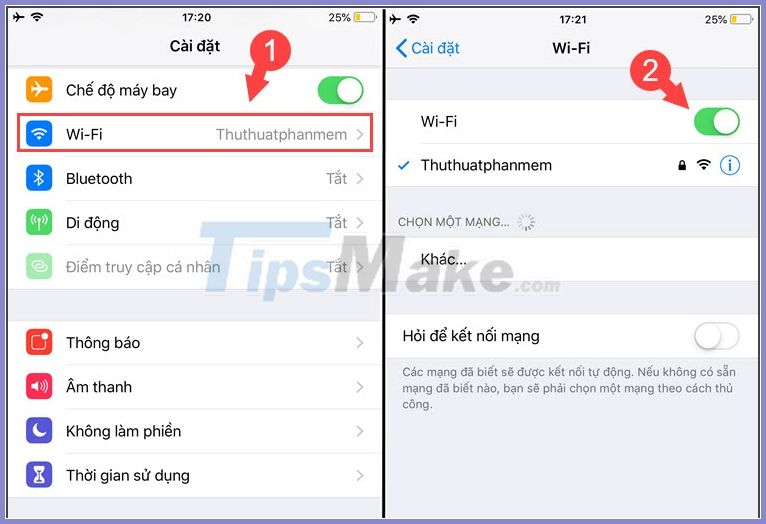
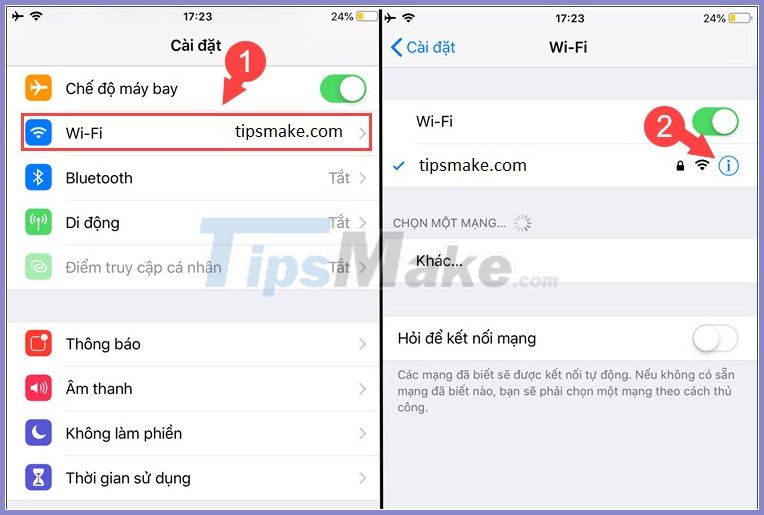
Besides turning off, turning on the Wi-Fi modem, you also do the same with the iPhone by going to Settings => Wi-Fi (1) => Set the Wi-Fi to On / Off (2) .
3. Restart iPhone

The method of rebooting the device is one of the fairly simple, but sometimes surprisingly effective ways. Press and hold the power key for 5 seconds to show the words slide to power off and slide the instructions from left to right to turn off the power. Then, open your iPhone again and check.
4. Forget the Wi-Fi network and reconnect
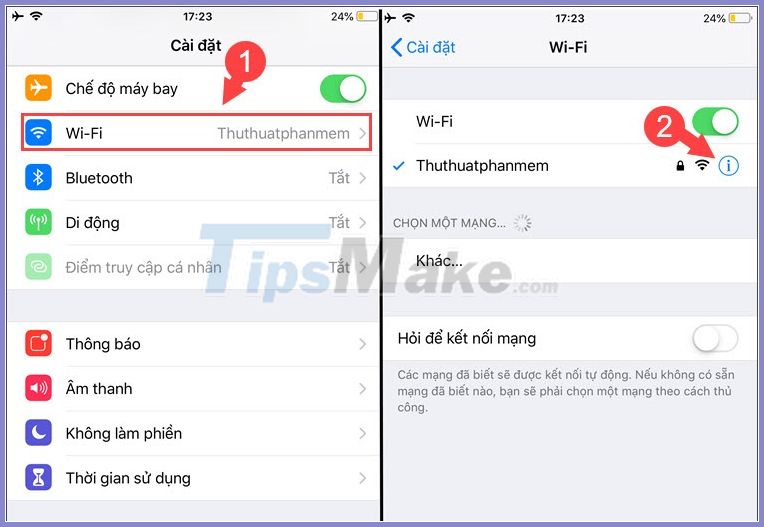
Step 1: Go to Settings => Wi-Fi (1) => touch the letter icon (i) on the Wi-Fi name (2) .
Step 2: You choose Forget this network (1) => Forgot (2) .

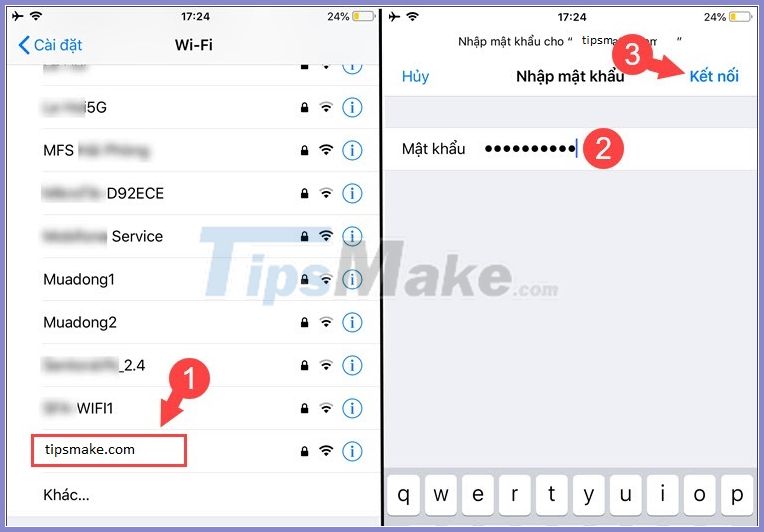
Step 3: Then, go back to the Wi-Fi section and tap on the old Wi-Fi network (1) => enter the password (2) => Connect (3) .
5. Change the IP address
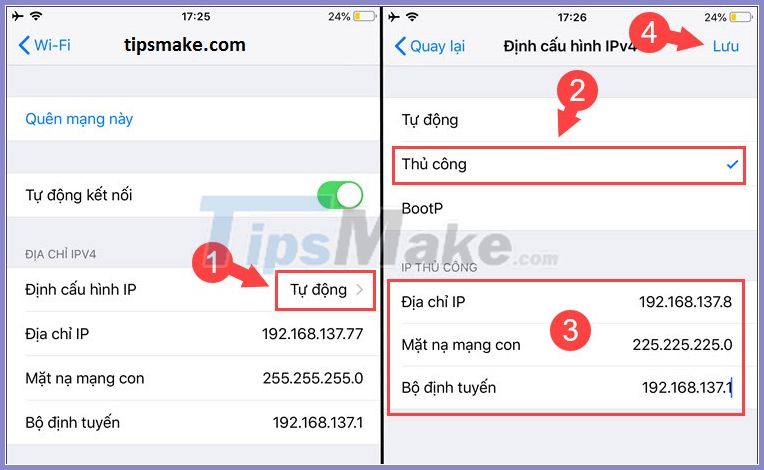
Step 1: Go to Settings => Wi-Fi (1) => touch the icon (i) on the Wi-Fi network (2) .
Step 2: Tap on Configure IP (1) => Manually (2) => re-enter a new IP address (3) => Save (4) .
Note : You should enter the correct Router's IP address usually of the form 192.168. xxx.1 and enter the IP Address with the extension greater than 1.
6. Software update
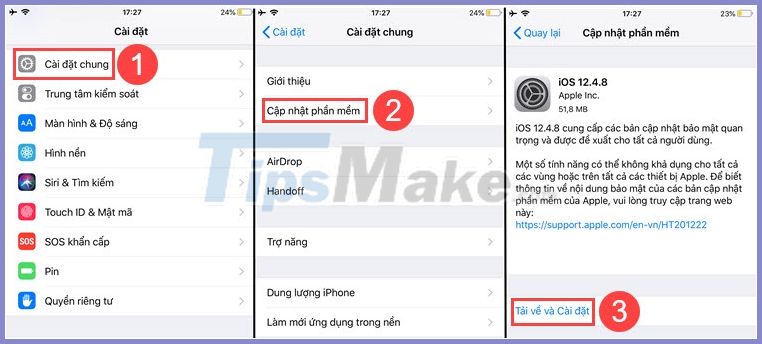
Sometimes minor bugs on iOS can be fixed with software updates. Please go to Settings => General (1) => Software Update (2) => Download and Install (3) to update iOS software to new version.
7. Reset network settings
Step 1: Go to Settings => General (1) => Reset (2) .
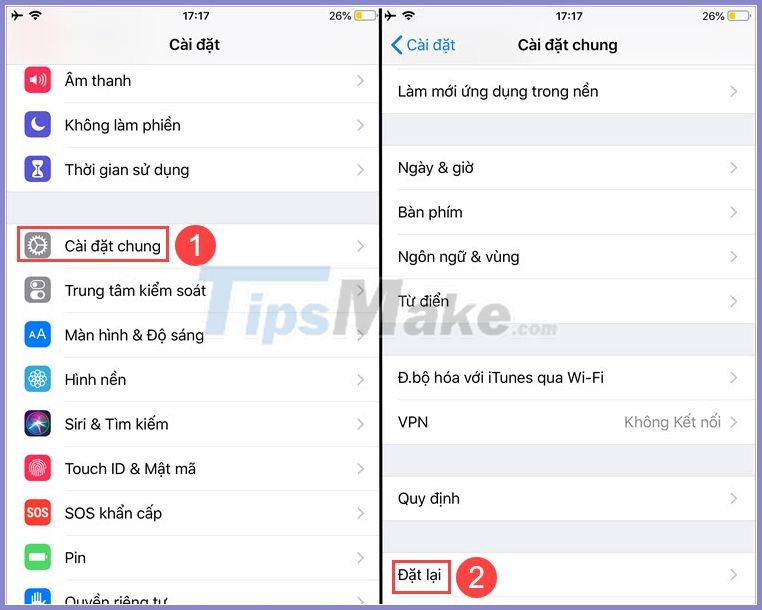
Step 2: Choose Reset network settings (1) => Reset network settings (2) .
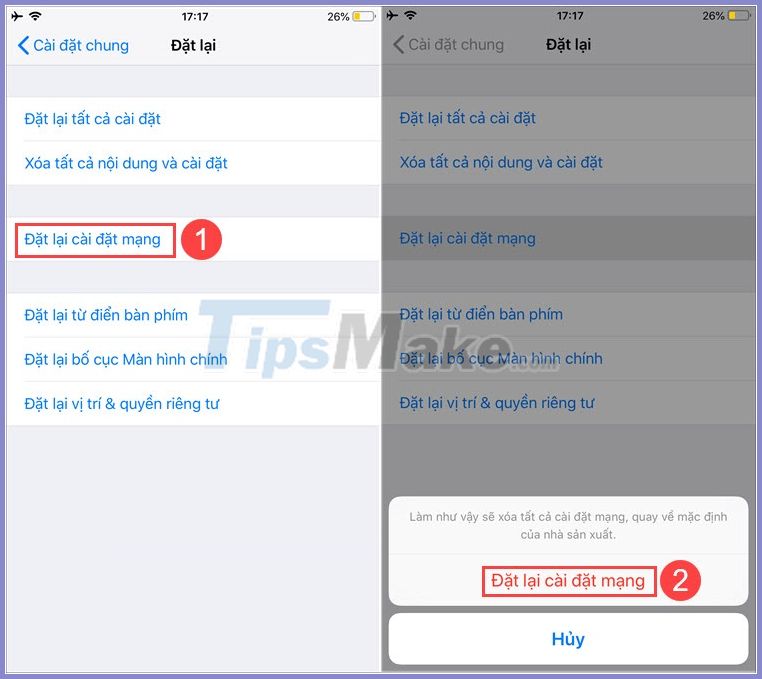
With the ways to fix the error of iPhone receiving Wi-Fi but not accessing the network in the article, you can fix this problem easily.
You should also note that before following the instructions in the article, you must ensure that your Internet modem is working properly and that other devices are still connected to the Internet normally, but your iPhone is not. instructions above.
Good luck!
FAQ
What usually causes the Error That iPhone Receives Wi-Fi but Cannot Access the?
The cause may involve incorrect settings, outdated software, damaged files, permission problems, device compatibility, or a temporary system issue.
What should I try first to resolve the Error That iPhone Receives Wi-Fi but Cannot Access the?
Restart the affected app or device, install pending updates, verify settings and connections, and follow the troubleshooting steps in order.
How can I prevent the issue from returning?
Keep software updated, maintain backups, avoid interrupted installations, and review system or device settings after major changes.
Related Articles
 Cause and How to Fix iPhone Error to Catch Wi-Fi but Not Access to6 minutes read
 Fix Wi-Fi No Internet Access Error7 minutes read
 How to Fix WiFi Error Cannot Be Accessed: Troubleshooting Guide13 minutes read
 Fixing the Error 'Wi-Fi Doesn't Have a Windows 10 Configuration2 minutes read
 How to Reset the Network, Reset the Network Connection on iPhone4 minutes read
 How to Fix the Problem of Not Connecting to Wi-Fi in Windows5 minutes read
Reader Comments 0
Sign in with email or Google to join the discussion.