7 best network troubleshooting tools 'save' your home network
Do you often experience network problems?Can not access?Do you feel frustrated and want to connect as soon as possible?This article willhelp you "diagnose" network problemsand offer Windows built-in tools and a few third-party utilities to troubleshoot your network.
- Some troubleshooting tips for Windows network
- How to troubleshoot laptop lost Wi-Fi network
Network troubleshooting tools
- 1. Command Prompt commands
- 2. Network troubleshooting in Windows
- 3. Speedtest
- 4. Wireshark
- 5. NetCrunch Tools
- 6. Microsoft Message Analyzer
- 7. JDisc Discovery
1. Command Prompt commands

The first place you should visit when encountering a network problem is the Command Prompt.You can use the following two commands to troubleshoot the network.
First,ipconfig provides information about your current connection. One of the most useful items here is IPv4 Address - any address starting with 169 means that your computer does not receive a valid IP address from the router.
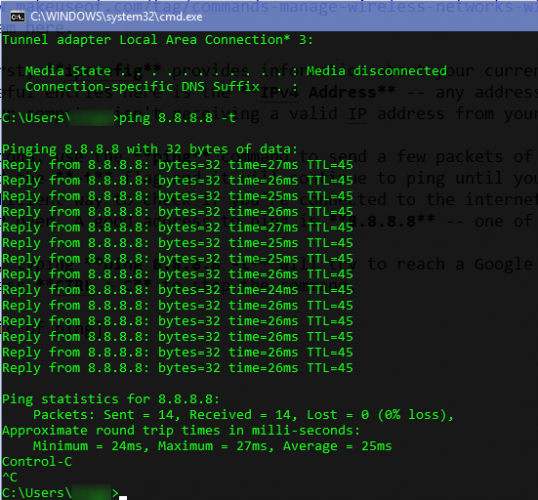
Second, use theping command to send several packets of information to a remote server. Add the -t flag and it will continue executing the command until you stop.This is a much more efficient way to check if you are connected to the Internet rather than refreshing a website continuously.A good ping address is 8.8.8.8 - oneof Google's DNS servers.
Typeping8.8.8.8 -t , it will try to reach a Google server every few seconds until you press Ctrl + Cto stop the command.
2. Network troubleshooting in Windows
Windowscontains a troubleshooterto fix common problems like print, Windows Update and audio.And there are also options for network problems.
Open theSettings application , then go to Update & Security> Troubleshoot . Select Internet Connectionsfrom the list to run the troubleshooter and see if any problems are detected.

If you want, you can also scroll down and try the Network Adapter troubleshooting option, which may find another cause for your problem.
3. Speedtest
If it seems that your connection is not as fast as usual, speed testing can help confirm suspicion.It will show the estimated upload and download speeds, as well as ping to the server (lower is good).
Speedtest.netis one of the most popular services for this.You can access the website oruse the Windows 10 Store applicationtodo it right from the screen.If you are paying for 100Mbps speed and only receiving 10Mbps, you know there is a problem.
4. Wireshark
Wiresharkis one of the most used network analysis tools.It will show you all the traffic bits on the network.You will feel 'overwhelmed' if you don't filter it to see only what you need.

After selecting a wired or wireless connection, you will see a list of all network traffic from your device.Each packet, from loading web pages to streaming music to download a file, is displayed here.Double clicking on a packet will tell you more about it.
5. NetCrunch Tools
If you like a set of multi-functional tools,NetCrunch Toolsmay be the right choice.This is a free tool, although you must register an account with the developer,AdRem Software,before using it.You can log in with your Facebook, Google or Microsoft account or create an account the old way with your email address and password.

Once finished, the homepage will display three types of tools including:Basic IP Tools, Subnet Tools and Scanners.Some basic tools,such as Traceroute,are graphical versions of the command line.
6. Microsoft Message Analyzer
If the integration tools aren't enough for you, but you want to use Microsoft's official tool for network monitoring,Microsoft Message Analyzeris the right choice.Like Wireshark, it has a lot of options in its package and therefore new users will feel a bit difficult to use.But if you take the time to find out, you can get useful details about your network.

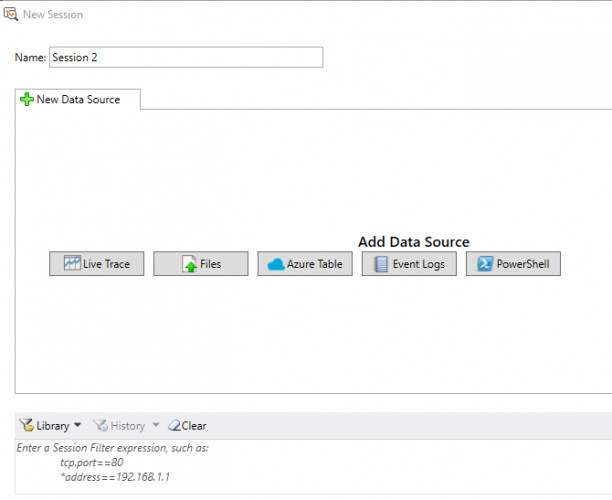
Starting the tool as an administrator, clickingNew Sessionwill allow you to start tracking traffic from multiple sources, such as files, Microsoft Azure tables, or PowerShell commands.If you need one of these, it's worth installing it.
7. JDisc Discovery
Unlike the tools in this list, JDisc Discovery is a network testing tool.Itscans all devices on your network (up to 25 devices in the free version) and collects details about them.After scanning, you will see information about the device's name, IP address, firmware version, serial number and more.
This is a great way to statistics devices on your network.Saving this information will 'prove' its usefulness when you encounter a problem.Automatic scanning will save you a lot of trouble when logging into the device.TheProfessional Edition version of the software collects a lot of information with a limit of 25 devices, while the Starter Edition version only provides basic but unlimited information about the device.