How to use the Startup Repair tool to fix problems in Windows 7
The Startup Repair tool fixes Windows 7 problems by replacing important operating system files that may be corrupted or missing. Startup Repair is a diagnostic and repair tool used when Windows 7 does not start.
Important note: If you want Startup Repair to work properly, you need to remove the flash drive or other USB storage devices, such as an external hard drive, from the computer before running this tool. Because the way computers report storage space on connected USB drives, Windows 7 Startup Repair may report no problems despite the fact that it has problems.
- Turn internal hard drive into an external hard drive
If you're not using Windows 7, you can still follow the steps below for newer Windows operating systems.
1. Boot from DVD
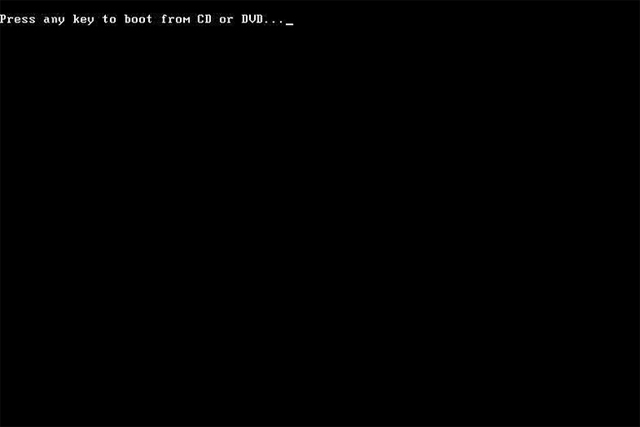
To start the Startup Repair process for Windows 7, users need to boot from the DVD.
Step 1: See the message Press any key to boot from CD or DVD . or similar message.
Step 2: Press a key to force the computer to boot from Windows 7 DVD. If you do not press the key, the computer will boot into the operating system currently installed on the hard drive. In this case, just restart the computer and try again.
2. Wait for Windows 7 to download the file
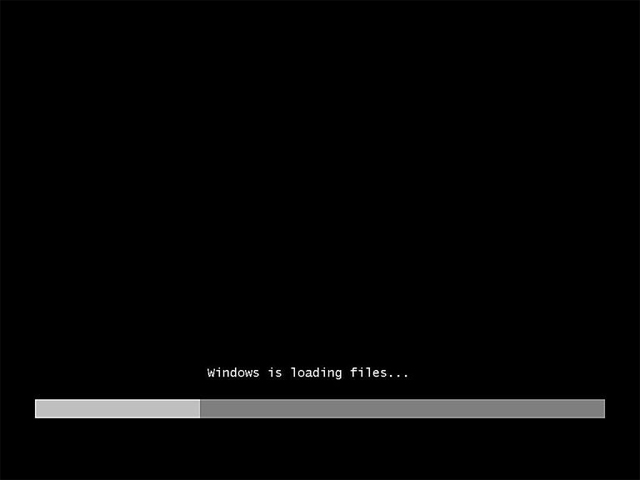
Users do not need to do anything here, just wait for Windows 7 to download the file to prepare for Startup Repair.
Note: This step will not change anything in the computer, Windows 7 will only temporarily "download files".
3. Choose n languages for Windows 7 installation and other settings

Select the language to install, the date and currency format , and the keyboard input method in Language to install, Time and currency format , and Keyboard or input method, then click Next .
4. Click the Repair Your Computer link
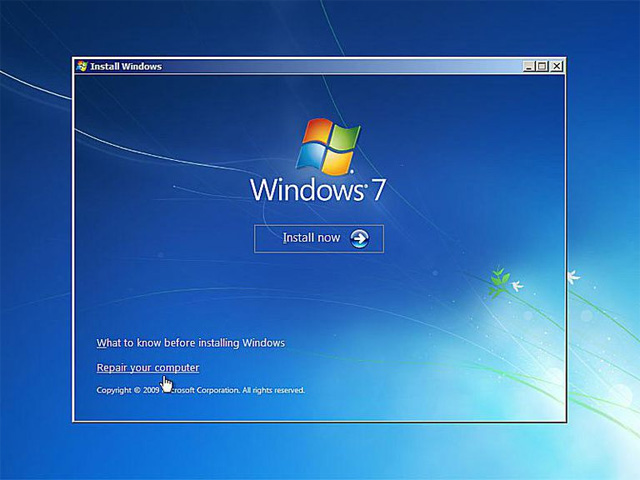
Click the Repair your computer link in the lower left corner of the Install Windows window. This link will open Windows 7's System Recovery Options, which contains some useful diagnostic and repair tools, including Startup Repair.
Note: Do not click Install now . If Windows 7 is installed, this option is used to perform a new installation (Clean Install) Windows 7 or Parallel Install Windows 7.
- How to install Windows 7 from USB
5. Wait for the System Recovery Options to locate Windows 7 on the computer
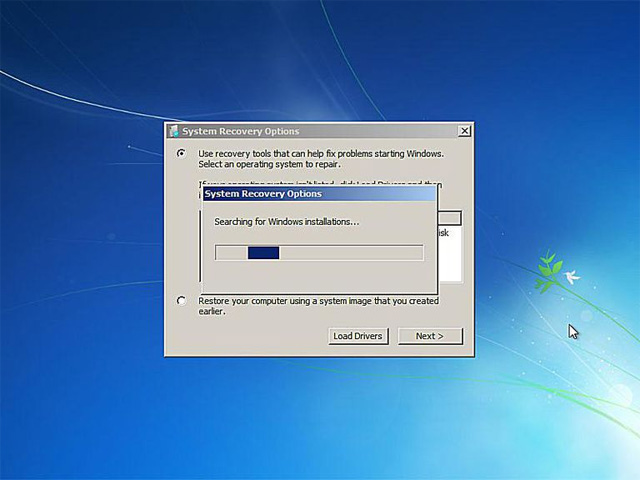
System Recovery Options, a tool that contains Startup Repair, will search the hard drive for Windows 7 installations. With this step, you don't need to do anything just wait. Searching for this Windows installation is not time consuming, it only takes a few minutes.
6. Select Windows 7 installation
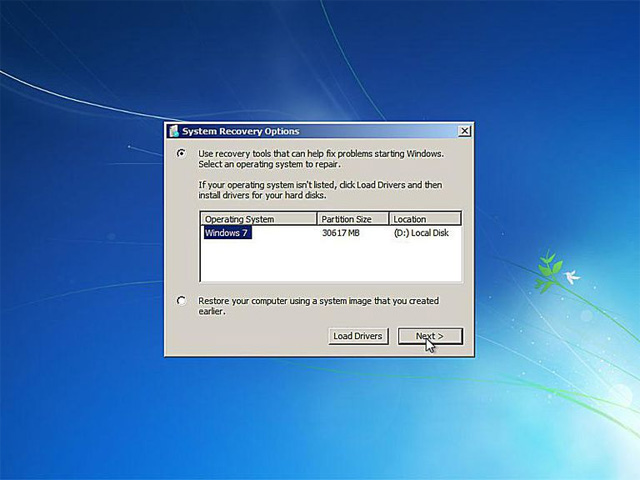
Select the Windows 7 installation you want to perform Startup Repair, and then click the Next button.
Note: You do not need to worry if the drive letter in the Location column does not match the Windows 7 drive letter that is installed on the computer. The drive letter will change especially when using diagnostic tools such as System Recovery Options. For example, like the image above, install Windows 7 on drive D: but it is actually in drive C:
7. Select the recovery tool for Startup Repair
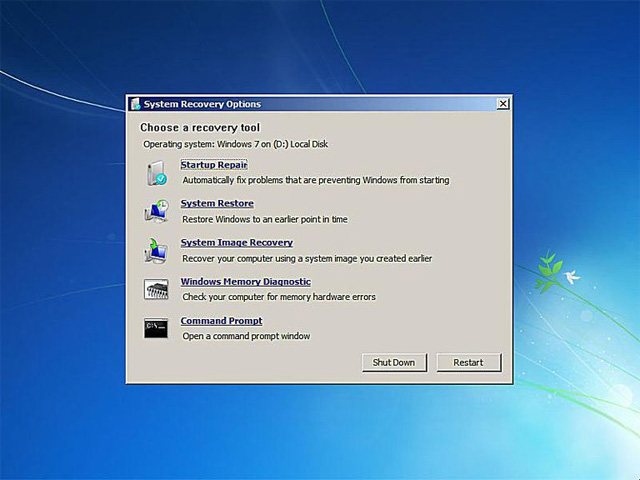
Click the Startup Repair link from the list of recovery tools in System Recovery Options. In addition to Startup Repair , you will see some other diagnostic and recovery tools like System Restore, System Image Recovery, Windows Memory Diagnostic and Command Prompt.
8. Startup Repair search for problems with Windows 7 files
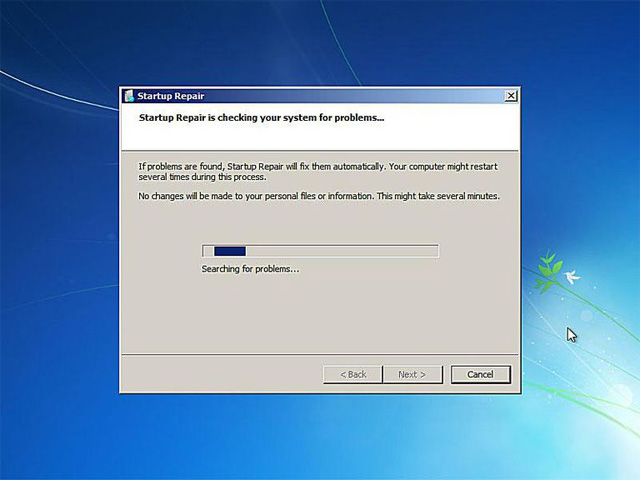
The Startup Repair tool will search for problems in important files. If Startup Repair finds a problem in an important operating system file, it will suggest a solution for users to confirm or can solve the problem automatically. In short, follow the notice and accept any changes proposed by Startup Repair.
9. Startup Repair fix Windows 7 file errors
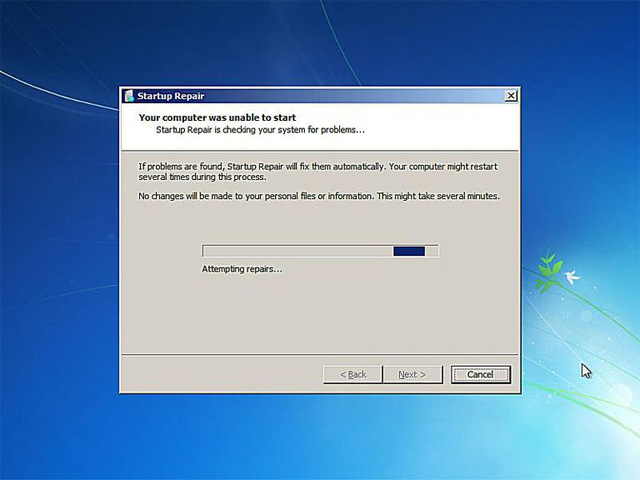
Startup Repair will try to fix the problems it finds with Windows 7 files. Users do not need to do anything.
Note: Your computer may or may not restart several times during the repair process. Do not boot from DVD when rebooting. In case you have started booting from DVD, please restart the computer immediately so that the Startup Repair process can continue normally. If Startup Repair does not find any problems with Windows 7, you will not see this step.
10. Click Finish to restart Windows 7

Click the Finish button when you see the Restart your computer to complete the repairs window to restart the computer and start Windows 7 normally.
Note : It may happen that Startup Repair does not fix the problem. If the Startup Repair tool determines itself not to correct the error, it will automatically run again after the computer restarts. If Startup Repair does not start automatically, but you still have problems with Windows 7, repeat these steps to run Startup Repair manually.
Startup Repair can not solve all problems of Windows 7, there are some other recovery options such as System Restore or System Image Recovery, but be sure to backup the entire computer before running these tools. Alternatively, you can try installing Windows 7 in parallel or installing a new one.
See also: Instructions to adjust screen brightness of Windows 7 computer