How to Enable Unicode UTF-8 in Windows 11
Changing the display language in Windows 11 may cause some programs to not display text in the language you want. If this is the case, you should enable Unicode UTF-8 to help Windows display text correctly in the language you want..
The display language in Windows determines the system menus, dialog boxes, and other interface content. Users can change the display language in the settings to customize it to their needs. However, changing the display language may cause some programs to not display text in the language you want. If so, you should enable Unicode UTF-8 for worldwide language support to help Windows display text correctly in the language you want, according to the article below.
How to enable Unicode UTF-8 in Windows 11
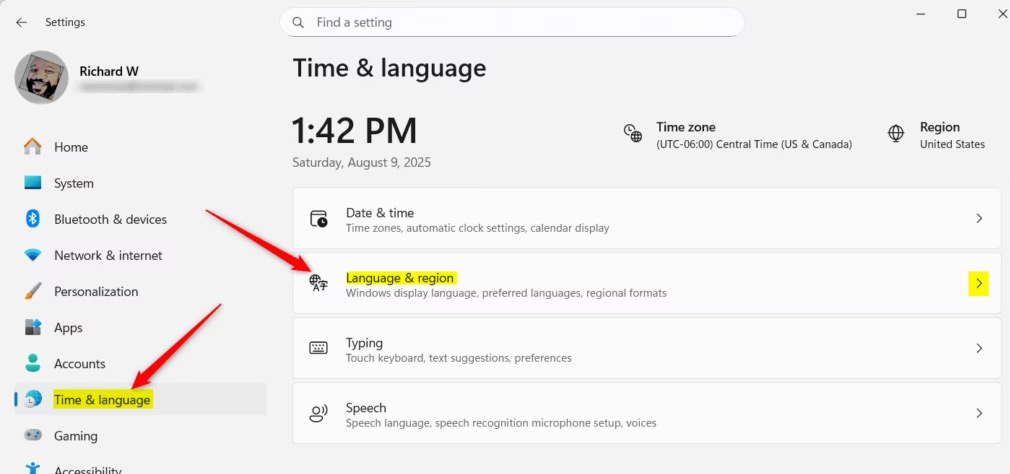
Step 1:
Open Settings on your computer, then click Time & language and look to the side and select Language & region .
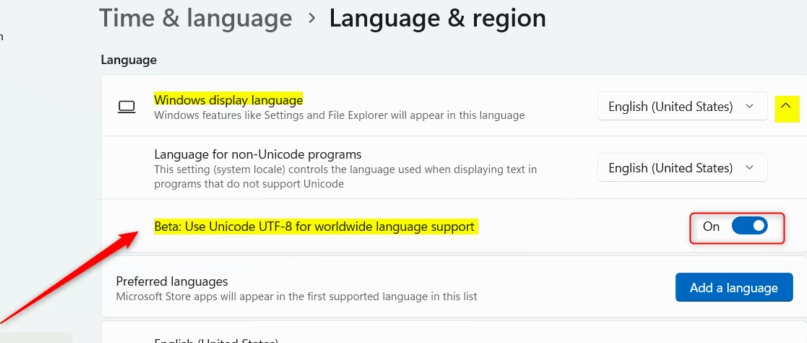
Step 2:
Switch to the new interface, click on Windows display language to adjust the display language on Windows.
Then below you enable the Use Unicode UTF-8 for worldwide lanauge support mode which is in Beta testing mode.
How to Enable Unicode UTF-8 Using Windows Registry
You access Windows Registry Editor and then access the path below.
ComputerHKEY_LOCAL_MACHINESYSTEMCurrentControlSetControlNlsCodePageThen double-click on the values ACP, MACCP and OEMCP to enable Unicode UTF-8 on your computer.
- ACP = 65001
- MACCP = 65001
- OEMCP = 65001
To disable UTF-8 language support on Windows, re-enter the value:
- ACP = 1252
- MACCP = 10000
- OEMCP = 437
