Instructions for activating Click to Do Windows 11
Click to Do Windows 11 helps you complete tasks more efficiently by recognizing text and images you can interact with on the screen..
Click to Do Windows 11 helps you get things done more efficiently by recognizing text and images that you can interact with on the screen. The tool evaluates the content on the screen, allowing you to select the text or image that you want to act on. There are several ways to enable Click to Do on Windows 11, follow the instructions below.
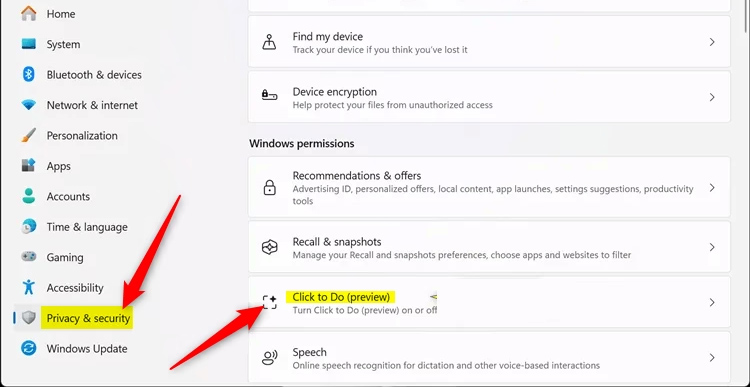
Enable Windows 11 Click to Do via Settings
You access Settings on your computer, then click on Privacy & security in the list on the left. Next, you look to the right to find the Windows permissions group and click Click to Do to activate.
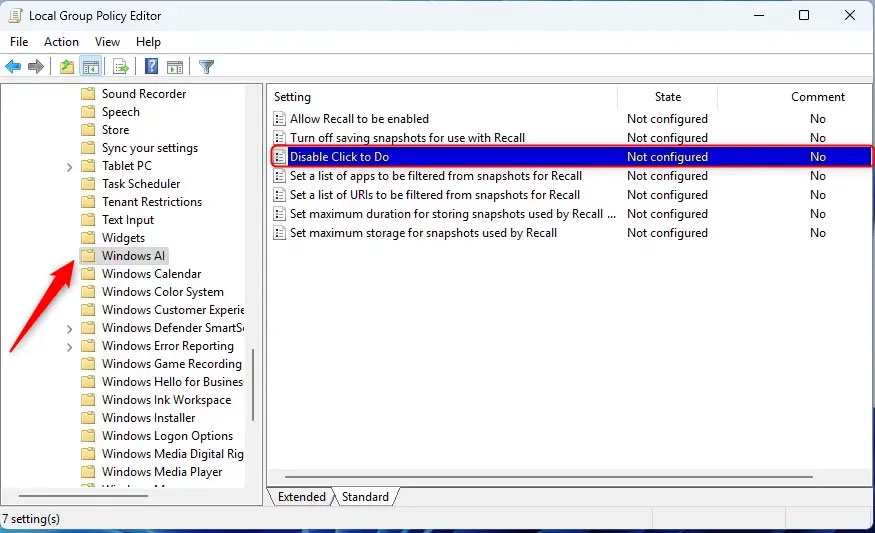
Enable Click to Do Windows 11 via Group Policy Editor
You type the keyword gpedit.msc in the search bar and access it. Then navigate to the folders below:
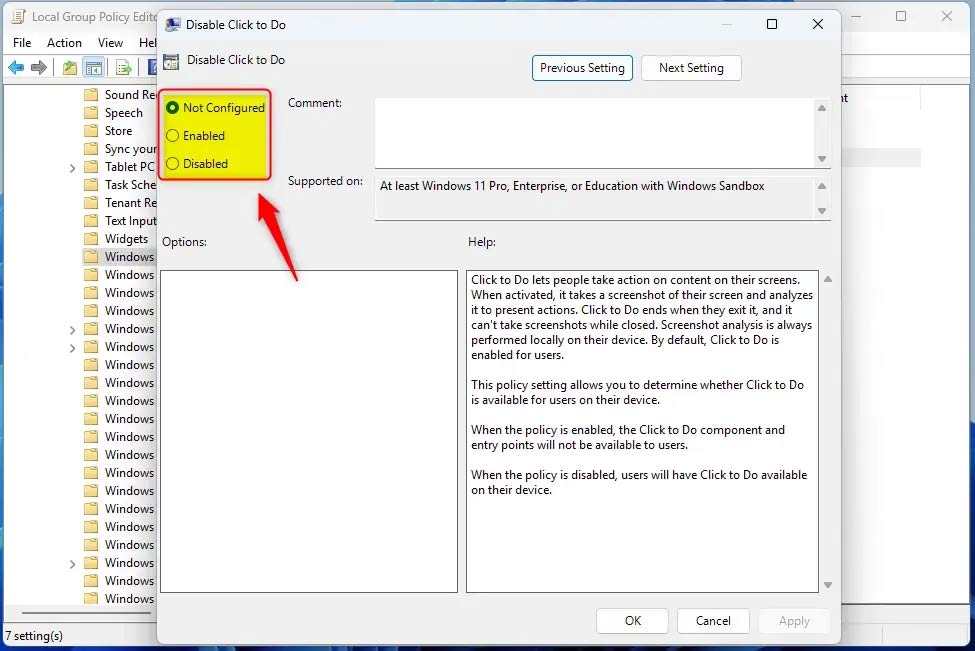
Computer Configuration > Administrative Templates > Windows Components > Windows AILook at the content next to it, double-click on the Disable Click to Do value to adjust.
Now click Enabled to activate Click to Do on Windows 11.
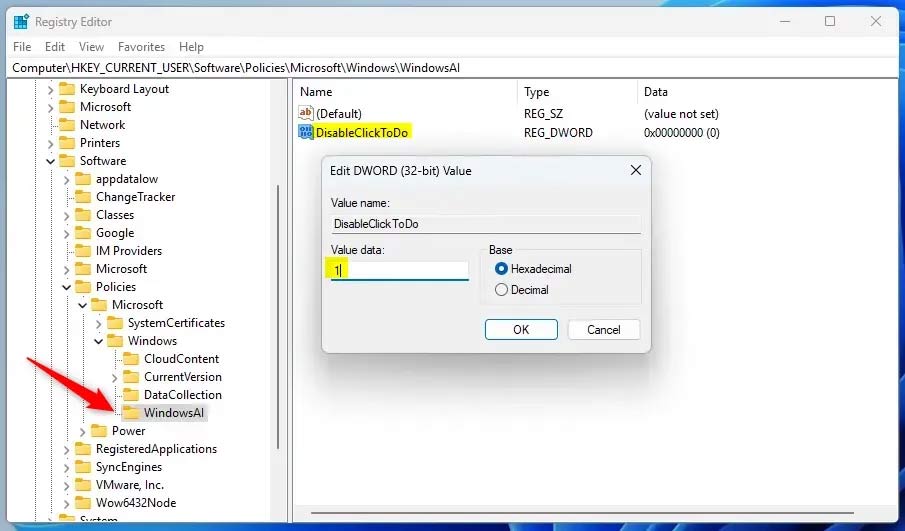
How to Enable Click to Do Using Registry Editor
First you also access Registry Editor on your computer, then navigate to the path below.
ComputerHKEY_CURRENT_USERSoftwarePoliciesMicrosoftWindowsWindowsAIRight-click on the interface next to it, select New > DWORD (32-bit) Value , then name the value DisableClickToDo . Then double-click on the value and set it to 0 to enable Click to Do.
If you want to disable Click to Do , change the DisableClickToDo value to 1 or delete this value.