How to Enable Hibernate in Windows 11
Hibernate is an expensive feature of Windows 11 operating system and it would be a waste if you don't use it during the process of using Win 11. Let Software Tips share with you how to enable Hibernate on Windows 11 quickly and effectively!
I. What is Hibernate in Windows 11?
For normal computers using Windows 11 operating system, the computer will automatically fall into Sleep mode after a period of inactivity. Sleep mode will save all data, files, and programs being worked on in RAM to reduce power consumption and has the ability to restart when necessary. When you need to restart the computer, you just need to press the power button and all the programs you were using before will be displayed as before putting the computer into sleep mode. Sleep mode on Windows 11 is currently being used by many people to be able to put the computer into working state quickly, without losing data after shutting down, and continue working immediately without waiting too long.
However, Sleep mode on Windows 11 requires the computer to be continuously powered because all data is stored in RAM. If the power is lost, it means that RAM is no longer working to store data.

Hibernate on Windows 11 is generally similar to Sleep mode, however the system will not store data on RAM but instead will store it in the 'Hiberfil.sys' file located on the hard drive. This means that if there is a power outage, the data file still exists on the hard drive and can still restore the programs that worked before the computer Hibernate.
The biggest difference between Sleep and Hibernate on Windows 11 is that Sleep requires the computer to be continuously powered to store. Meanwhile, Hibernate does not require the computer to be continuously powered.
II. How to enable Hibernate on Windows 11
To enable the Hibernate feature on Windows 11, we have many different ways. Below are effective ways to enable the Hibernate feature on Windows 11.
1. How to enable Hibernate Windows 11 in Control Panel
Hibernate on Windows 11 is enabled directly in Control Panel through the following way:
Step 1 : Enter the keyword Control Panel in the search bar to open.
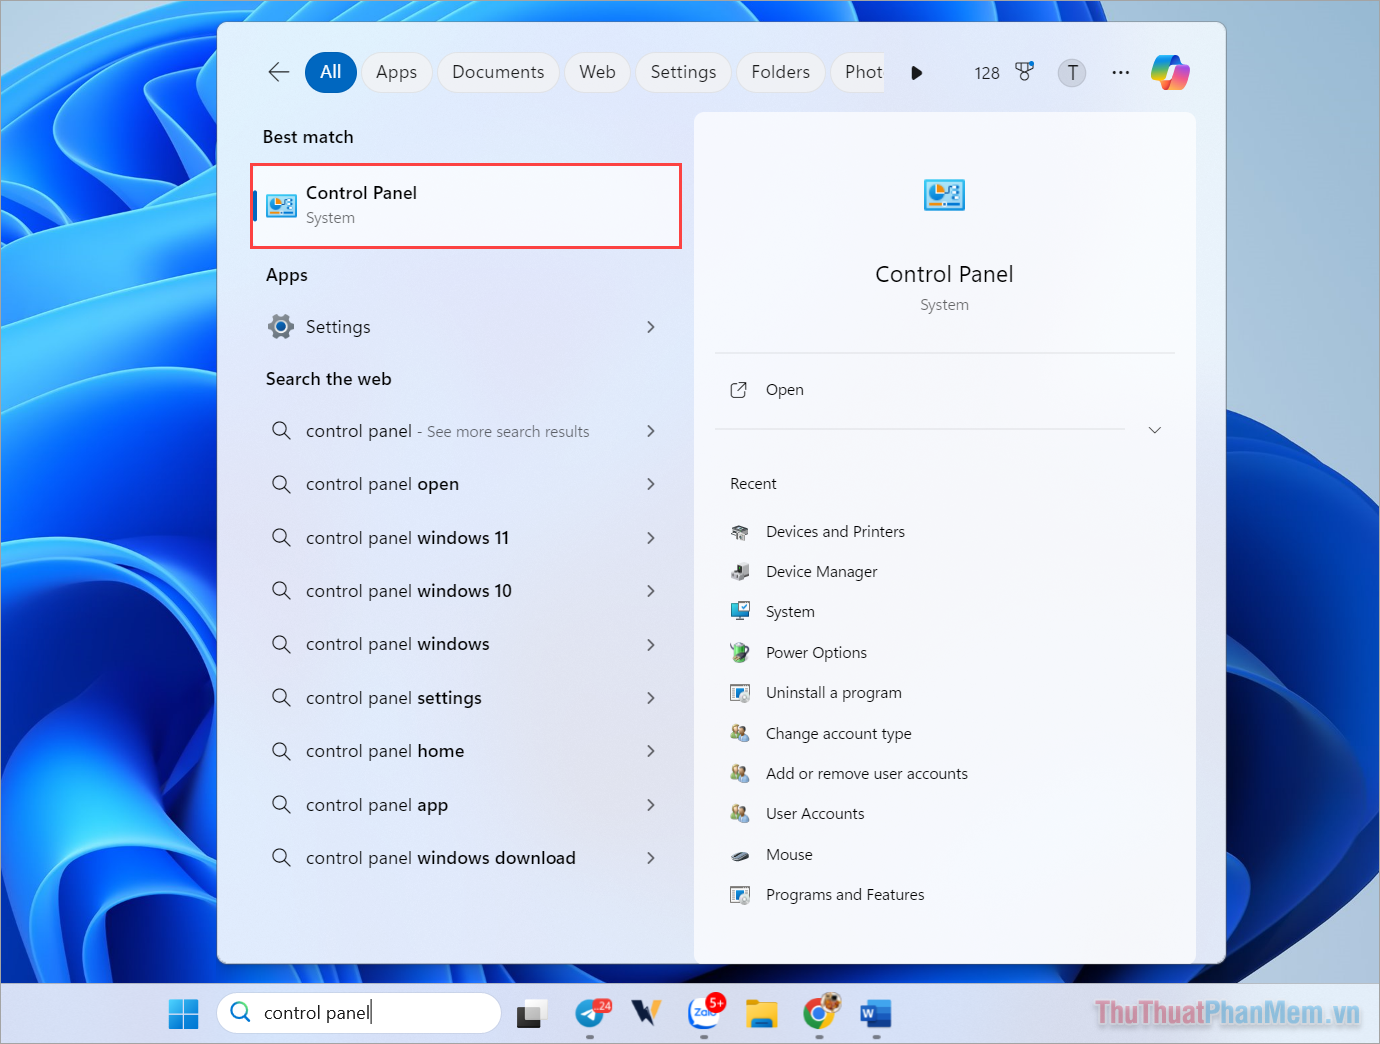
Step 2 : In the Control Panel window, select Power Options to view power settings. If you don't see Power Options, change View by to Small Icons .

Step 3 : Next, select Choose what the power buttons do .

Step 4 : To be able to change the settings in this section, you must select Change settings that are currently unavailable .

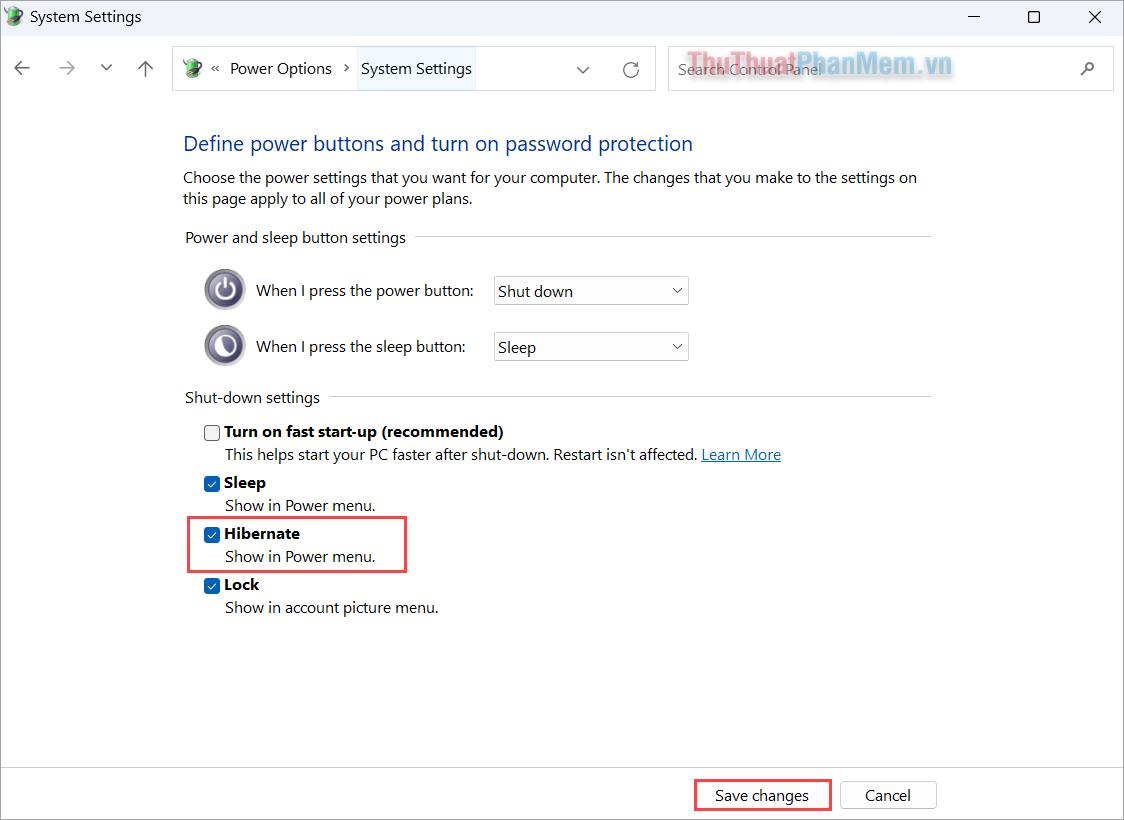
Step 5 : Finally, select Hibernate and click Save Change to save the changes to enable Hibernate.
2. How to enable Hibernate on Windows 11 in Command Prompt
Command Prompt is a simple command line program on Windows that has existed for decades. With Command Prompt, users can easily access and turn on/off different features through commands. To enable Hibernate through commands on Command Prompt, do the following:
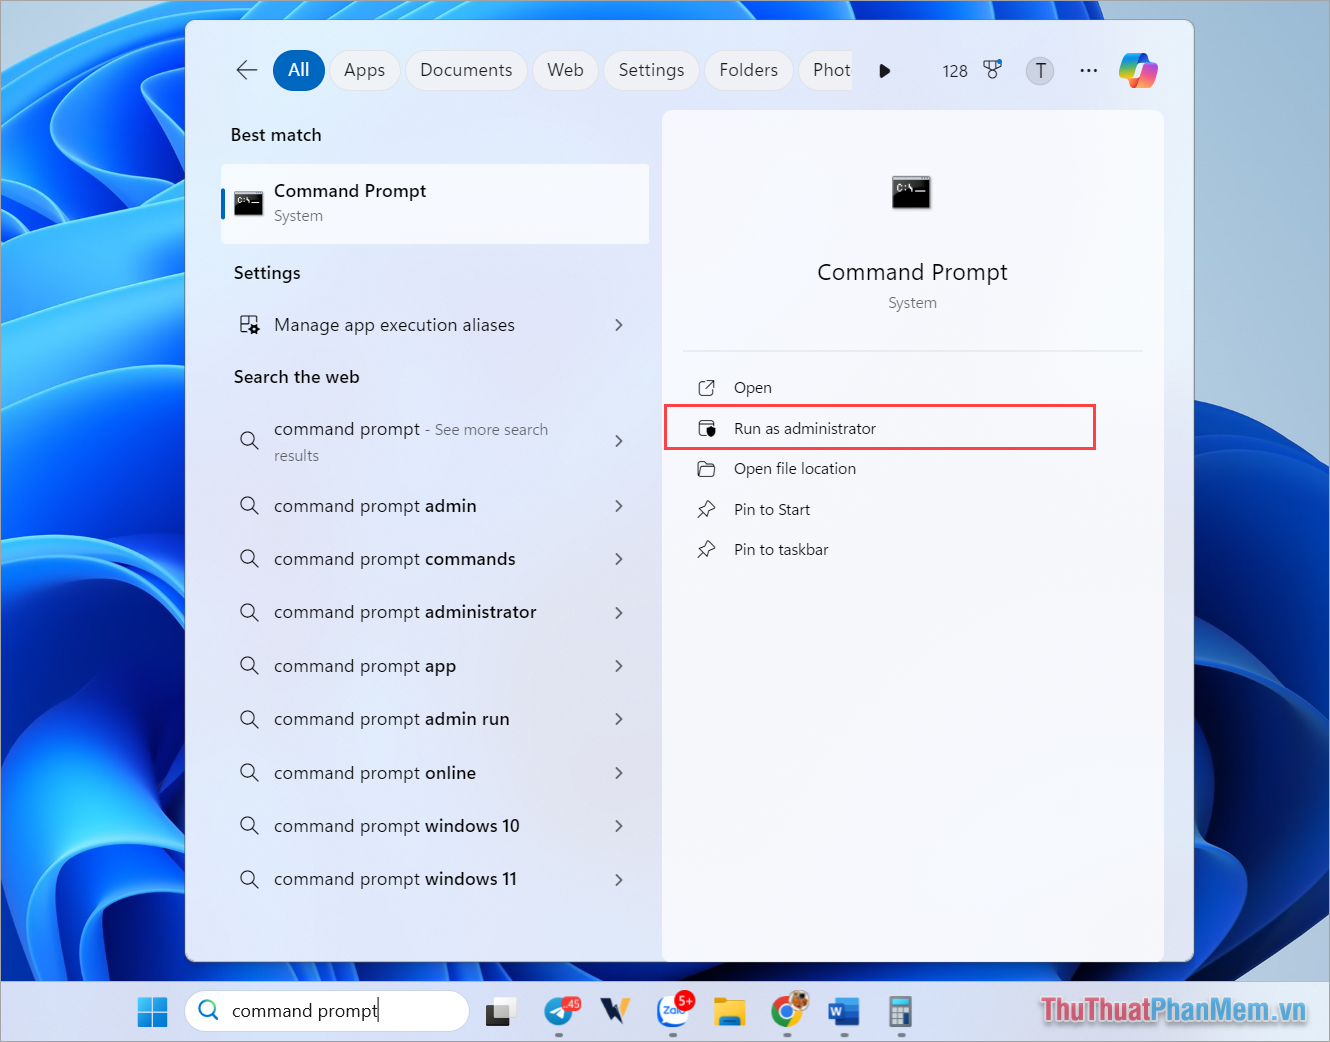
Step 1 : Enter the keyword Command Prompt in the search bar and select Run as administrator .
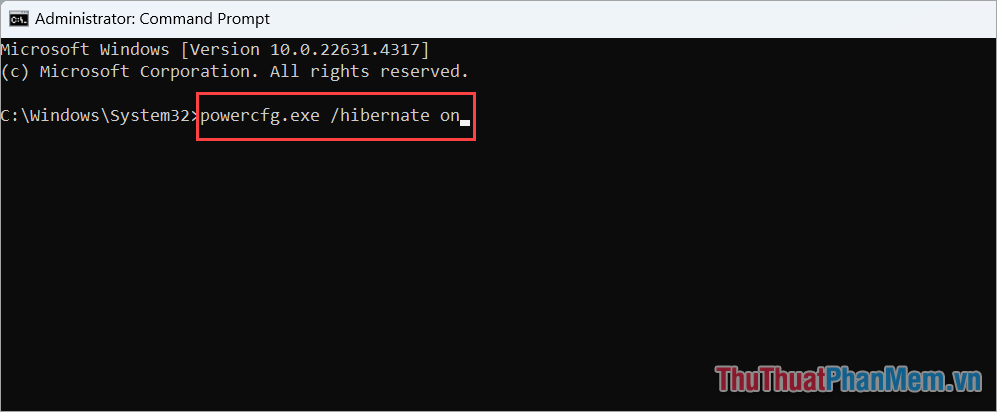
Step 2 : In the CMD window, enter the command below and press Enter to run the command.
| powercfg.exe /hibernate on |
3. How to set up automatic Hibernate on Windows 11
For Hibernate, users can also set it automatically like Sleep. After a period of time when you do not use the computer, the computer will automatically enter Hibernate mode to save energy and easily restore it the next time you use it.
Step 1 : Enter the keyword Control Panel in the search window to open.

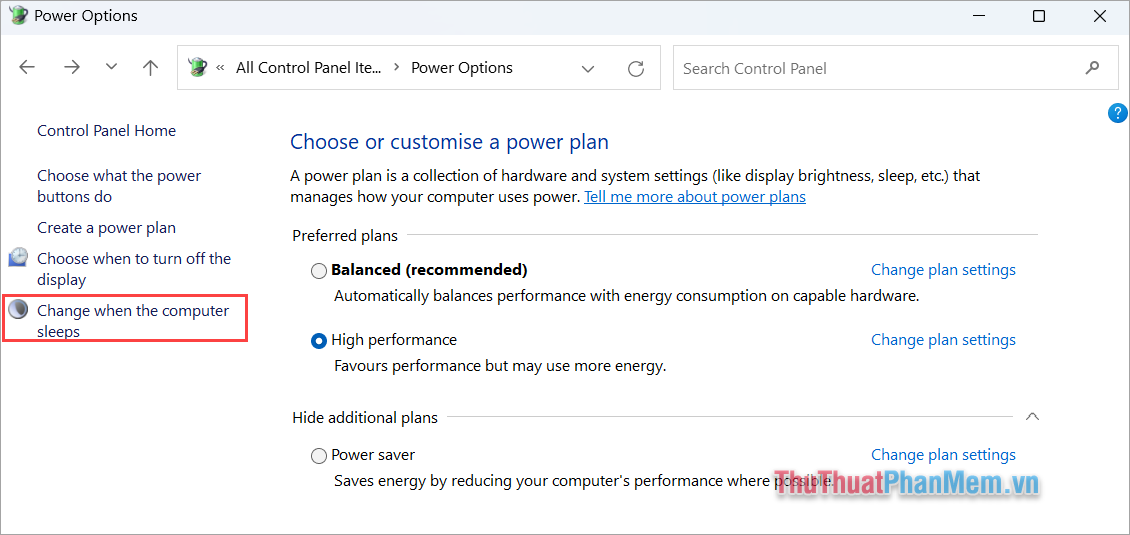
Step 2 : Then, select Power Options to open the power settings on your computer.

Step 3 : Here, select Change when the computer sleeps to set up sleep mode.
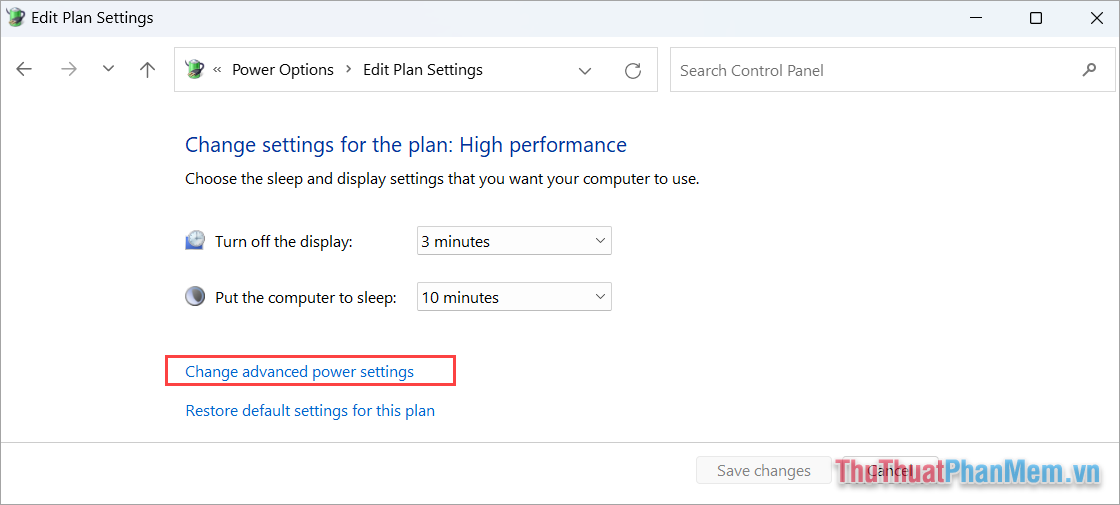
Step 4 : To be able to set up automatic Hibernate on Windows 11, you need to select Change advanced power settings .
Step 5 : To set the time for the computer to automatically Hibernate, select Sleep and select Hibernate After to set.
Then, enter the time you want to put your computer into Hibernate mode in Settings (in minutes). Finally, select Apply → OK to complete.

In this article, Software Tips has shared with you how to enable Hibernate on Windows 11 quickly and simply. Have a nice day!