How to enable or disable Secure Sign-In on Windows 10, Windows 11
Windows is the most targeted operating system by hackers. Therefore, you should strengthen your PC's defenses to stay safe both online and offline. This article will guide you how to enable or disable Secure Sign-In in Windows 10.
Table of Contents
Windows is the most targeted operating system by hackers. Therefore, you should strengthen your PC's defenses to stay safe both online and offline. This article will show you how to enable or disable Secure Sign-In in Windows 10 or Windows 11.
What is Netplwiz?
Netplwiz is a built-in Windows tool that lets you edit user account settings. From changing your username and password to enabling Secure Sign-In, Netplwiz lets you configure how you want to authenticate Windows logins.
For example, you can use Netplwiz to remove the login password. This way, you can log into Windows without entering any login information.
On the other hand, you can also use Netplwiz to make your Windows login process more secure.
The Windows 10 sign-in process isn't without its flaws. While it's generally safe to use, malware can hijack the process. By spoofing the sign-in screen, malware running in the background can trick you into giving up your login details.
Secure Sign-In on Windows 10 and Windows 11 fixes the root of the problem by blocking programs from displaying fake sign-in screens.
What is Secure Sign-In?
Secure Sign-In is an additional element on the Windows 10, Windows 11 login screen. It does not prevent people from accessing your PC if they have the credentials. Instead, Windows will clear the login field until a keychain is entered. Then, enter your password or PIN as usual.
This feature is intended to prevent malware. Malicious code can lie in the background and fake the Windows login screen to steal your login information. Since apps and programs typically don't have access to the Ctrl + Alt + Del command , you can bypass the fake login screen by using Secure Sign-In, which is activated by entering these three keys.
How does Secure Sign-In work?
Using Netplwiz, you can set up Secure Sign-In for Windows. Secure Sign-In allows you to prevent such attempts by making the login screen only accessible after pressing a certain key combination.
Programs do not have access to the path created by Ctrl + Alt + Del . Windows has used this key combination as a Secure Attention Protection/Sequence since Windows Vista. Press this combination before entering login information to ensure that the login information is safe from viruses and malware.
A quick note before moving on: Secure Sign-In is not a replacement for anti-malware programs. Make sure you have other anti-malware protections installed on your computer.
Enable or disable Secure Sign-In using the Netplwiz command
To get started, open Run by pressing Win+ R, type netplwiz in the text field and then click the OK button (or press Enter ) to continue.
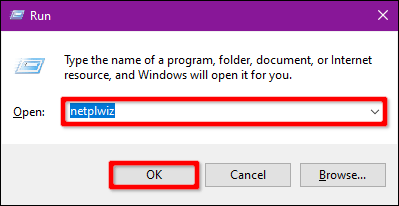
Alternatively, you can access User Accounts by typing netplwiz in the Taskbar search field and selecting the appropriate result.
The User Accounts control panel will appear on the screen, click on the Advanced tab (if not opened by default). Check or uncheck the Require Users to Press Ctrl+Alt+Delete option under Secure Sign-In .
Click the Apply button and then click the OK button to finish.

Enable or disable Secure Sign-In using Local Security Policy
This is another method that is a bit more complicated than the User Accounts guide. Use this method if you want to avoid the Windows registry.
Open Run, type secpol.msc in the text field and then click the OK button (or press Enter ).
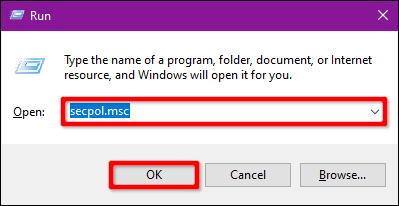
Similarly, you can also access Local Security Policy by typing secpol.msc in the Taskbar search field and selecting the appropriate result.
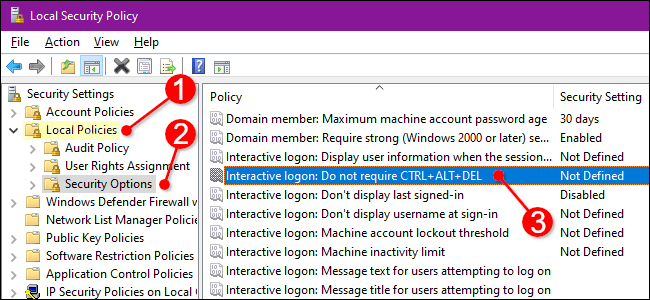
In the Local Security Policy window, expand Local Policies on the left and select the Security Options folder below. Next, scroll down on the right and double-click Interactive Logon: Do Not Require CTRL+ALT+DEL .
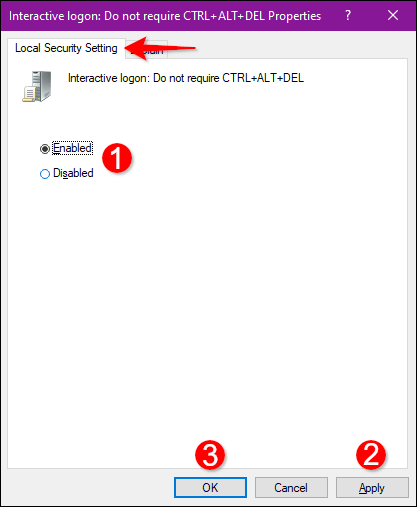
The Properties dialog box appears on the screen with the Local Security Setting tab displayed by default. Click the Enabled or Disabled button to enable or disable the feature. Then click the Apply button and press OK .
Enable or disable Secure Sign-In using the Registry
Another way to enable or disable Secure Sign-In is to use Local Security Policy. However, be aware that any changes to the registry can cause system instability. You should back up the registry and system before making changes.
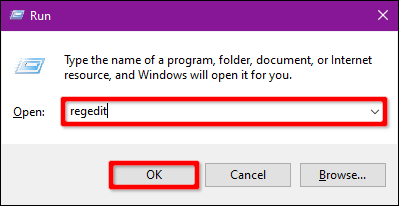
Launch Run, type regedit and click OK or press Enter .
You can also use the Taskbar to open Registry Editor.
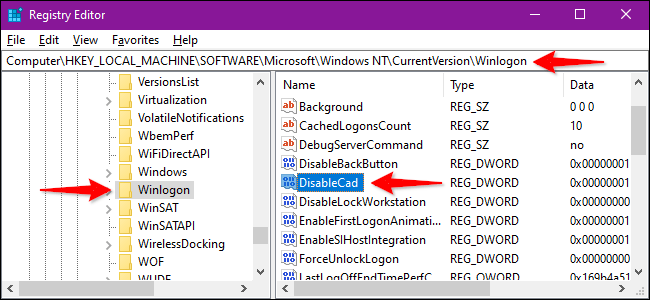
In Registry Editor, expand the following folders in order:
HKEY_LOCAL_MACHINE > SOFTWARE > Microsoft > Windows NT > CurrentVersionIn the CurrentVersion folder , select Winlogon to display its settings in the right pane. Double-click DisableCad to edit the value.
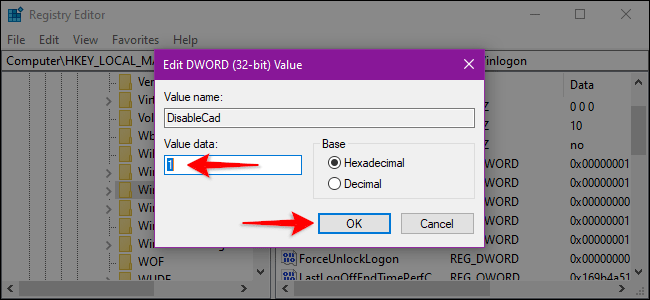
In the Edit DWORD (32-bit) Value box that appears, change the Value Data to one of the following values:
- On = 0
- Off = 1
Click OK button to finish. Restart your computer to save the settings.
Note : If you don't see the DisableCad entry in the Winlogon settings , right-click Winlogon , select New in the menu that appears, and then click DWORD (32-bit) Value in the subsequent list. Name the new DWORD DisableCAD and change its value.

Good luck!
Was this article helpful?
Your feedback helps us improve.
Related Articles
 How to enable or disable Secure Sign-In on Windows 105 minutes read
 How to enable and disable Secure Sign-In in Windows 104 minutes read
 How to disable / enable UEFI Secure Boot in Windows 105 minutes read
 How to check Secure Boot has been enabled on your computer or not?4 minutes read
 How to enable or disable UEFI Secure Boot in BIOS8 minutes read
 Enable or disable Secure Boot via the ASUS UEFI BIOS utility5 minutes read
Reader Comments 0
Sign in with email or Google to join the discussion.