How to downgrade macOS High Sierra Beta to macOS Sierra
Along with the release of the official iOS 11 version, Apple also released the macOS High Sierra with many new features. And, before waiting for the official version, users can also experience new features, via macOS High Sierra Beta version.
However, since it is not an official version, there will be some incomplete features, which are in the process of testing. Or your device is not 'hot' to use this version, you can downgrade to macOS Sierra version. In the following article, we will guide you how to downgrade macOS High Sierra Beta version to macOS Sierra.
However, users should note, before carrying out downgrade, it is necessary to back up data. This backup will take a lot of time. We click Preferences> Time Machine and then make a backup. During the backup process, make sure the battery capacity is full, do not disconnect the device during the backup and downgrade process.
Step 1:
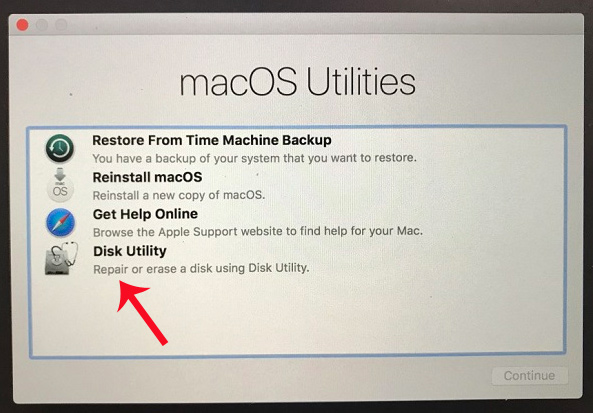
First of all, you proceed to restart the Mac . When the machine is running again, hold down the Command and R buttons until the Utilities menu appears. Here, click on Disk Utility .

Step 2:
Then, choose Continue and then select the boot drive, usually labeled as Macintosh HD . Select Delete and then select macOS file format from the list and select delete.
Step 3:
Next, users will proceed to reinstall macOS Sierra version, in 2 different ways.
Way 1
This way will install the new macOS Sierra version completely. We will wait for the Drive auto-delete device to completely reinstall macOS Sierra.
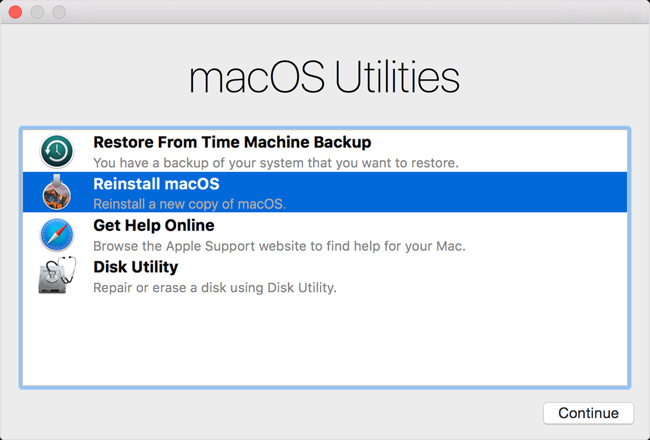
In the main Utilities screen select Reinstall macOS . Then click on Apple's terms of use.
Users wait until the Mac restarts and so we can downgrade to the macOS Sierra.

Method 2
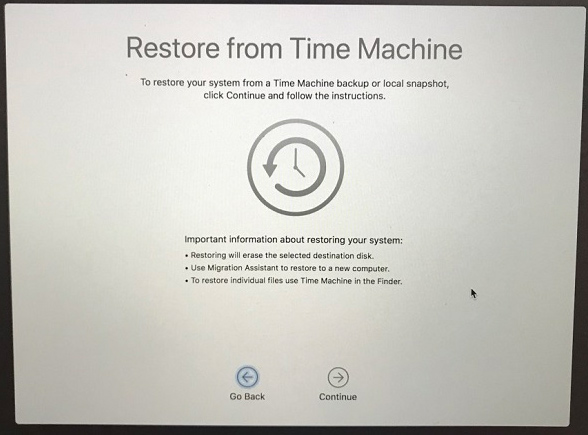
If you want to reinstall macOS Sierra from macOS High Sierra Beta, users can also do it through the previous backup. We will restore macOS Sierra backups with files and applications back to the same position as when backing up data.

We restart the Mac, then hold down the Command button and the R button to access the MacOS Utilities menu. Then the option to recover data from the backup computer. Finally click Next and wait for the data recovery process to complete. Thus, we have downgraded the macOS High Sierra Beta version to the macOS Sierra successfully.
macOS High Sierra Beta during use may occur some errors, or incomplete features. You can wait for the official version from Apple to install or proceed to downgrade to macOS Sierra according to the article above.
I wish you all success!
You should read it
- ★ How to experience new features on Safari does not need to upgrade macOS High Sierra Beta
- ★ Useful tips for macOS 10.12 Sierra
- ★ How to fix common errors when upgrading to macOS Sierra
- ★ How to change the default macOS Sierra wallpaper
- ★ Instructions on how to install macOS Sierra (clean install) 10.12 on Mac