Table of Contents
This step-by-step guide explains how to create a macOS sierra installed USB drive 10. 12. It covers the required setup, the main actions, and the checks that help prevent common problems.
In this guide, the Network Administrator will show you how to create a macOS Sierra installed USB drive 10. 12.
Part 1: Prepare
- Mac compatible with macOS Sierra version 10. 12.
Mac list compatible with macOS Sierra:
- MacBook - late 2009 and later
- IMac - late 2009 and later
- MacBook Air - 2010 and later
- MacBook Pro - 2010 and later
- Mac Mini - 2010 and later
- Mac Pro - 2010 and later
- A minimum of 16GB USB drive. The process will format the entire drive, so the USB drive must have a large capacity to store important data before performing the process.
- Access the Mac Apple Store.
- The process takes place in about 15-20 minutes.
Part 2: Implementation Steps
Step 1
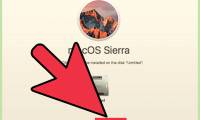
Start by visit the Mac App Store to download the macOS Sierra installer 10. 12. App named ' Install macOS Sierra '.
Step 2
Plug the USB drive into Mac, then launch the Disk Utility app to format the connected USB drive.
After the app is open, make sure your USB drive is selected in the left pane, then select the Erase Button.
Step 3
A new window appears on the screen, where you name your USB drive, such as Untitled or any name you want.
Step 4
After the USB drive has been successfully erased, the next step is to open the Terminal app. You can find the app in the / Apps / Utilities Folder or use Spotligth search to find and open the app.
Step 5
Open Terminal under Admin, then enter the command below and press Enter To create install media on the USB drive:
Sudo / Apps / Install macOS Sierra. App/Contents/Resources/createinstallmedia -volume / Volumes / Untitled -applicationpath / Apps / Install macOS Sierra. App -nointeraction && say Done
Make sure the command syntax is completely correct, otherwise an error will occur.
Step 6
When asked, enter the Admin password on your Mac. This is because in the above command we use the "sudo" command to run additional permissions. Next press Enter.
Terminal displays the commands during execution. The process takes about 15-20 minutes, depending on the Mac model. Once completed, Terminal displays "Done" In the bottom corner, which means that the USB drive has been successfully created.
You can now exit the Terminal app and eject the USB drive, and perform the new install install macOS Sierra on your Mac.
Refer to the macOS Sierra steps to install clean install on Mac using Bootable USB drive here.
Refer to Some of the Following Articles
- Instructions on how to install a clean install macOS Sierra 10. 12 on the Mac
- Steps to install Windows 7 on Mac using Boot Camp
- Summary of the list of common shortcuts on Mac OS X
FAQ
What should I check before following these steps?
Confirm device and software compatibility, save important data, and make sure you have the required permissions, files, and account access.
Why might the process not work?
Common causes include outdated software, missing permissions, incompatible hardware, an unstable connection, or completing a step in the wrong order.
Can I undo the changes if necessary?
That depends on the tool or setting. Use built-in restore options when available, keep a backup, and record the original configuration first.
Related Articles
 Synchronize Files and Folders on Desktop and Document on macOS Sierra4 minutes read
 How to Change the Default macOS Sierra Wallpaper4 minutes read
 Useful Tips for macOS 10. 12 Sierra7 minutes read
 How to Fix Common Errors When Upgrading to macOS Sierra8 minutes read
 Drive: How to Clean Install macOS Sierra7 minutes read
 How to Customize Message Notifications on macOS Sierra5 minutes read
Reader Comments 0
Sign in with email or Google to join the discussion.