Table of Contents
This guide explains how to create Videos from Photos with ProShow Producer Quickly and, with clear steps, practical tips, and important checks before you begin.
1. The interface of ProShow Producer
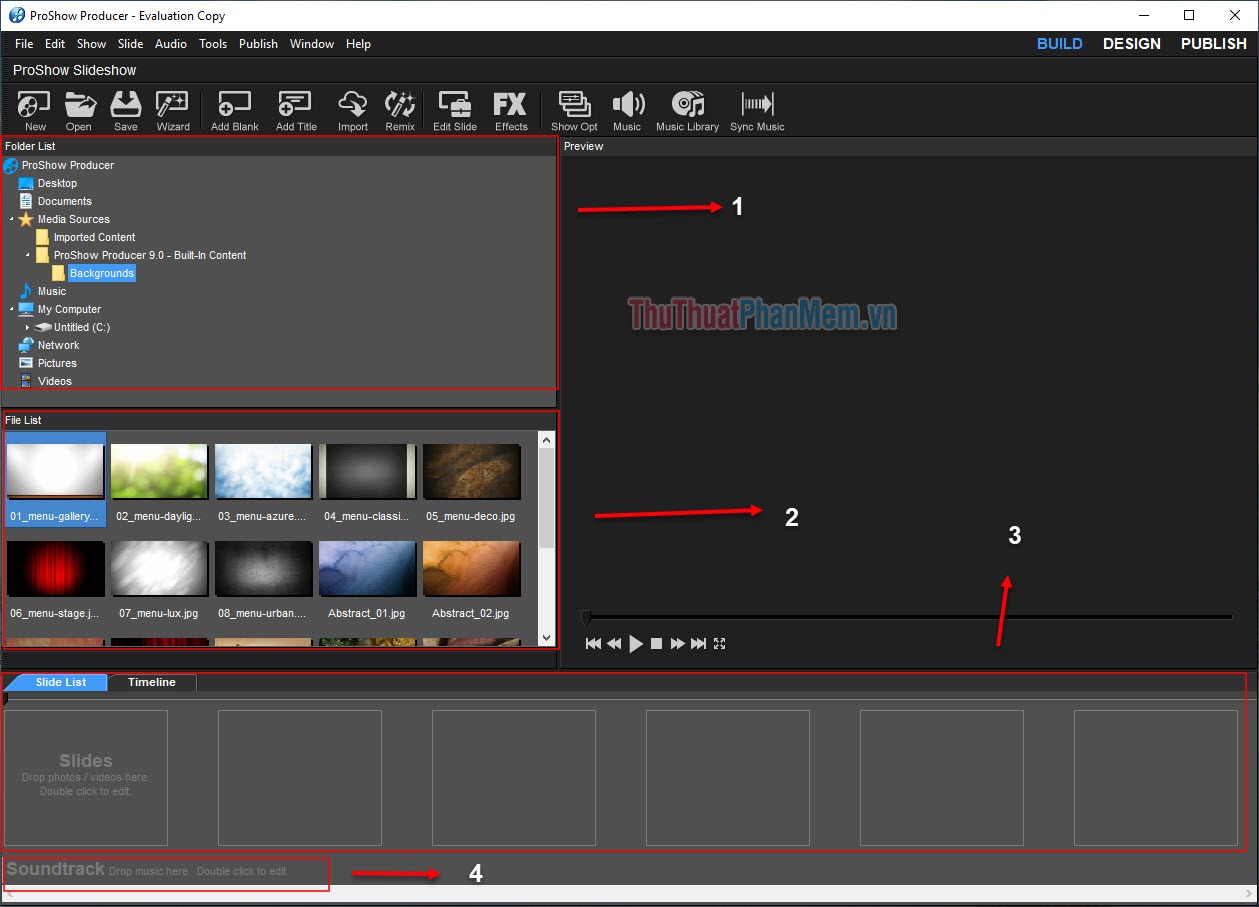
The main interface of ProShow Producer is very simple and easy to use. But currently there is no Vietnamese language support, so you still have a hard time understanding some places.

This is the entire area we will use in this article to make a beautiful and fast Video.
- The area to add image and audio documents for processing
- Available effects of ProShow Producer
- Timeline work, adjust, edit images
- Additional sound section
2. How to create video from photos with ProShow Producer quickly
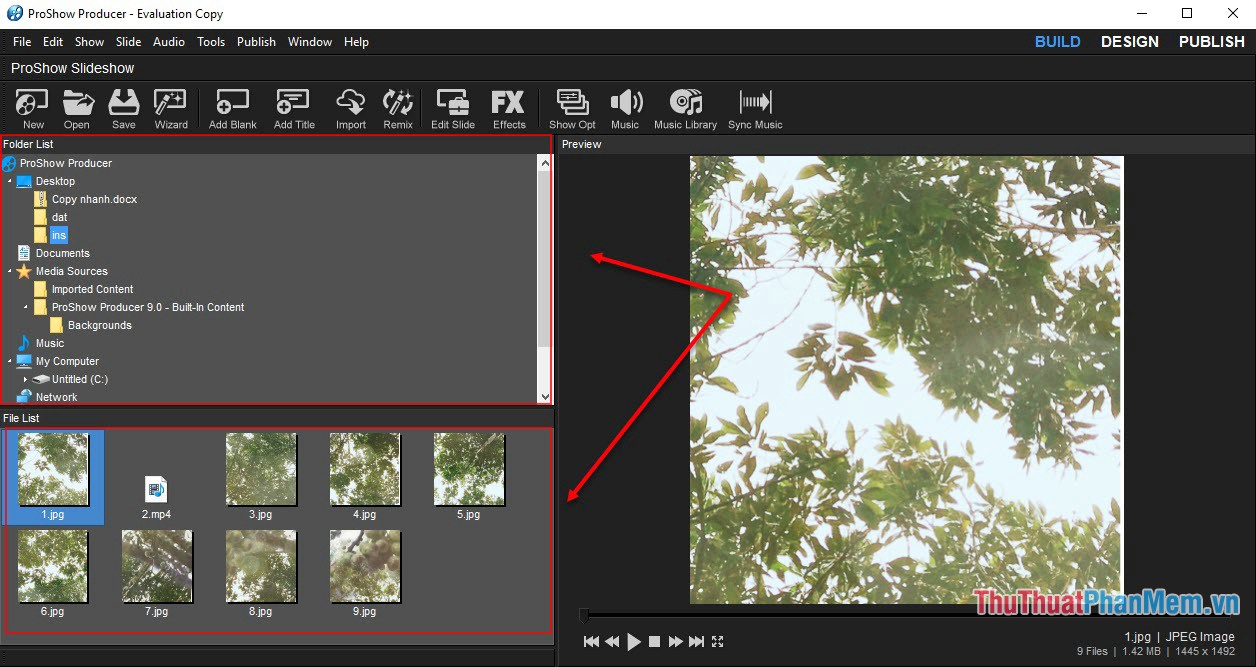
Step 1. You proceed to open the image you want to make into a video. In the Fodler List, proceed to open the folder containing the images you want to use.
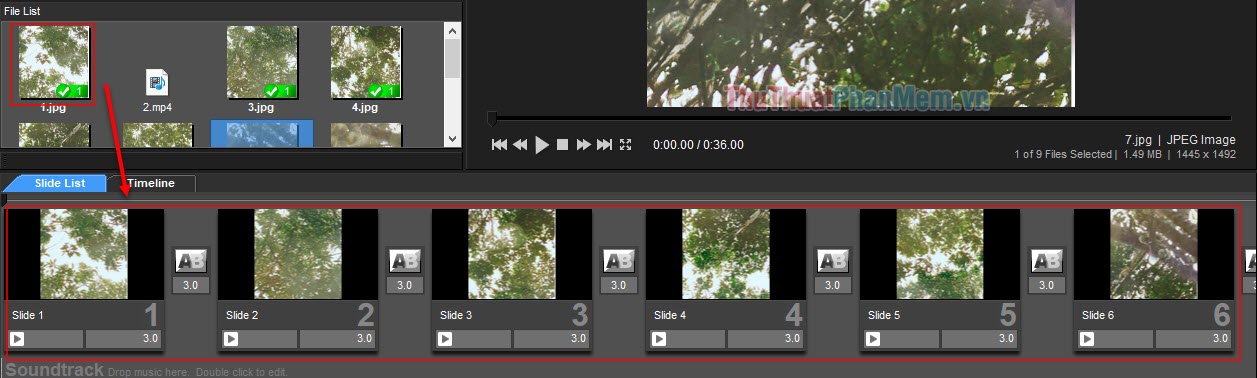
Step 2. In the File List section will be the images you use. You proceed to drag the image down the Time Line bar. Please put your photos in order to put down TimeLine so that it takes less time to fold. You keep holding the mouse on the image and drag down the Slide List and release.
Step 3. You double-click the image slide in SlideList to open effects editing settings for photos. Here, there are many effects for you to choose. Find yourself a satisfactory effect.

Step 4. If an image is viewed for too long, it will be very boring, now you adjust the display time by the following way. Still in Slide Options above but you click Slide Settings to open settings. Then, at Slide Timing will have the following parameters:
- Transition in: Time to transition
- Slide Time: The time the photo is displayed
- Transition out: Time to transition

Step 4. After editing the photos, you wait a bit for the software to add effects to the photos you've just edited.
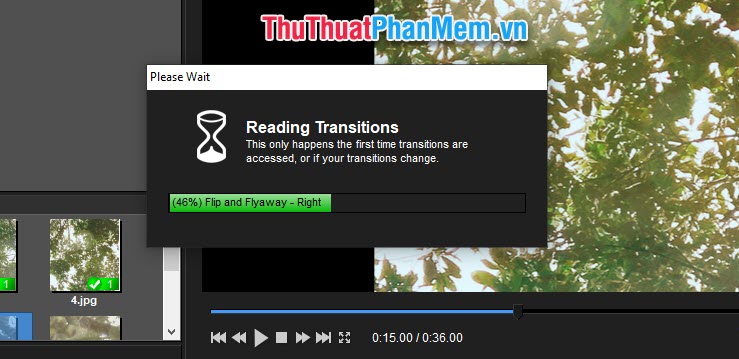
Step 5. Now we continue to add transitions between images by clicking the AB icon on the Slide List.

Step 6. After that, find a transition effect that you like to use. You can see the preview after adding that transition effect on the screen (number 1).
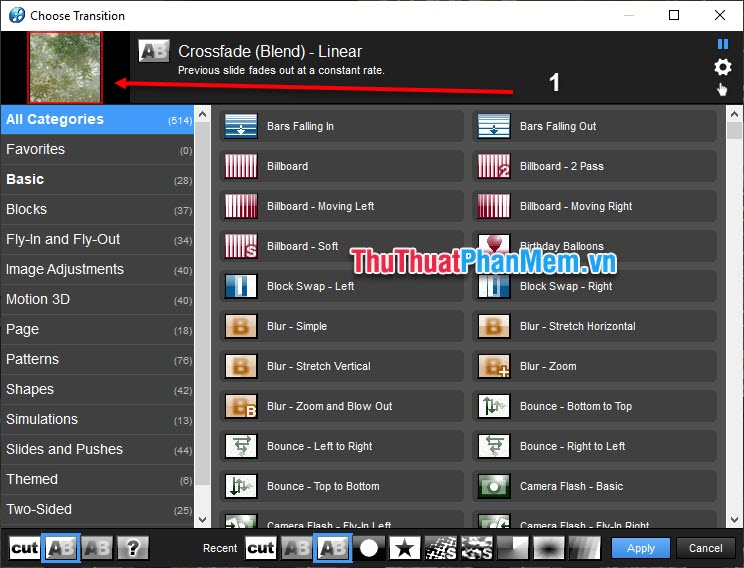
Step 7. So we're done with the visuals, followed by the audio for the video to make it more vivid. You double click here to handle the audio.
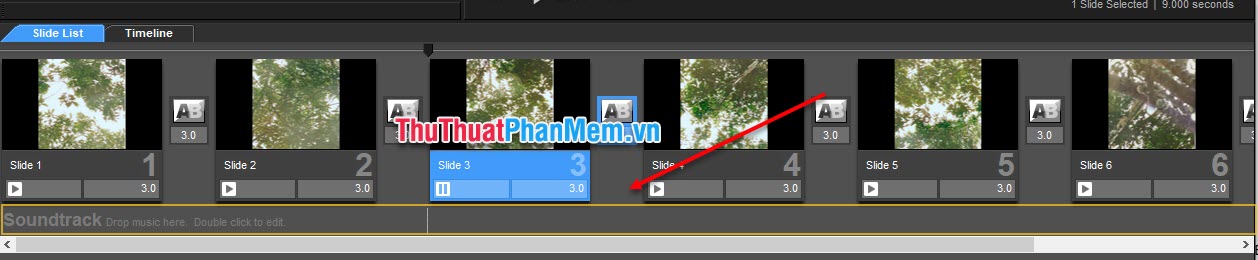
Step 8. In the window that has just opened, click on the + sign in SoundTrack and select Add Sound File .
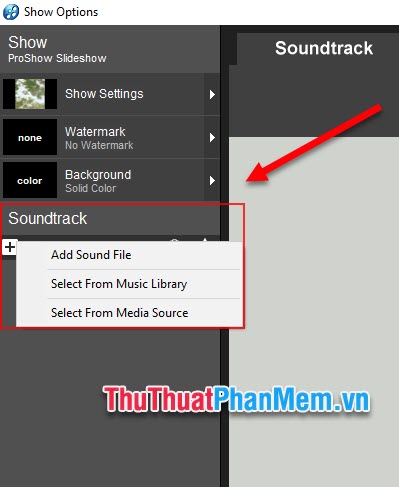
Step 9. Here, open the folder containing your audio files to add them to ProShow Producer.
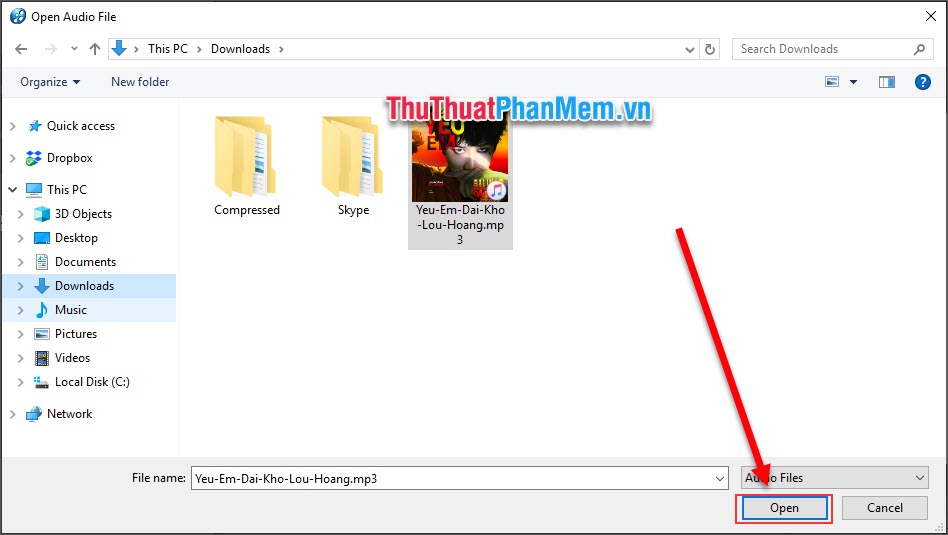
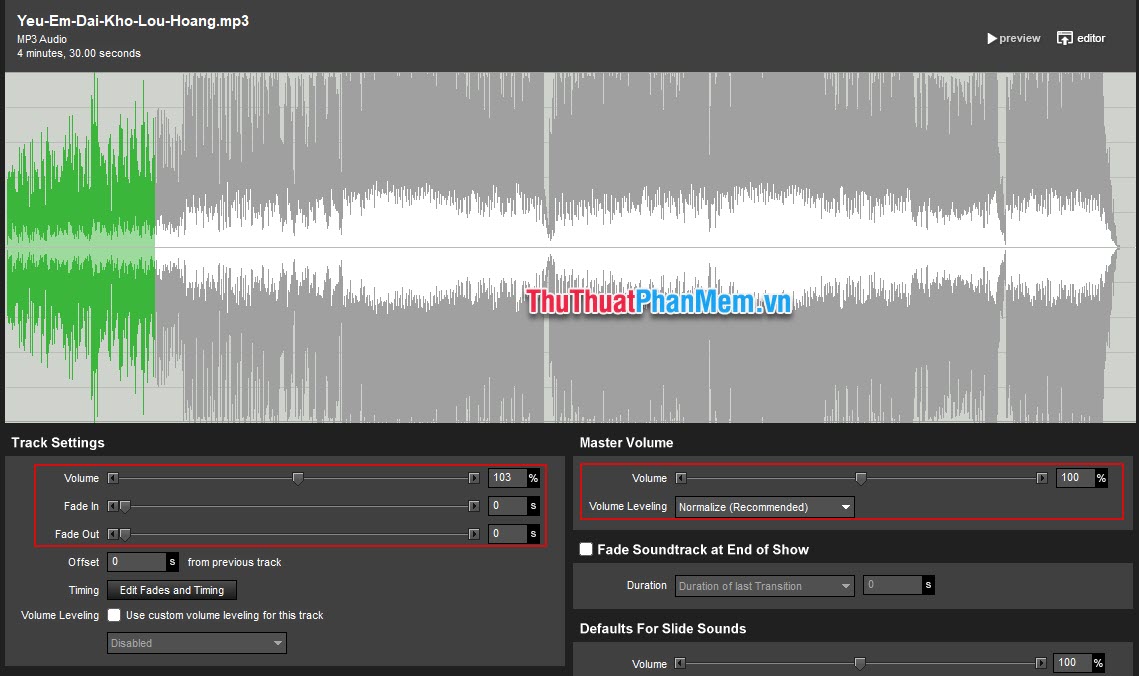
Step 10 . After adding, you will look like this. Here, we continue to adjust a bit of sound.
- Volume: Sound volume
- Fade In: The time the sound gets louder when it starts
- Fade Out: The time the sound fades to the end
Step 11 . Align video length and audio length. As you can see, the audio is getting longer than your video. If you don't cut it, there's only a black screen and music in it.

Step 12. Move your mouse down to the section where you need to cut the music for the audio .
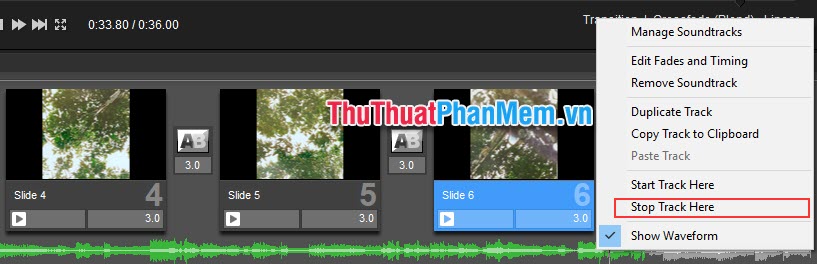
So we have relatively completed.

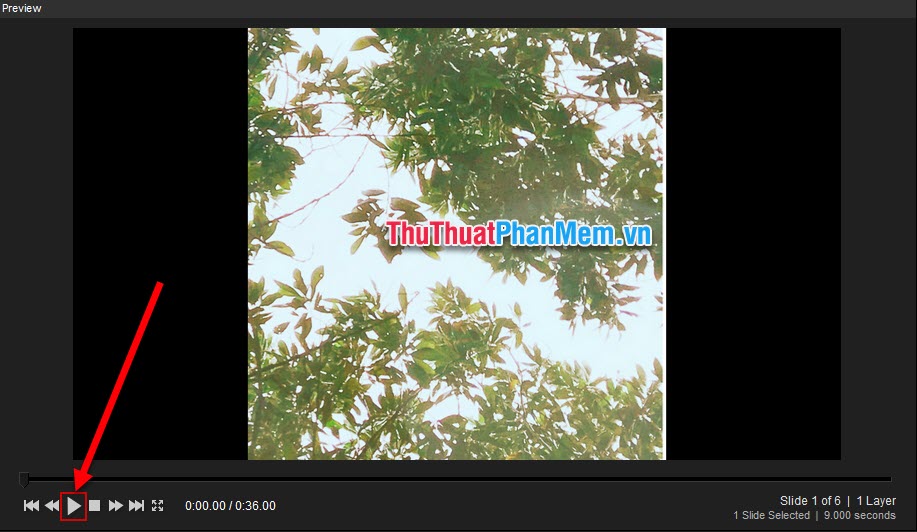
Step 13. Review the result and continue to customize it as you like. Click the Play button on Preview to see the result.
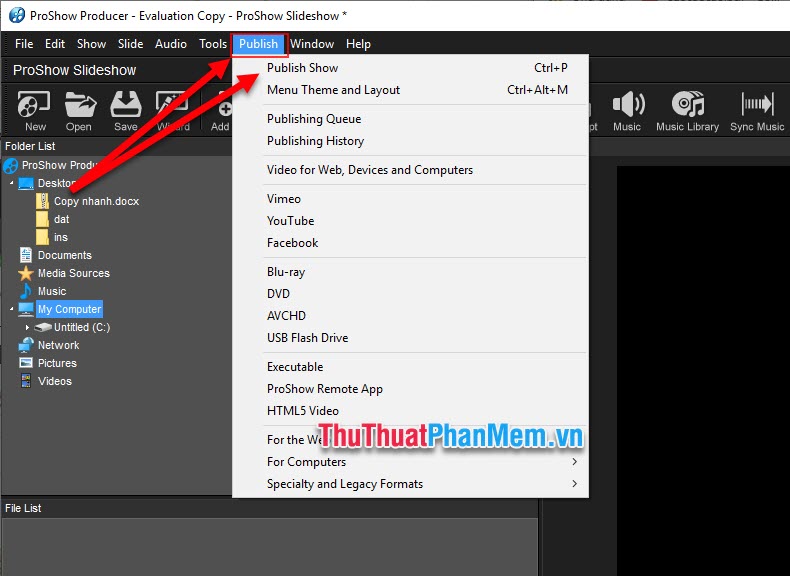
Step 14. Export the video by selecting Publish and selecting Publish Show ( Ctrl + P )
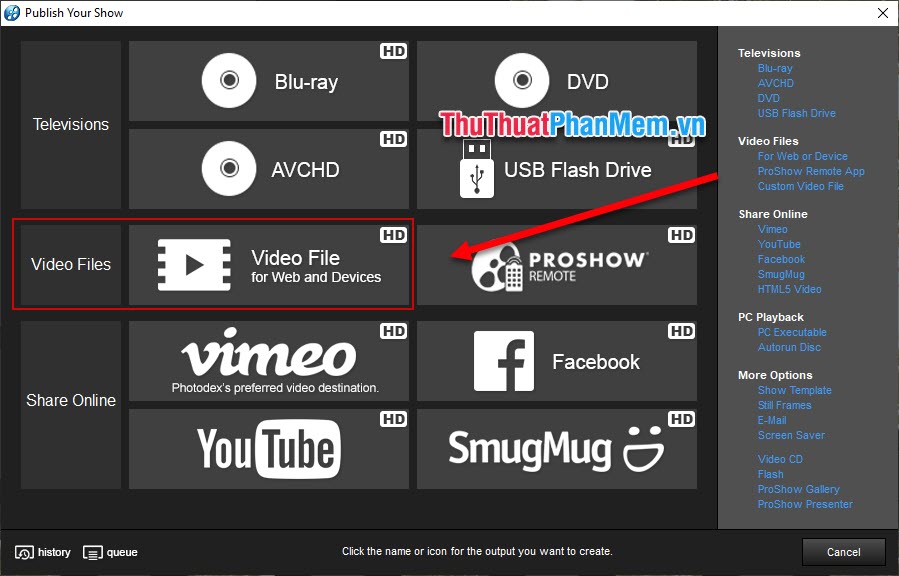
Step 15. Then you choose the format for the video you want to export. With computers or phones, you choose like me to get the highest quality.
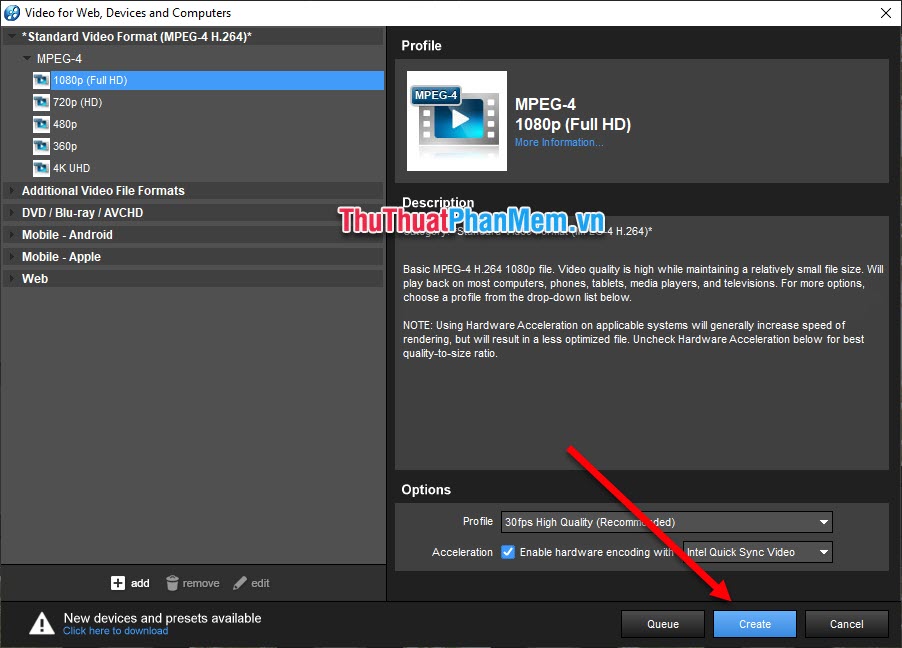
Step 16. Finally, you choose the resolution format, frame and output Video by clicking Create .
Thus, in this article Software Tips have detailed instructions on how to create videos quickly and professionally with ProShow Producer. Hopefully through this article you can create your own beautiful products. Good luck.
FAQ
What should I know about Create Videos from Photos with ProShow Producer Quickly and?
Focus on the key features, requirements, limitations, and practical use cases explained in this guide.
How do I get the best results with Create Videos from Photos with ProShow Producer Quickly and?
Follow the recommended steps, use current software or information, confirm compatibility, and review settings before major changes.
Are there any risks or limitations?
Potential limitations depend on compatibility, data quality, cost, privacy, support, and how the product or method is used.
Related Articles
 How to Use Proshow Producer to Create Video from Photos, Create8 minutes read
 Insert Logos into Videos with Proshow Producer6 minutes read
 How to Write Vietnamese in Proshow Producer3 minutes read
 10 Best Tips for Using ProShow Producer21 minutes read
 Instructions to Use ProShow Producer to Make Professional Videos10 minutes read
 Detailed Instructions on How to Create a Video from Photos in the Simplest Way6 minutes read
Reader Comments 0
Sign in with email or Google to join the discussion.