Table of Contents
This guide explains how to create Videos from Photos Quickly and Simply, with clear steps, practical tips, and important checks before you begin.
What are you waiting for? Do not get started right now, please follow the following steps to ThuThuyPhuc. vn. vn can guide you how to make videos from photos quickly and easily .

1. Install Movie Maker software - software for making videos from professional photos
Windows Movie Maker is a software released by Microsoft, it provides tools for you to create unique videos from music files, image files available, save memorable moments. Windows Movie Maker allows to insert background music, captions, effects. supports a lot of different formats. The video when done can be shared on social networks.
Step 1: You access the link to download Windows Movie Maker software.
Step 2: You simply click Next to install the software.

2. Make videos from photos with Movie Maker software
Step 1: Open the software, in the main interface, select Import Pictures.

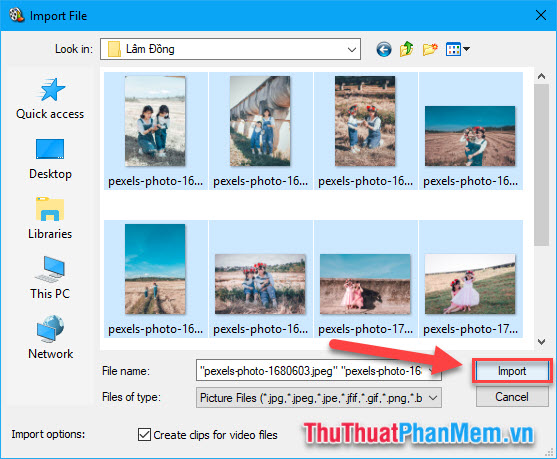
Step 2: Select the photos you want to use to make videos then click Import.
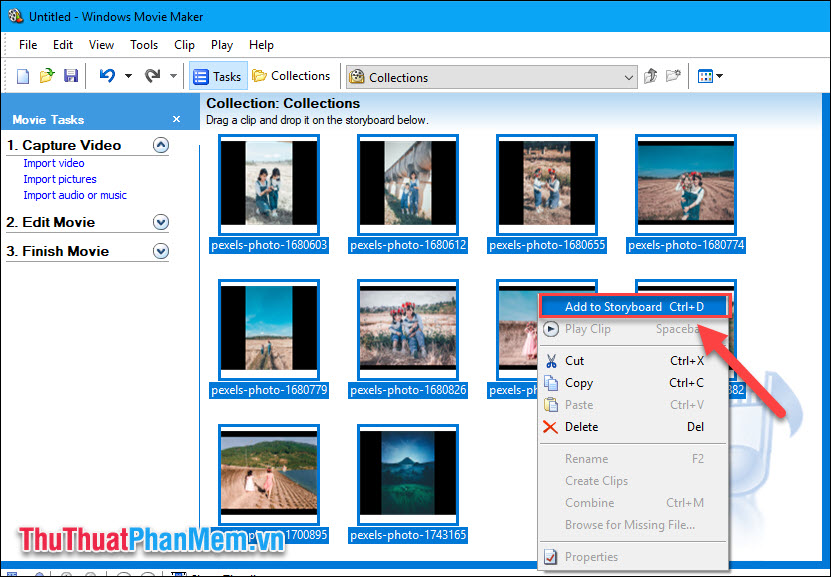
Step 3: When the image is added to the software, press Ctrl + A to select all the pictures then right click and select Add to Storyboard.
Step 4 : In the Edite Movie tab, choose View video Effect . You can add effects to photos by dragging effects and dropping them onto photos below the Storyboard.

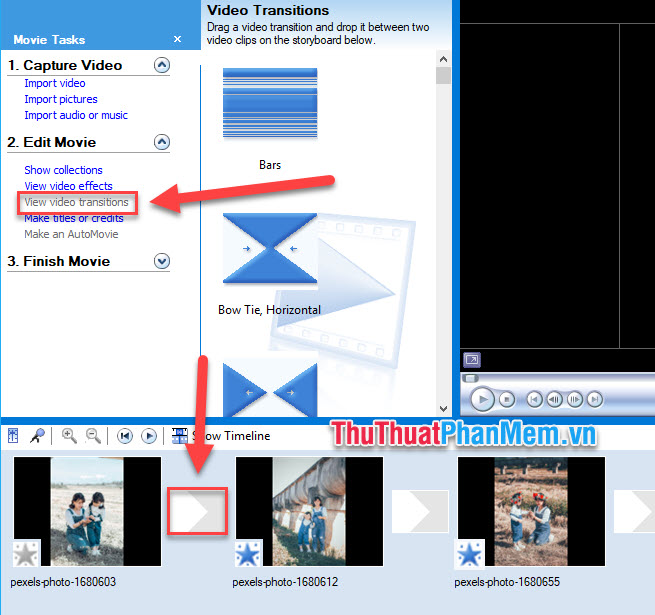
Step 5 : Switch to the View video transitions section to select transition effects, you do the same as step 4 , drag the effect and drop down the connection between the two photos .
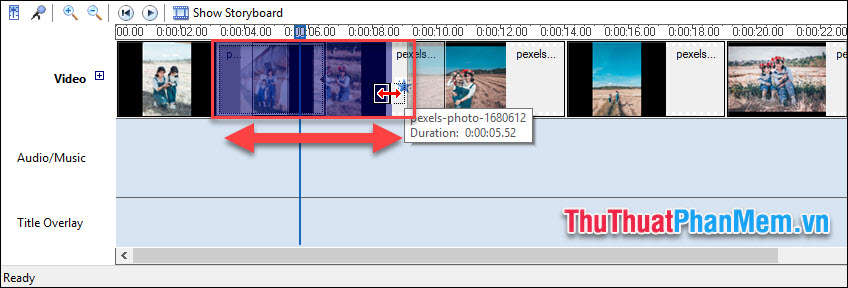
Step 6 : To set the runtime for each image, select Show Timeline .
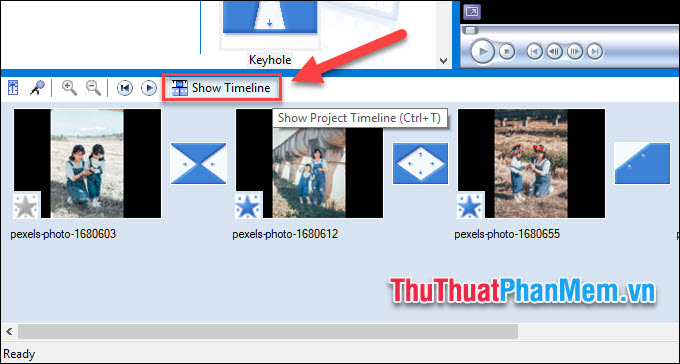
Drag out or shrink the length of the image on the Timeline to customize the running time of the image, hold the mouse pointer at the edge of the image and start dragging.
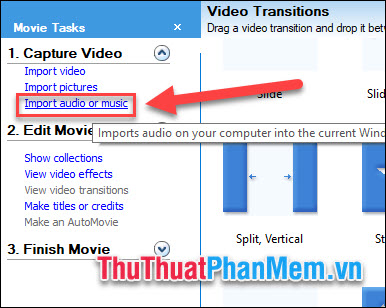
Step 7 : To add music to insert into Video, select Import Audio or Music.
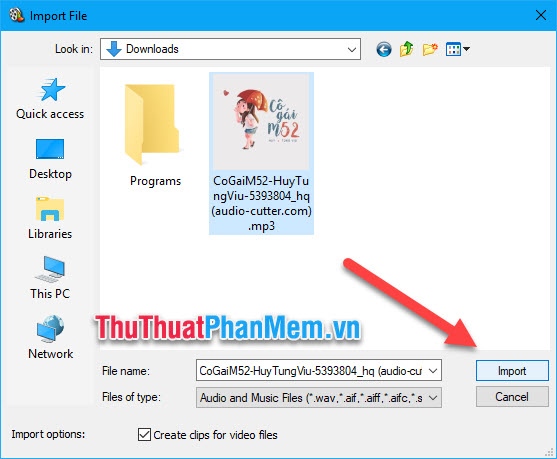
Select the music file you want and click Import.
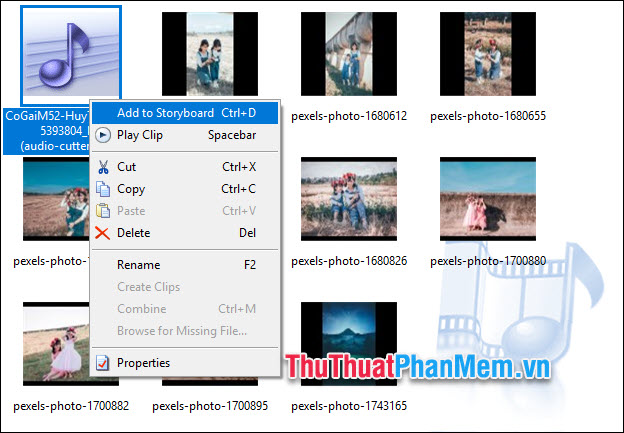
Similarly, you also add music to the Storyboard.
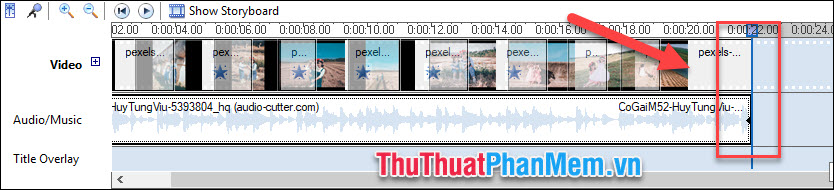
Note that you should let the music runtime end at the same time as the image runtime , avoiding the case that the picture has run out and the music still plays.
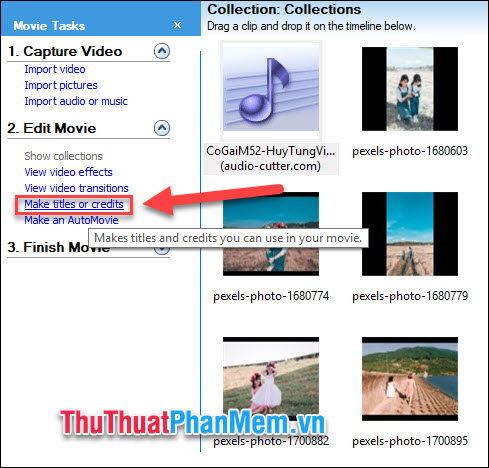
Step 8: Add Title and Production Information to the video, select Make titles or credits.
Here you will have the following options:
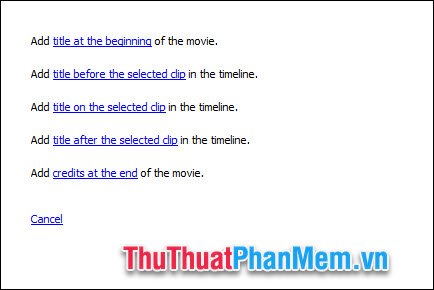
- Add title at the begining of the movie: Add a title at the beginning of the video
- Add title before the selected clip : Add a title before the selected clip
- Add title on the selected clip : Add a title on the clip you choose
- Add title after the selected clip: Add a title after the clip you choose
- Add credits at the end of the movie: Add production information when the video ends.
Step 9 : Publish videos.
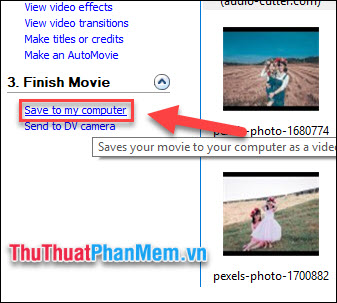
In the Finish Video section, select Save to my Computer.
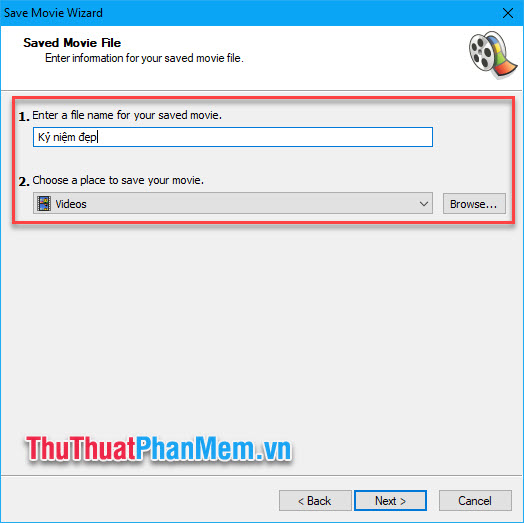
Choose File name and file export location :
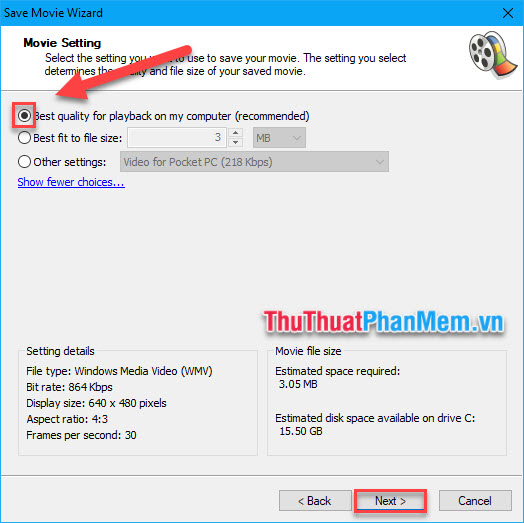
Choose the highest quality or customize according to your requirements.
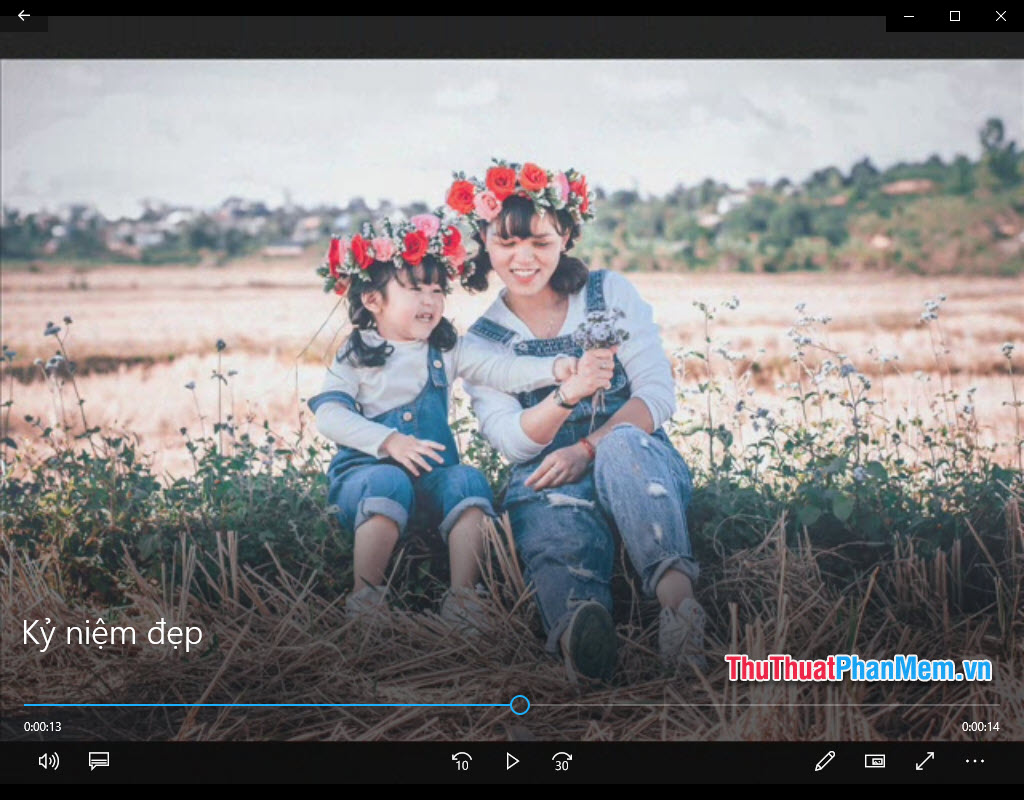
Wait for the process of exporting the file to finish, open the video and verify the result:
So with just a few simple steps, you can create a video from photos quickly and simply with Movie Maker software. Wish you have moments of fun!
FAQ
What should I know about Create Videos from Photos Quickly and Simply?
Focus on the key features, requirements, limitations, and practical use cases explained in this guide.
How do I get the best results with Create Videos from Photos Quickly and Simply?
Follow the recommended steps, use current software or information, confirm compatibility, and review settings before major changes.
Are there any risks or limitations?
Potential limitations depend on compatibility, data quality, cost, privacy, support, and how the product or method is used.
Related Articles
 How to Create Videos from Photos Quickly Guides AZ Steps5 minutes read
 Detailed Instructions on How to Create a Video from Photos in the Simplest Way6 minutes read
 How to Create Videos from Photos with ProShow Producer Quickly and6 minutes read
 How to Make English Videos Using Vivavideo3 minutes read
 How to Insert Photos into Canva Simply and Quickly: Clear Instructions7 minutes read
 How to Create Subtitles for YouTube Videos Quickly and Simply3 minutes read
Reader Comments 0
Sign in with email or Google to join the discussion.