How to create USB boot to install multiple Windows with Easy2Boot
In the previous article, we showed you how to create a USB device that installs many Windows using WinSetupFromUSB, and in this tutorial article, let's continue to explore another tool that has the same effect, that is Easy2Boot.
- How to create a USB device that installs multiple operating systems?
Before we start working, we need to keep in mind that Easy2Boot has a command -line interface that is mainly in the command line, so it's not really intuitive and user-friendly like delivery programs. other graphics. Please consider before you use it!
1. Download the Easy2Boot free app
Similar to Rufush, Windows 7 USB DVD Download Tool . Easy2Boot is a tool to help users create USB boot, install operating system from Windows ISO files. And this program is completely free, you just need to download the Easy2Boot compressed file to your computer, unzip and use.
2. Easy2Boot settings
Easy2Boot does not have the ability to automatically identify the location of ISO files through Browse functions like other tools, but instead is a fixed address. That is Easy2Boot v1.79_ISOWINDOWS folder, so you need to copy the corresponding Windows ISO file into the folder.
Step 1:
As an example, I will do multiboot for Windows XP and Windows 8, so I copied the Windows XP ISO file to the XP folder, and the Windows 8 ISO file into the WIN8 folder.

Remember to copy the Windows ISO file to this folder (Easy2Boot v1.79_ISOWINDOWS)
Step 2:
After finishing this step, move on to the next step. Go to the directory below:
- Easy2Boot v1.79_ISOdocsMake_E2B_USB_Drive
Please remember the link above, lest misuse the docs folder with DOCS . Here, you run the MAKE_E2B_USB_DRIVE command file. Cmd under Administrator :

Run the MAKE_E2B_USB_DRIVE.cmd file in the docs directory
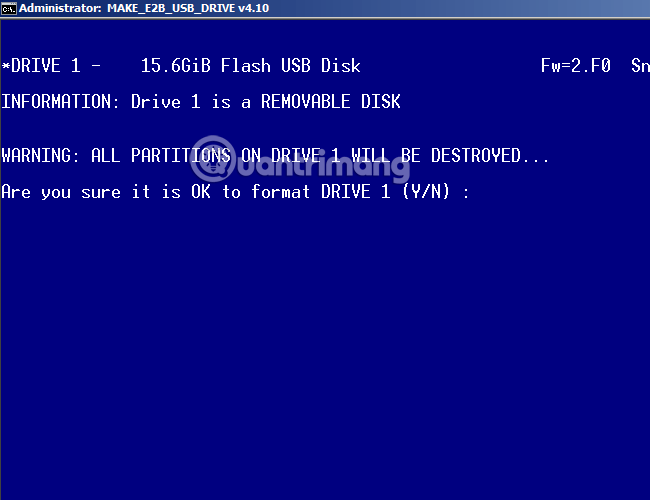
Of course, you must connect USB to the previous computer, after running this file, the command screen will display (like PowerShell ) as follows:

Step 3:
At this screen, you will see the system recognizes the USB drive at Driver 1 line (with 16GB capacity) as above, and you enter 1 at the USB DRIVE NUMBER line. Easy2Boot will ask if you want to Format USB, of course yes. Select Y here:

Step 4:
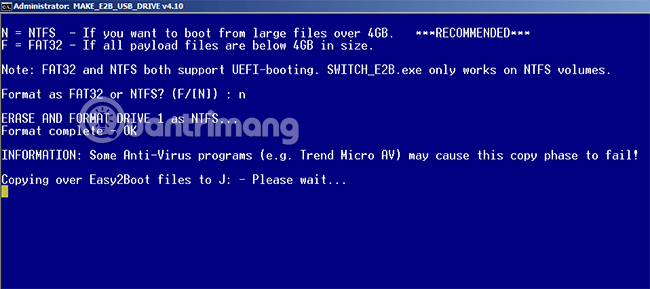
Selecting the format to Format , should of course leave NTFS . Click N here:

Choose OK:

This format takes place long or slow depending on the speed of reading and writing data of USB, please wait patiently! Format finished, Easy2Boot will proceed to copy the ISO file from the Windows folder to the USB to create boot, please remember to turn off the antivirus program, because they will block the autorun file in the ISO file, and the process of creating a USB boot will fail:

Step 5:
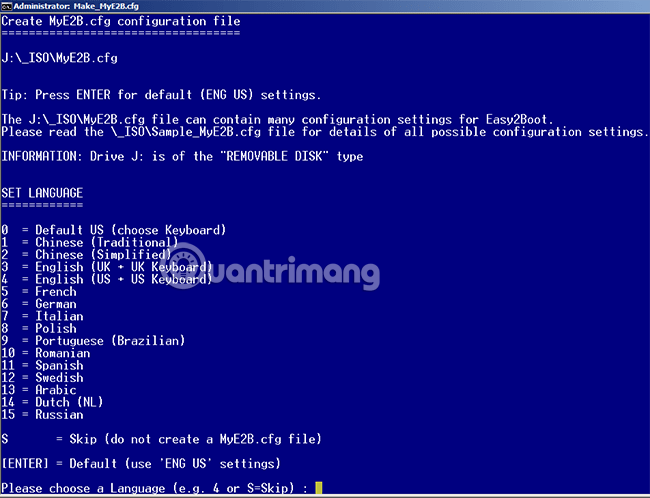
At this point, the process of copying the iso file is complete. Finally, create custom files, MyE2B.cfg (I don't know what this file does), if you don't want to create it, click Skip or S to ignore it, press Enter to use the default option, or follow Easy2Boot's instructions:

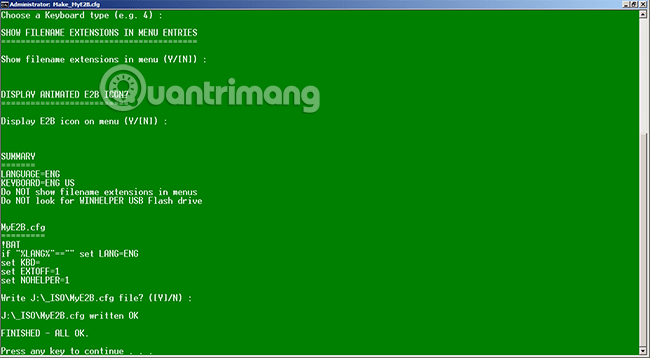
Here, I use Default all so just press Enter, never go to the blue screen like this and finish:

The above are a few steps to create USB to install multiple Windows with the free Easy2Boot tool, hopefully can help you in your daily work. Good luck!
You should read it
- ★ How to create USB Boot, create a Windows installation USB with Rufus is simple and effective
- ★ 20 best USB boot software
- ★ Instructions for creating USB boot with Hiren's BootCD quickly
- ★ It is possible to create a USB to install Windows 11 on an unsupported machine with Rufus
- ★ How to install Windows 7 from USB