Table of Contents
This guide provides a practical overview of Create Windows 10 Bootable USB, Install Windows 10 Using USB, including its main features, benefits, limitations, and important considerations.
At that time, even for experienced technicians or general users, reinstalling Windows was seen as a quick-and-quick solution for fixing any problems that arise when using the computer. Compared to using a CD or DVD as before, installing Windows 10 with USB is a much faster and more convenient way.
To install Windows 10 using USB, we must first create windows 10 bootable usb . This is the USB that will contain the Supported operating systems to be installed and the system boot files to copy the new Win version to the hard drive.
How to create windows 10 bootable usb
How to create this win USB installation is extremely simple, anyone can do it. With this way, you can completely install Windows 10 at home without having to bring the machine to the repair center.
First, we need to Format the USB intended to use to install the new win. This will help the Windows 10 bootable USB to ensure that there are no viruses or malicious code that exists in the old files. In addition, the integrity of the system data and the faster installation process.
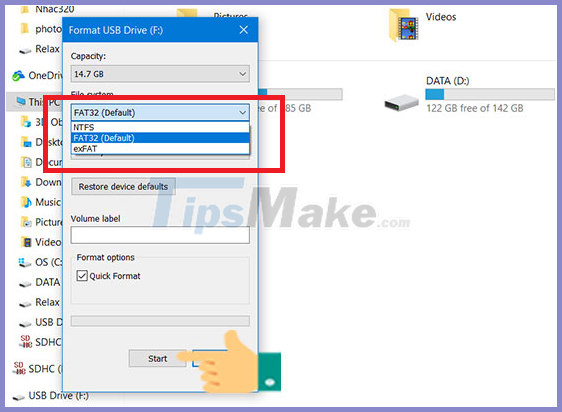
Step 1: Plug the USB into the computer. After the computer has received notice of USB, go to My Computer (This PC)> Select USB> right click> Format.

Step 2: Select the USB format as FAT32. This format will ensure the compatibility of the Windows 10 installation USB we are about to create with all devices, even with old computers.

Step 3: Select Start to start Format USB. After pressing this button, all of your previous data will be lost. Therefore, check the data once before performing this operation.
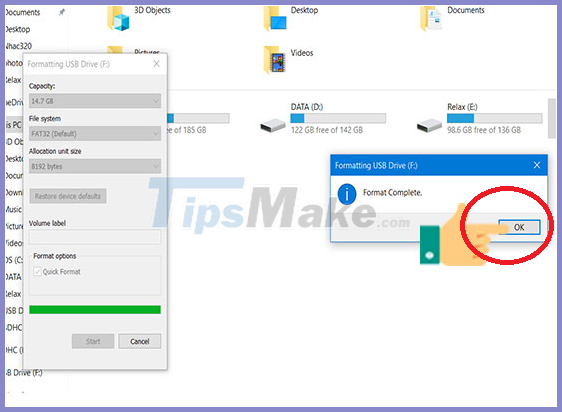
Step 4: After the Format process is done, press OK to complete.
After the USB Format is complete, we will start to download the Windows 10 installation file. In this article, Hanoicomputer will show you how to download the original installation file from Microsoft!
First you click on Here to download the software MediaCreationTool . This is the software that supports Microsoft to create a Windows 10 installer.
After successfully downloading a file called MediaCreationTool. exe, we begin to launch this program.

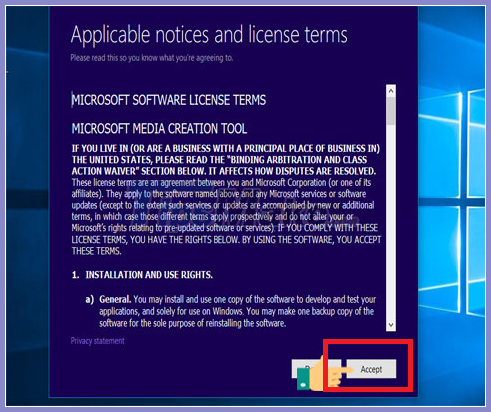
A message about security policy will appear. Click Accept to agree
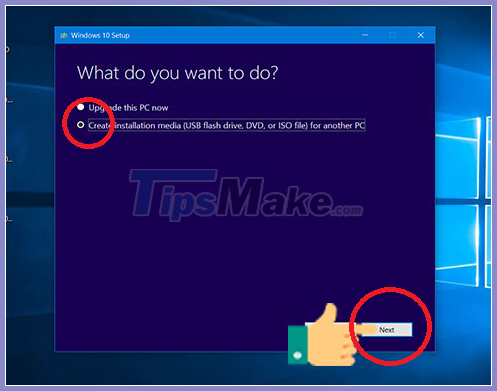
Software will have 2 options. It will ask you if you want to Update window or want to create Windows 10 installation file for USB? Of course, we choose to create the file. Select Create installation media > click next
In the next step, you can choose the appropriate language and version to download. Here I choose the English language and 64 bit win 10 version.
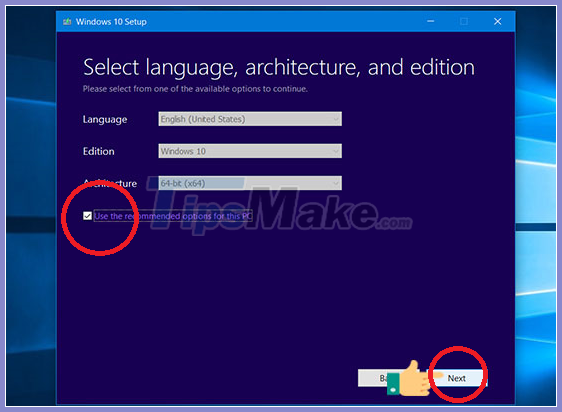
Select USB Flash Drive > click Next .

Select the USB you want to create the installer for

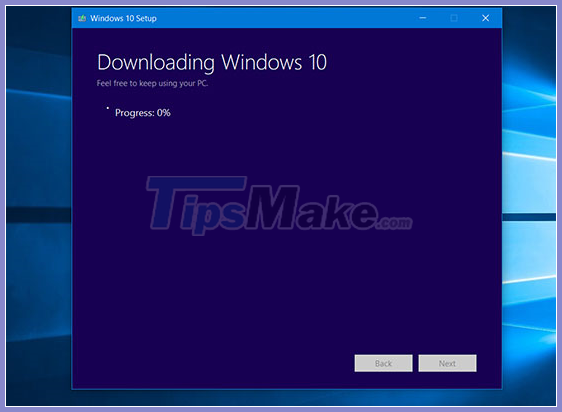
Then the software will automatically Download Windows 10 from the latest Microsoft to USB. Usually this step will take about 20-30 minutes depending on your network speed.
How to install Windows 10 using USB
Once you've finished initializing the Windows 10 installation USB, proceed to restart your computer. During the boot process, please set BIOS / UEFI to prioritize booting from USB.
There are some machines that will automatically recognize USB boot and proceed to boot into the Supported operating systems on USB when restarting. If your computer is not one of these, please restart the computer, during the reboot process, press F2 or F12 (depending on the model) to enter the boot option setup Boot Options Setup. Different BOOT access shortcuts will be different. You can refer to below
- SONY VAIO Laptop : To get into BIOS when you restart your computer you need to press and hold the F2 key.
- Laptop HP : To get into BIOS when restarting the computer you need to press and hold the F10 key.
- Laptop ACER : To get into BOOT when restarting the computer you need to press and hold the F12 key.
- ASUS Laptop : To get into BIOS when restarting the computer you need to press and hold ESC key.
- LENOVO Laptop : To get into the BIOS when the computer reboots, you need to press and hold F1.
- Laptop DELL : To get into BIOS when you restart your computer you need to press and hold the F2 key.
After entering the BIOS interface, use the arrow keys to navigate to the tab Boot> Removable Devices (or USB Storage Device or External Drive depending on the model), press Enter to select the Supported operating systems load from USB.
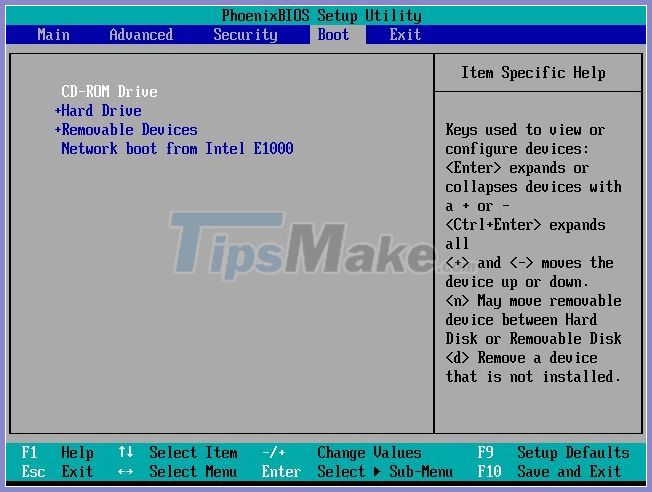
After choosing to boot from USB, choose Save and Exit . The machine will reboot by itself and we can start installing Win 10 using USB.
The first is the option to set the language, time zone and keyboard type. Select the language in Language to install (recommended to keep English United States)> Select the time format in Time and curency format (recommended to keep English United States)> Select the format you key at Keyboard or input method (it is recommended to keep the US)> Click Next to continue.

- Next, click 'Install' to move to the Windows 10 installation step.

- In this step, if you already have a Windows 10 license key, you can enter it directly in this step. If you have activated Windows 10 on this computer before, simply click on the line 'I don't have a product key' to skip this step.

- Then you choose to install the Windows 10 Supported operating systems you want, here I have a lot of options. Usually I will choose the Pro version to be able to fully own the features of Windows 10
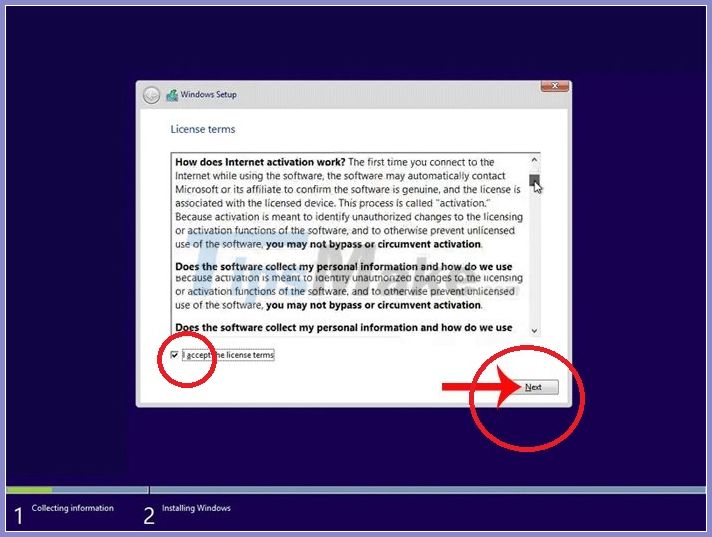
- Select I accept the license terms to agree with the terms of use from Microsoft then click Next.

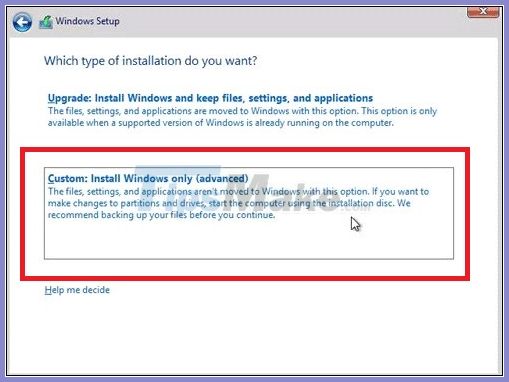
- Next, click the option ' Custom: Install Windows only (advanced) ' to perform a new installation of the Supported operating systems instead of updating the current old Windows 10 version.
Select the drive you install Windows on, note this drive will be formatted (erase all data) after installing Windows 10. In addition, another important information to note is to choose the correct drive to install, If you choose the wrong drive, your computer will lose data.
After selecting the correct drive to install Windows 10, click Next to proceed with the installation

After that, the installation of Windows 10 from the USB will take place completely automatically.
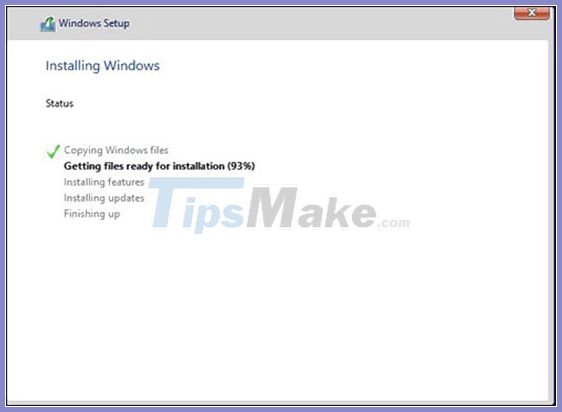
When the process is done running, you will reboot and return to the setup screen for the first time use.

When the installation of Windows 10 from the USB is done, the setup interface for the first time using Windows 10 will appear. You just have to adjust the settings to suit your needs.
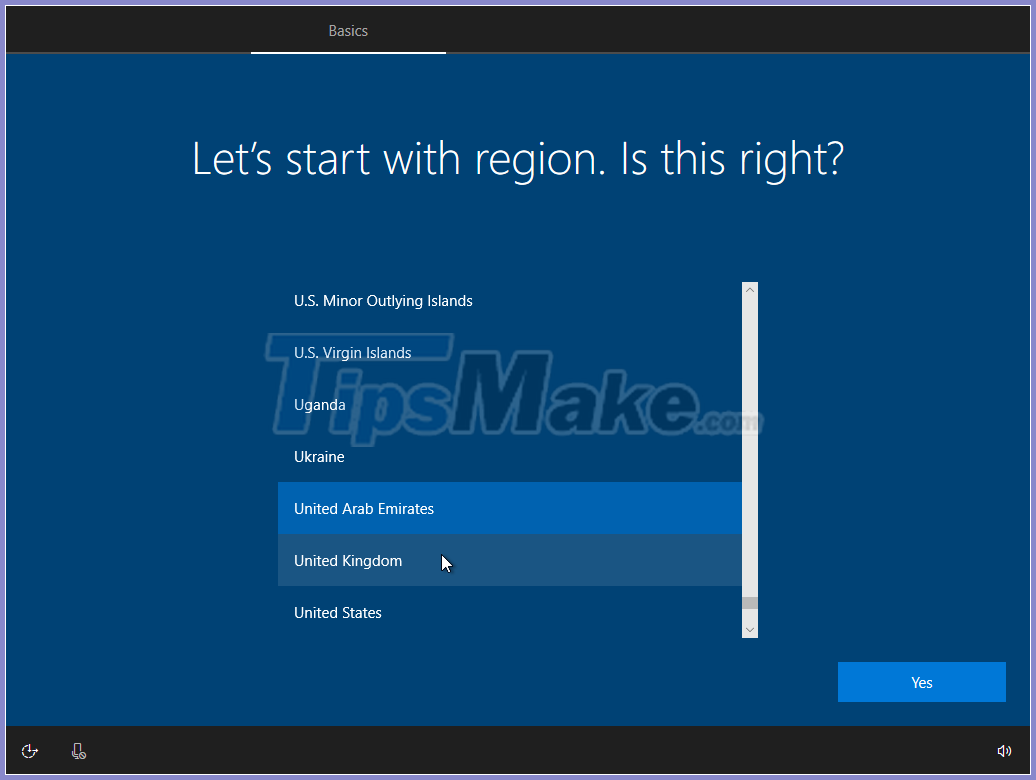
In the language selection, we choose the United States to be able to use the common English language> Click Yes to continue.
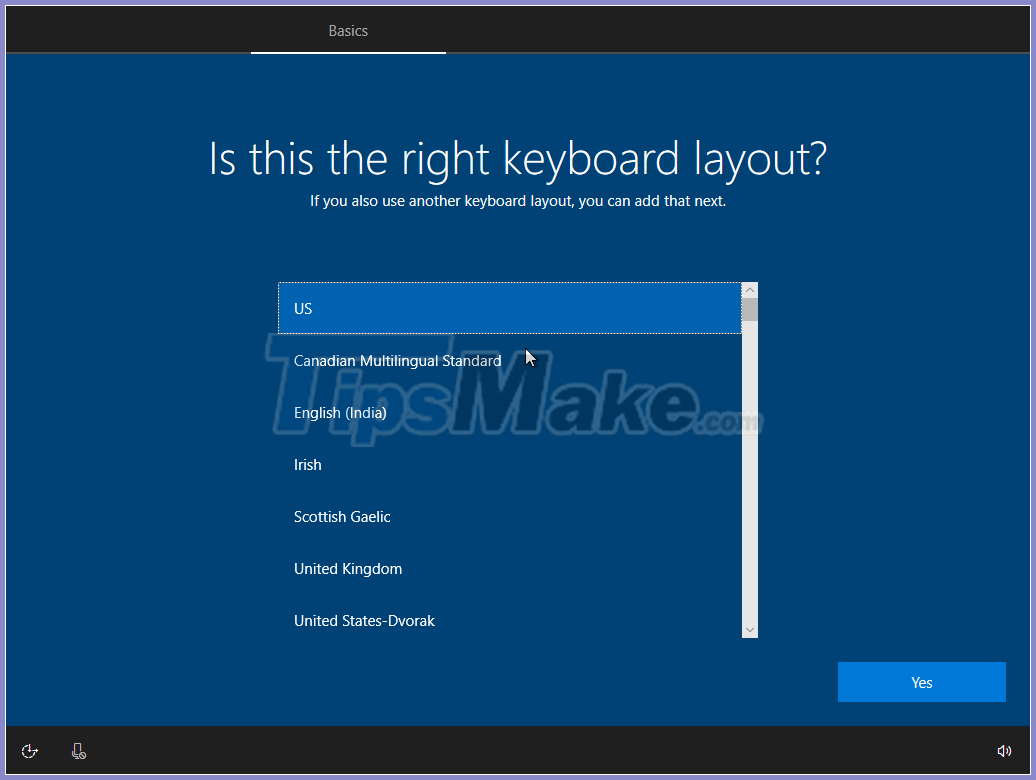
Select keyboard, it is recommended to choose US> Press Yes to continue.
Click Skip to skip, if you want to set up the second keyboard, click Add layout, here I will press Skip.

Select the intended use setting, here I choose to go to Set up for personal use (personal use).
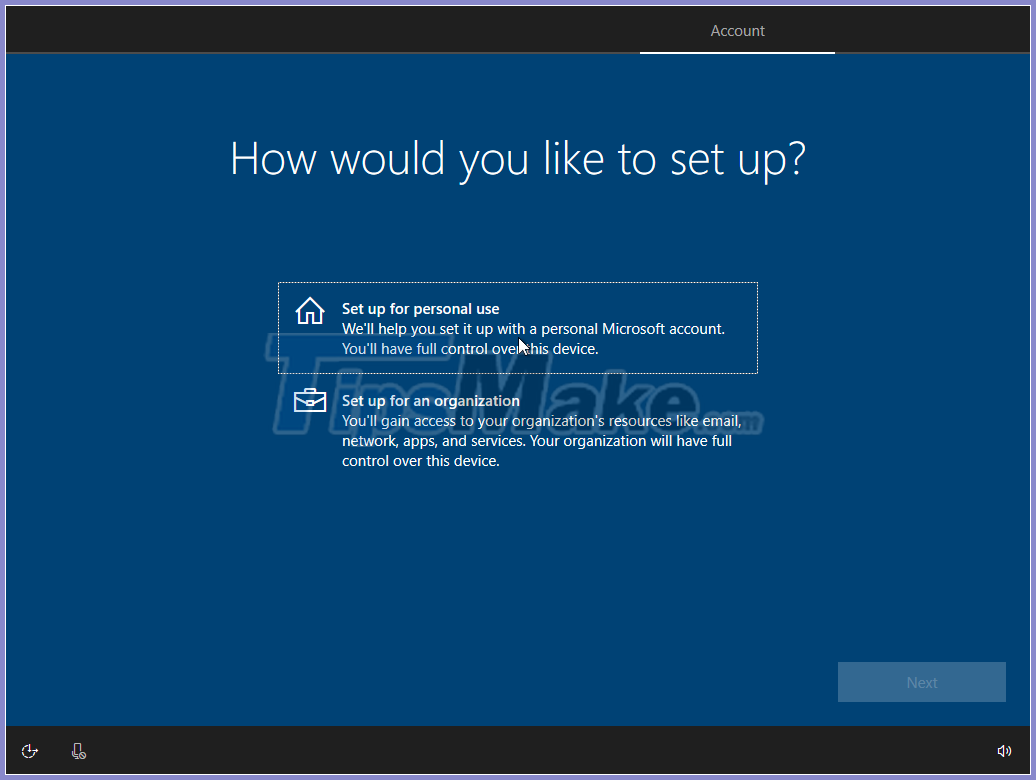
Enter your Microsoft account name, if you don't have one, tap Create account to create a new account. Here I will select another item, Offline Account, to create an internal account (not a Microsoft account)> Then click Next.

Click on Limited experience to ignore the feature of downloading and syncing default applications of Microsoft.

Enter the admin name you want to use on your computer.

Enter the password you want to use to log into your computer.

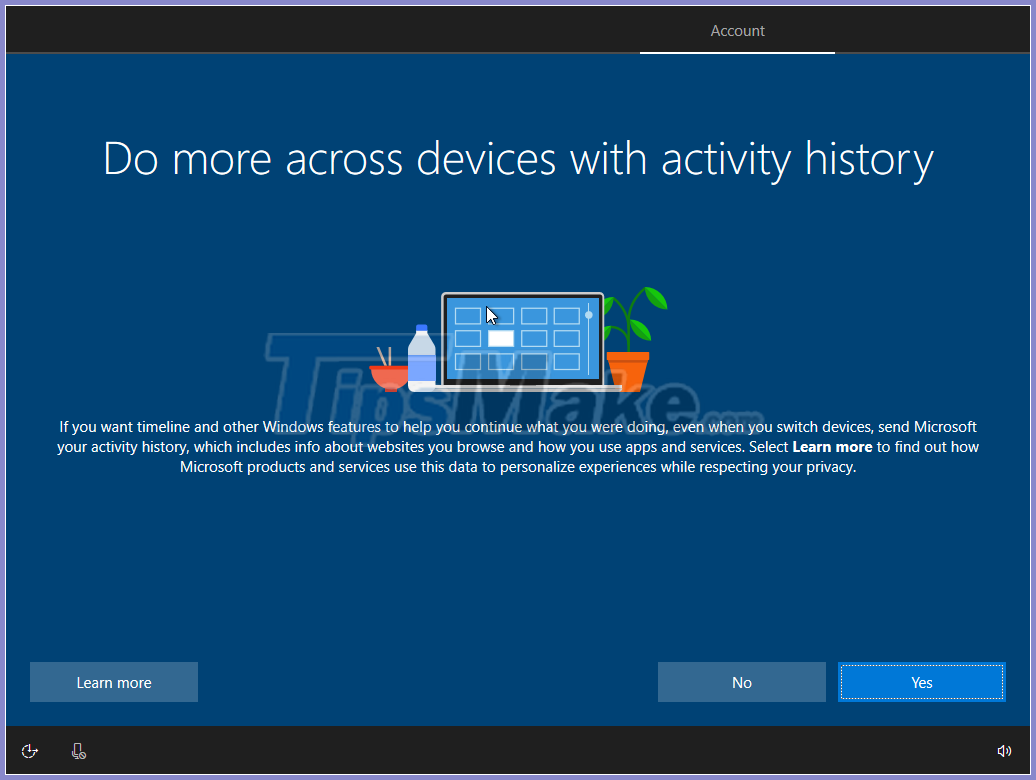
Click Yes to sync your settings and required activity history in the previously used Windows platform through your Microsoft account and move on to the next step.
Press Acpect to agree to Windows 10's default options.

Once completed, the familiar Windows 10 desktop interface will show up
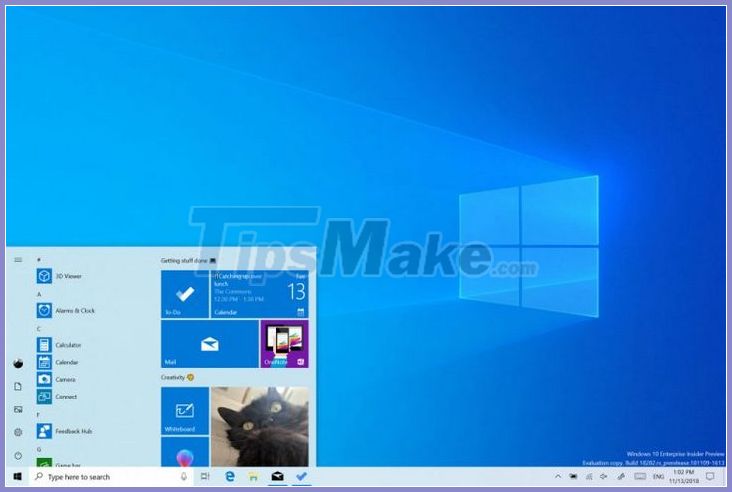
Above, TipsMake has guided you how to install Windows 10 using USB in the most detailed and complete way. Compared with how to install Windows 10 by disc, creating usb to install Windows 10 is quite simple and easy to understand, anyone can do. We hope that the above steps will help you install Windows 10 on your computer by yourself.
Good luck!
FAQ
What should I know about Create Windows 10 Bootable USB, Install Windows 10 Using USB?
Focus on the key features, requirements, limitations, and practical use cases explained in this guide.
How do I get the best results with Create Windows 10 Bootable USB, Install Windows 10 Using USB?
Follow the recommended steps, use current software or information, confirm compatibility, and review settings before major changes.
Are there any risks or limitations?
Potential limitations depend on compatibility, data quality, cost, privacy, support, and how the product or method is used.
Related Articles
 Instructions on How to Create USB Install Windows 1010 minutes read
 It Is Possible to Create a USB to Install Windows 11 on an3 minutes read
 How to Install Windows 10 from USB with ISO File8 minutes read
 How to Install Windows on Winpe6 minutes read
 Instructions to Install Windows by USB, Create USB Boot, USB3 minutes read
 How to Install Windows 7 Using USB - Create a Bootable USB to Install Windows 78 minutes read
Reader Comments 0
Sign in with email or Google to join the discussion.